Weaving is a fun, creative way to make beautiful pieces of art with fiber. You can weave everything from simple scarves and blankets to intricate tapestries and wall hangings.
And you don’t need a lot of expensive equipment – all you need is a pop out loom and some yarn.
In this how-to article, you’re going to learn how to weave using a pop out loom – the basics of setting up your loom, weaving your first piece, and adding finishing touches. So let’s get started!
WHAT IS A POP OUT LOOM?
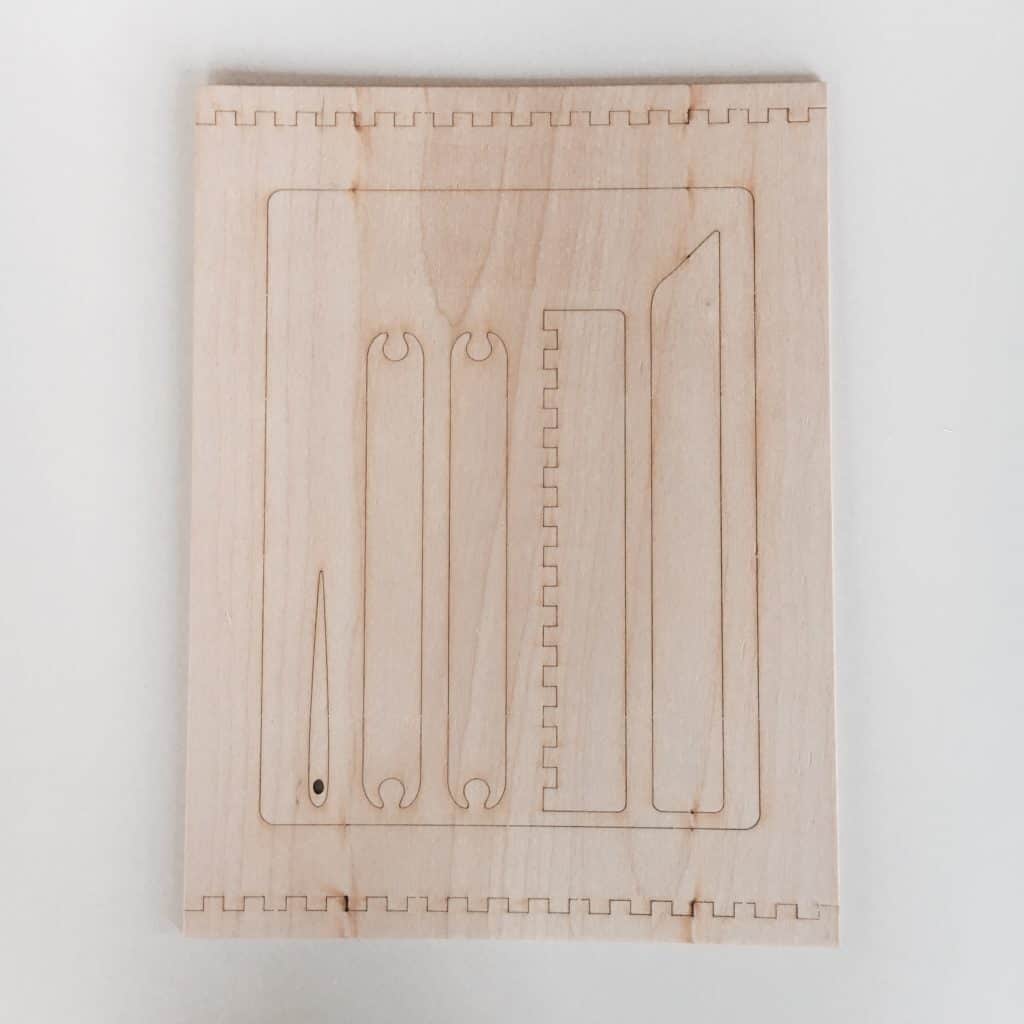
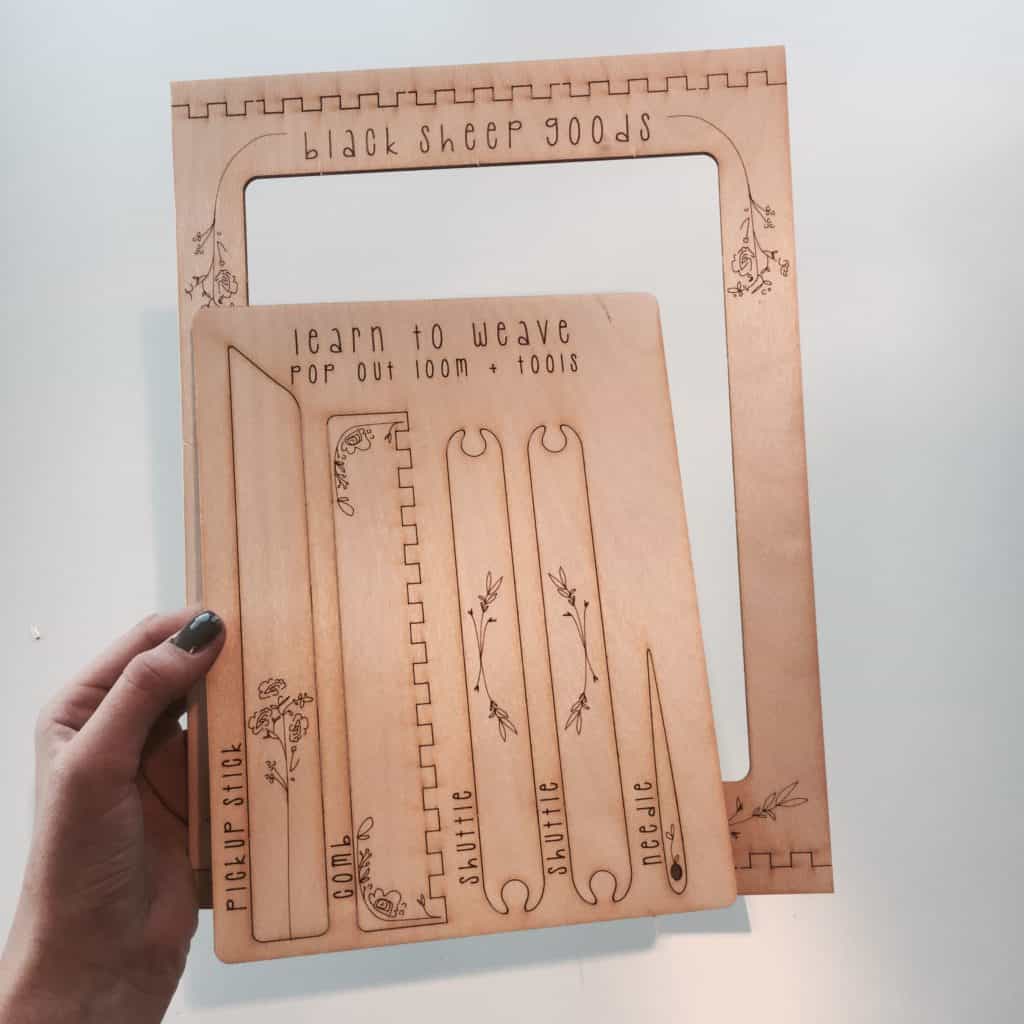
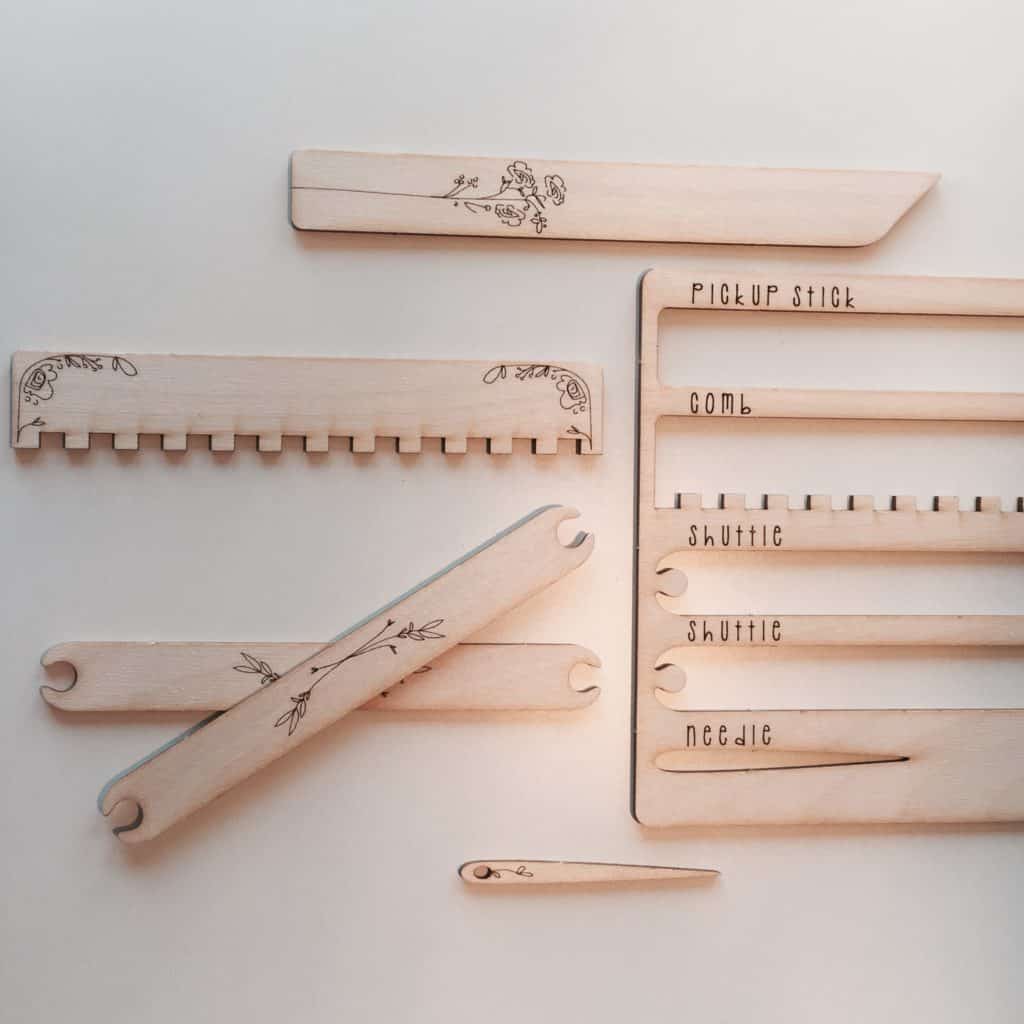
A pop out loom is a small, portable weaving loom, where the loom and weaving tools are laser-etched or wood burned onto a flat sheet of wood. After “popping out” each laser-etched piece from the sheet, it requires simple assembly to build and quickly allows someone to begin weaving.
For serious weavers, or those with cash to spend, there are incredibly ornate looms out there that can run upwards of $3,000, like this Schacht floor loom on Amazon.
A pop out loom is not that at all.
SUPPLIES NEEDED TO WEAVE USING A POP OUT LOOM
For beginners, or someone looking to weave on the go, a pop out loom is a great option – it’s small, easy to use, and far more affordable than most looms.
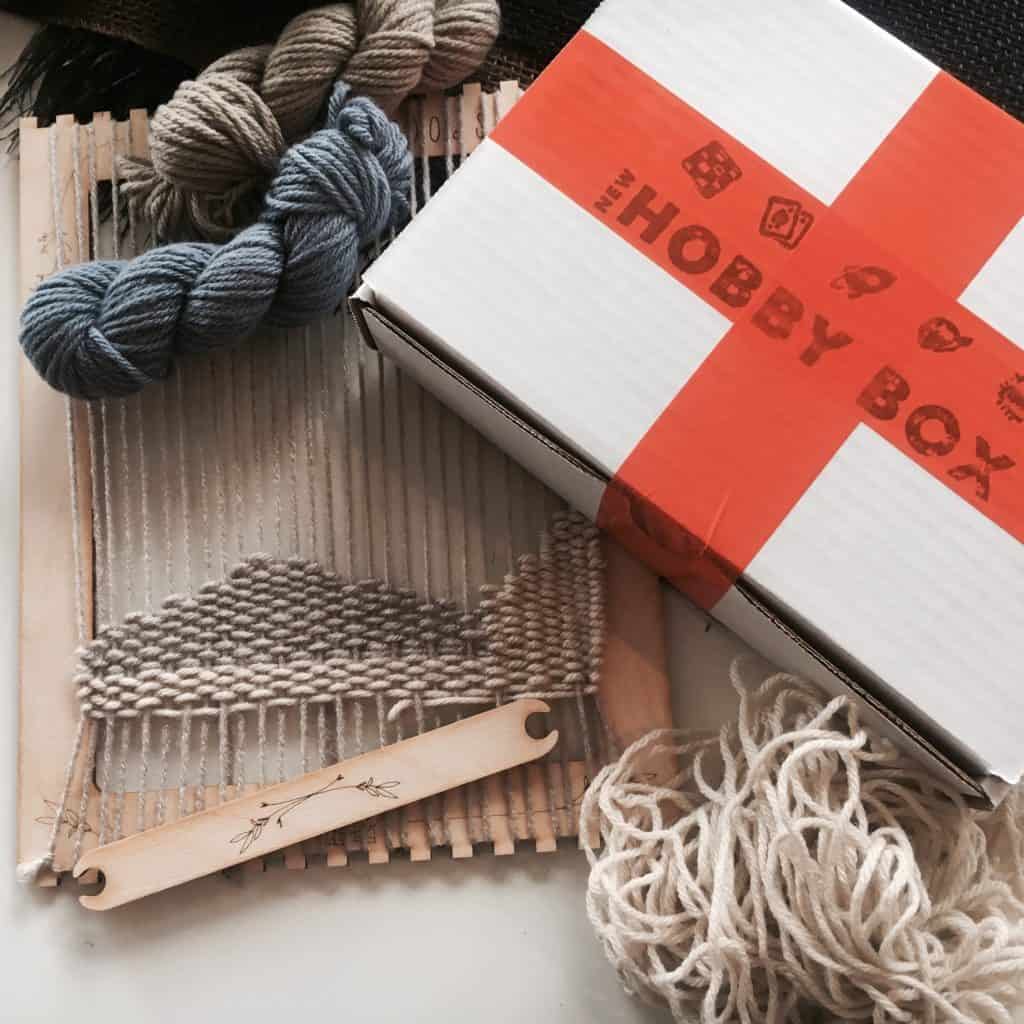
This tutorial was created using Black Sheep Goods’ pop out loom and tools. The kit has everything you need and is priced extremely well, especially for everything you get in the kit.
The Pop Out Loom Kit Includes:
- 8.5″x11″ Pop out loom
- Tools (2 shuttles, pick-up stick, comb, and tapestry needle)
- 10″ wooden dowel rod
- 5 mini skeins of acrylic yarn (30 yards in length each)
One really cool thing about this Black Sheep Goods pop out loom kit is that you can select different options for your skeins – there are 6 color schemes for your yarn.
And perhaps the best part of this kit is that it’s made from birch, and sourced in sustainably managed forestry practices. It’s certified by the Forest Stewardship Council, which is a leader on policing products from sustainable harvesting of wood.
Black Sheep Goods then burns the wood to create this neat little pop out loom kit, and they’ve become a great partner with New Hobby Box over the years.
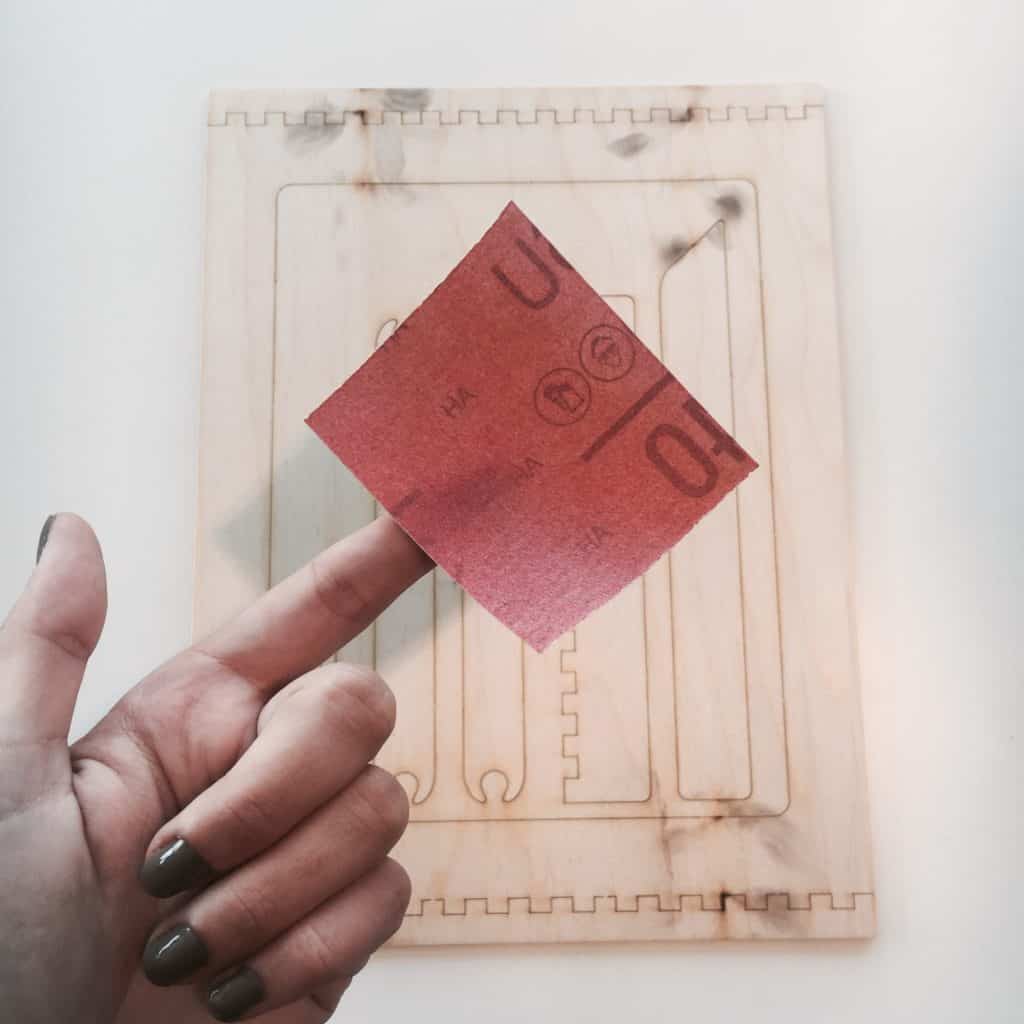
The sandpaper is just to smooth out your needle and other tools when working with fiber – believe us, you definitely don’t want a birch splinter.
We recommend reading through this full tutorial before you get started, but once you have your kit and some sandpaper, you’re ready to get weaving.
HOW TO WEAVE USING A POP OUT LOOM
1. Assemble Your Loom
Start by popping out the loom first, then remove the tools (like shown above). One time we removed the tools first and found it difficult to do – so we overcompensated and slightly cracked a piece.
Maybe it was just us though because, in the video below, the tools are popped out first.
If you watch the video above, the first thing you’ll see once the tools and loom are popped out is a demonstration of warping.
The thread used for this is known as your warp — the longitudinal yarn that sits vertically keeping your project’s tension. And this is where your weaving prep begins.
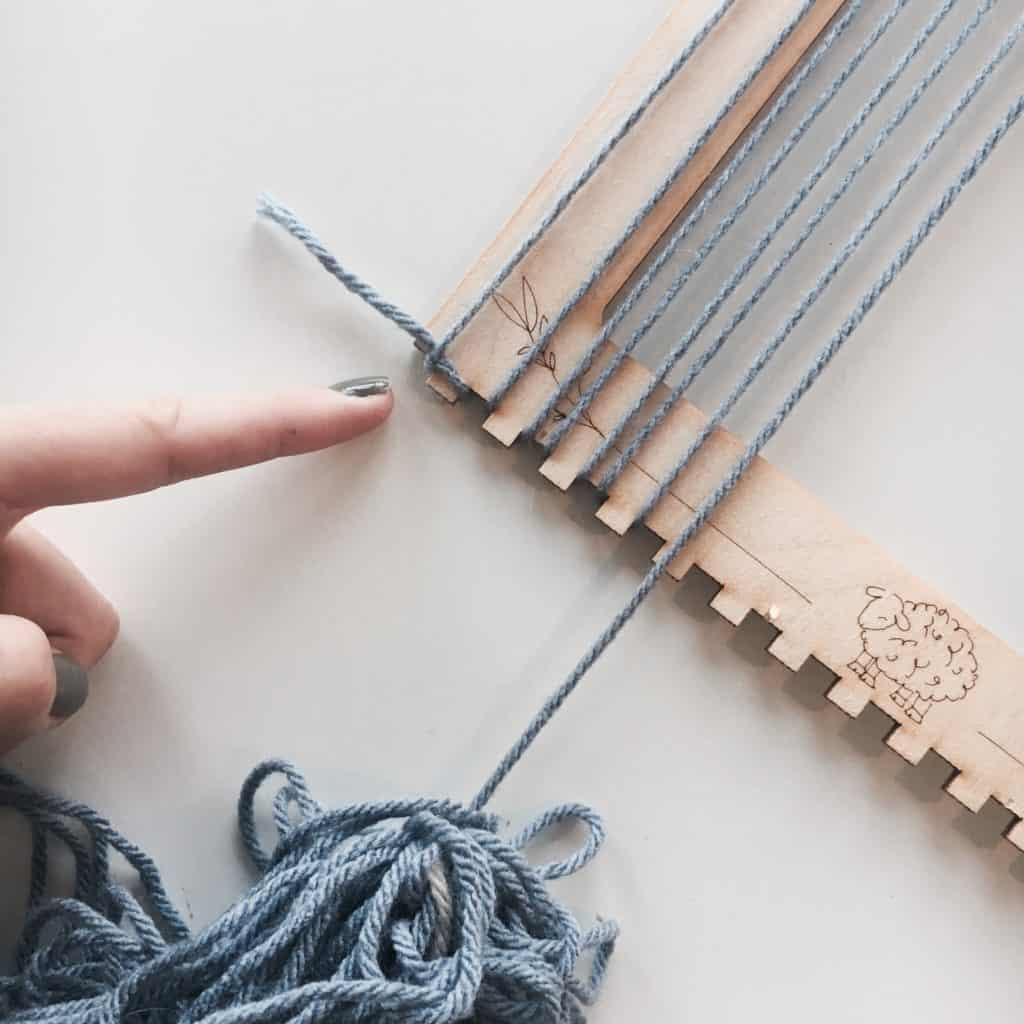
2. Warp Your Loom
Tie a knot on the left side of the loom. Bring the yarn up and around the top tooth, then back down.
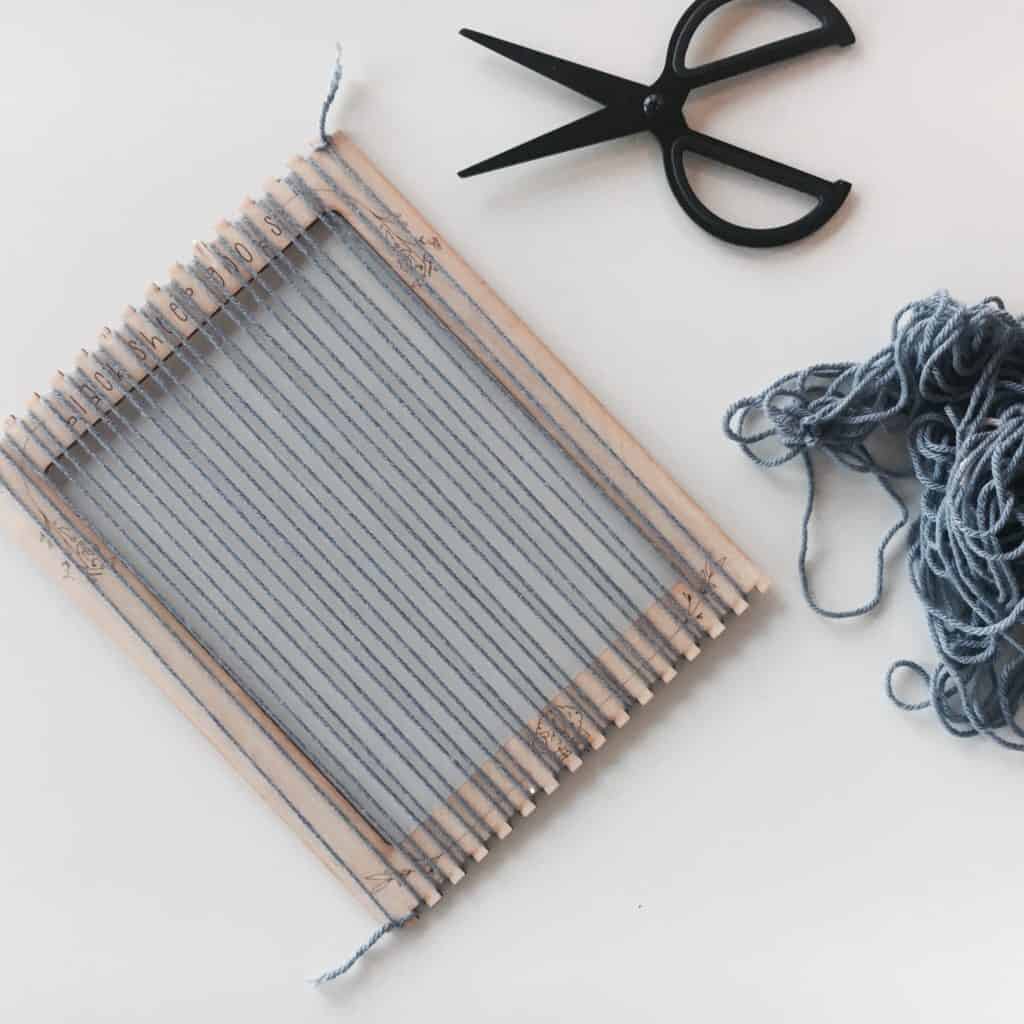
3. Create Your Canvas Width
Continue going up and down until you have reached your desired width, then tie off. Make sure your warp has even tension!
HOW TO USE A PICK-UP STICK
The next thing demonstrated in the video (0:16) is the use of the pick-up stick.
You’ll use this tool to pick up every other warp and create a shed to pass your shuttle through.
To wrap a shuttle, tie the yarn onto an end and create a “figure 8” on one side, then repeat that same “figure 8” shape on the other side.
This concludes the setup steps for weaving with a pop out loom, now it’s time to have some fun and be creative.
4. Weft Your Warp
If a warp is your thread going in a longitudinal direction, your weft is the latitudinal direction of the thread. Together, the warp and weft weave the fabric of your tapestry.
Now for what you need to do in this step…
Use your needle or shuttle to pull up every other warp thread and pass your weft through. Pull excess and make an angle with the weft.
PRO TIP:
Careful not to pull too hard… or the sides will start to squish in. (OH NO!) Occasionally use the comb to softly push down your weft to keep it even and in place.
Now, there are quite a few ways to create fringes of your tapestry. Because you’ll ultimately be creating your vision, this is where the strict instructions stop, and where you get an idea of what can be done with your fabric art.
FRINGE TECHNIQUE: HOW TO RYA
At the 0:26 mark in the video above, you’ll see a demonstration of how to rya.
1. Cut Your Yarn Length
Cut a few pieces of yarn twice the length of the tassel. Wrap one end around the left warp.
2. Wrap The Yarn
Wrap the other end around the right warp so that the ends are now together.
TECHNIQUE: HOW TO SOUMAK
The next technique, called soumak, is demonstrated at the :50 mark in the video above. It’s accomplished in three steps.
1. Wrap Each Warp
Wrap around each warp from the left side, then back through around the right side. Continue warp by warp.
2. Wrap The Last Warp Twice
When you’ve reached the end, wrap around the last warp twice.
3. Repeat and Mirror
Mirror what you just did to create a braided look.
There are many other techniques you can try, but soumak and rya are great for beginners. And once you get a handle on weaving, rya fringe, and soumak, you’ll be in a great position to take on others that are more complex.
Speaking of which, if you haven’t started yet and read through this first, or you’re mid-tapestry and yet to finish, here are some “tricks of the trade” that will help you along the way.
11 THINGS YOU SHOULD KNOW BEFORE FINISHING YOUR TAPESTRY
1. How to Finish Your Tapestry
To finish, cut the bottom warp threads off the loom in pairs, and tie them in a square knot. Then insert the wooden dowel rod into the loops of the top warp.
Any excess yard can be hidden by using your needle to thread yarn through a few rows of the reverse side of your tapestry.
2. Splinter Problems
If at any time, a tool or connection point for your loom slightly splinters, simply rub it with your sandpaper until smooth. Ignoring this can damage your tapestry, or end up damaging your fingers.
3. Move Bottom to Top
It’s easier to weave from the bottom of the loom to the top. You’ll also want to leave at least 2.5″ from the bottom of the loom to the first row.
Weave up, but leave at least 1″ of space – this will make room for your dowel rod. In the video, you’ll notice they left even more room than that.
4. Leave 4″ Tails on Weft Ends
Always leave at least a 4″ tail on all weft ends — this makes it possible to hide the thread on the backside.
5. Four Rows Before Rya
Make sure to weave at least 4 rows of plain weave before adding rya tassels – this will help keep them in place.
6. Creating Weft Angles
When creating an angle with your weft, place a finger on the edge to keep the warp ends from pulling inwards.
7. Wrapping the Shuttle
To wrap the shuttle, tie the yarn onto the end and create a “figure 8” on one side, then repeat that same “figure 8” on the other side.
8. Soumak – Keeping Weft in Place
After weaving a soumak, add another single row above, this will help keep the top few rows of weft in place.
9. Hanging Your Tapestry
To hang your fiber art, tie a piece of yarn onto the dowel next to the warp ends.
10. Dowel Rod Alternatives
The pop out loom can create an 8.5″x11″ tapestry, but you’ll get 150 yards of yarn in the kit – which means you’ll be able to make far more than one tapestry.
The kit includes one dowel rod, so after making your first tapestry, and you create a second, you’ll need something different to hang the work with.
If you make more than one tapestry, sticks and driftwood are perfect substitutions for the dowel rod.
Opinion of one, but natural alternatives to wooden dowel rods carry a beautiful boho chic vibe.
11. Making Smaller Tapestries
To make a smaller item (ex: bookmark or coaster) create a smaller warp simply by using less teeth.

YOU NOW KNOW HOW TO WEAVE
You’ve now got the skills and equipment to build amazing works of art, thanks to weaving. Plus, you didn’t have to spend an arm and a leg to get there either.
If you’re trying to find some ideas or creative fuel, check out the New Hobby Box Pinterest board on weaving for inspo.
We’ve pinned everything from techniques and tutorials to project ideas to get you started down the weaving rabbit hole.
You’ll discover that weaving is a super rewarding hobby that creates the potential to learn more and more each time you engage.
But for now, enjoy your new skill and ultimately new tapestry; and the added satisfaction that comes with having made something beautiful with your own two hands.
Happy Hobbying,
Your friends, @NewHobbyBox