Macrame took the textile experts and novices by storm a few years ago, and still continues to grow in popularity. It’s a craft that anyone can learn quickly and make beautiful pieces for their home. This macrame plant hanger DIY is perfect for beginners.
If you’re new to macrame, or if you’re looking for a quick and easy project, this plant hanger is the perfect place to start. It uses just a few simple knots to create a design that looks great in any room of your home.
The bulk of this tutorial focuses on how to tie 4 of the most important knots in macrame and then shows you a few amazing macrame plant hanger how-tos, where you can put your new knot knowledge to the test.
New Hobby Box began as a subscription business for hobbyists, covering a wide variety of hobbies, including macrame. The New Hobby Box macrame kit was so popular that every May, the whole month was dedicated to macrame – earning the name macra-May.
And the most popular macra-May on record was the macrame plant hanger DIY.
The supplies listed below are for the exact materials from the original macrame plant hanger DIY, so that you can follow along with that tutorial (also below).
If you don’t want to gather individual supplies or just want to try some different kits out, you’ll find a list of fantastic kits below.
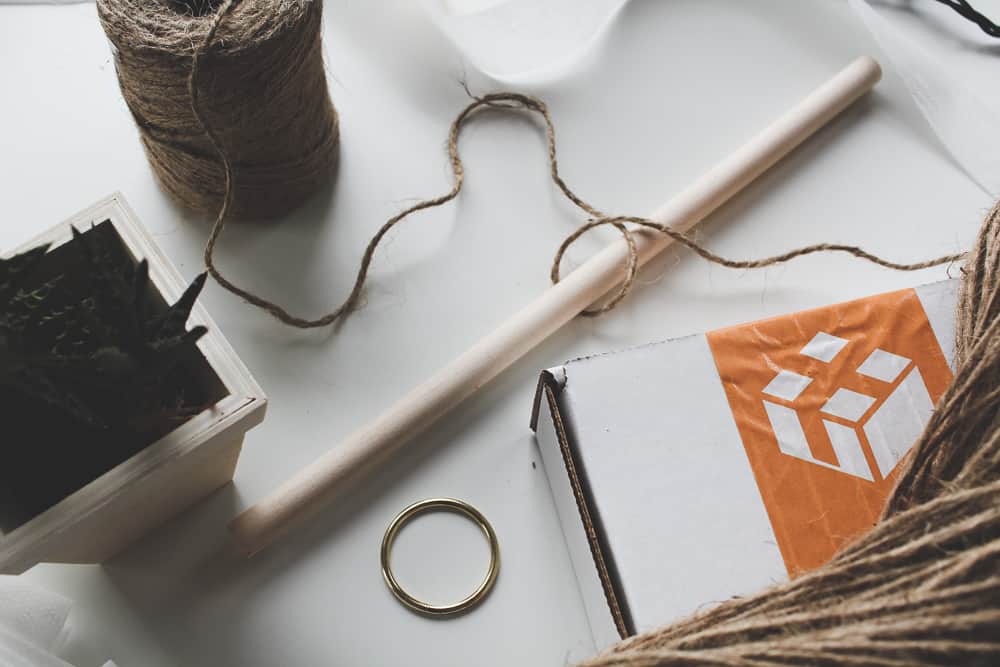
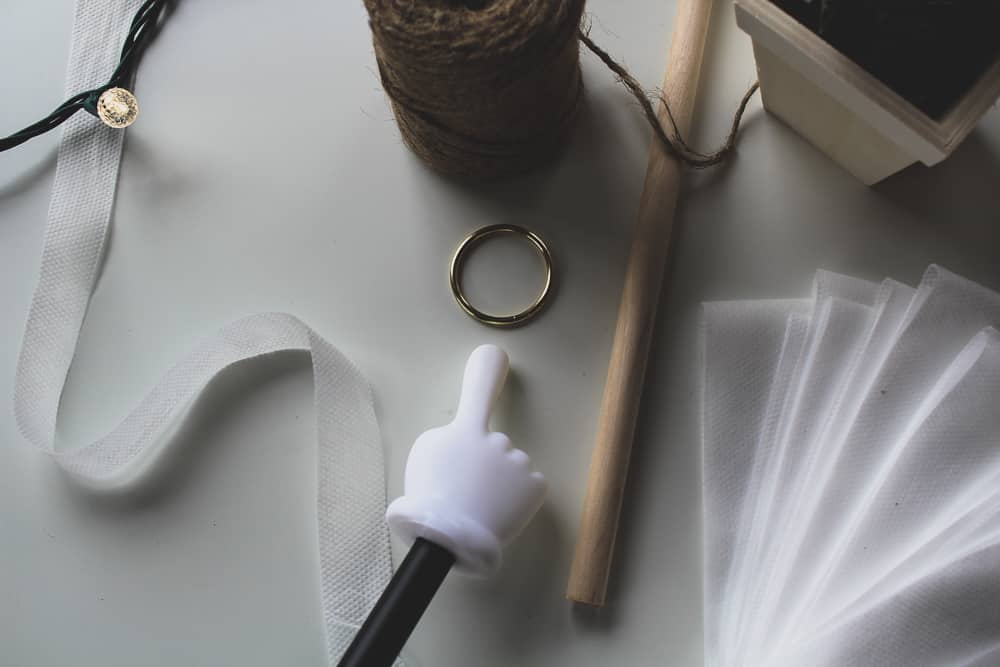
SUPPLIES NEEDED FOR MACRAME PLANT HANGERS
You can make so much with so little when it comes to macrame. You only need 5 items to make the macrame plant hanger in this tutorial.
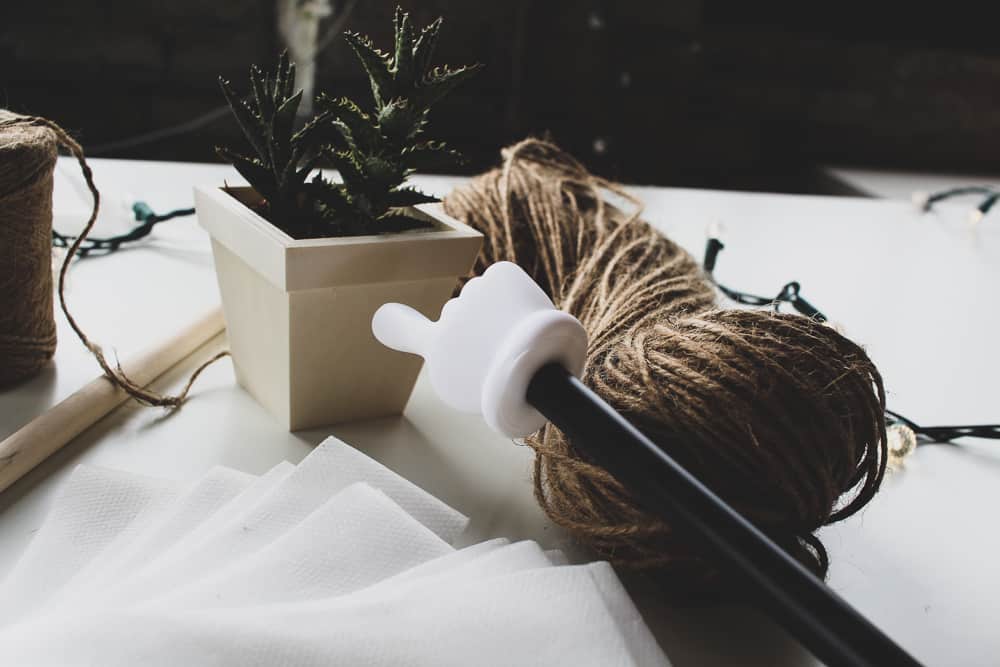
- Dowel Rod or Stick/Small Branch
- Macrame Rings (Metal, Wooden, Plastic – Your Choice)
- Small Wooden Planter
- Light Fabric
- Jute or Any Type of Thread
- Scissors
- Tape Measure
The following info includes a kit that has everything but the flower pot (scissors and tape measure also not included), and then shows you each item needed for this tutorial, your options for that item, and where to find them.
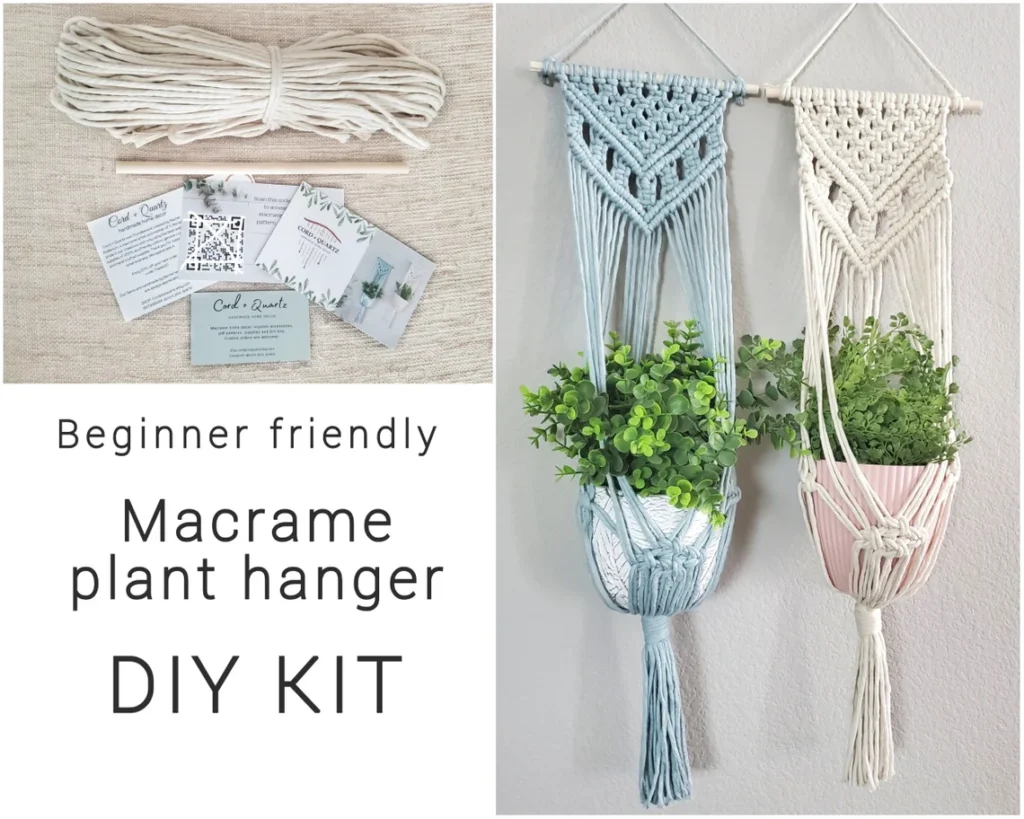
Macrame Plant Hanger Kit
I don’t normally lead off a materials list with a kit, but this macrame plant hanger kit for beginners (pictured above) is too good of a deal to not lead off with.
It has everything you’ll need to do this tutorial and so many other macrame tutorials, and the price is fantastic – less than $30 at the time of writing this.
In full transparency, we have not purchased this kit, but we regularly use all the items included in this kit, so we feel comfortable making it an option because of that, since we know the price of getting macrame materials of this quality far exceeds $30.
It’s important to note that this does not include flower pots for your plant hanger – but you’ll be hard-pressed to find any kits that do.
Dowel Rod
You can use a dowel rod, or a stick/small tree branch from your yard or park. It depends on what kind of style you want to go with for this. I opted for a stick out of my yard to get the boho style.
Macrame Rings
You have a lot of options when it comes to rings. In the original kit I made and sold, I used metal rings.
But I tend to use wooden rings for most of my projects these days. Here are some great options for both styles. Below, you’ll find metal options, which is what came in our original kit, but also wooden rings.
Metal Rings
This set comes with 12 rings in 6 sizes, and the price is pretty solid – at the time of writing this, it’s $8. For the kit we sent, we used a size comparable to the smallest in this set.
Having variety of sizes for this is great for macrame, but also many other projects – like weaving, or making a dream catcher.
Wooden Rings
While I don’t use a wooden ring in this tutorial, I use wooden rings on so many other projects, including macrame. It comes down to the type of aesthetic you’re trying to create really, and where you want to put your macrame project.
This set is an amazing value though, which is why I’m linking to it – at the time of writing this, it’s 100 wooden rings in 5 different sizes for $13. That’s tough to beat.
Preassembled Wood Planter
This is another one where you have a ton of options to pick from.
The key though is to choose a light weight pot – you don’t want to have excess weight if you can help it.
You could use plastic if you wanted, that’s your choice, but for me, it wasn’t part of the aesthetic I was going for.
If you want to use the exact planters I used in the tutorial, you’ll need to get the S&S mini wooden planters. I will say that they are a little pricey here, even though you get six of them in this pack.
I was able to purchase them at wholesale and in bulk, so they cost far less than this. But I absolutely love these planters for my macrame projects. There are a few things that make them perfect.
Since they have 4 sides to the planter – which makes it easier to keep the pot level when it’s hanging. If you have rounded edges to your pot, it can be a little more challenging to keep your pot level. It’s doable, just a little more work.
Also, I like being able to customize my planters, so getting them unfinished, so I can paint or stain them is an added bonus.
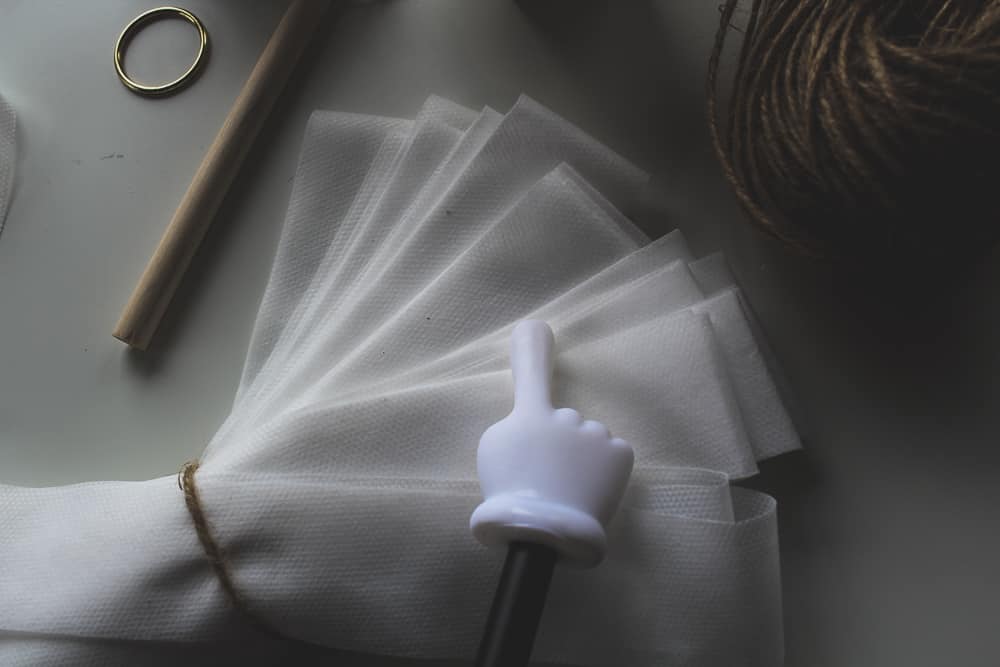
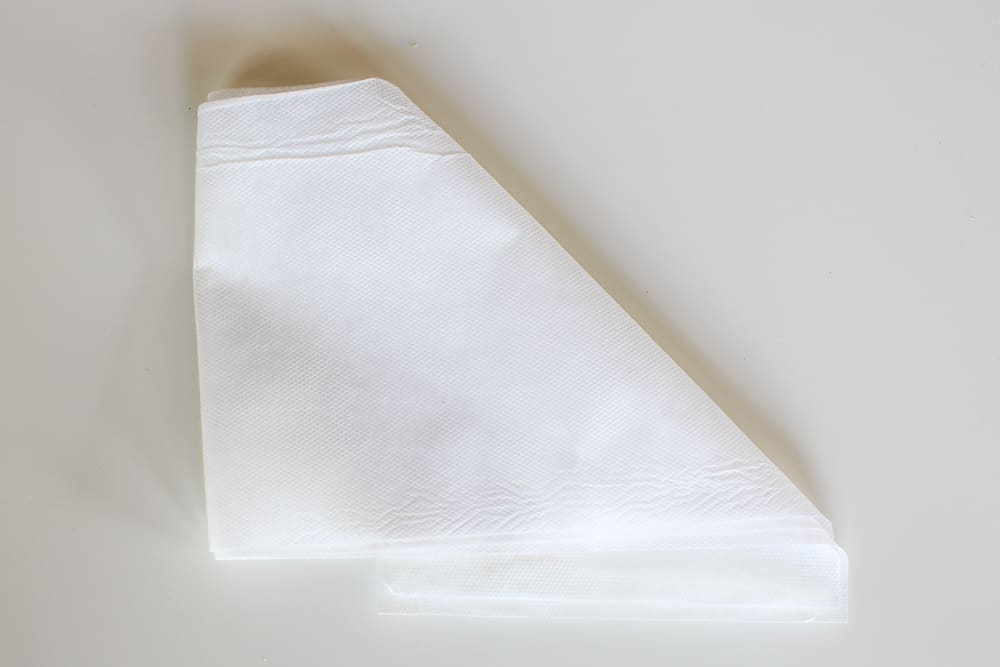
Light Fabric
This is only used for practice in my tutorial, and I used an unbleached muslin. Muslin is a great practice fabric because it’s lightweight and easy to work with.
So for something like practicing knots in macrame, once you cut the fabric into strips, it’s ideal for macrame. You could use just about any fabric or rope you have lying around your house to fill in for muslin.
Just try to pick something that moves easily and is lightweight. It will make knot practice way easier for you.
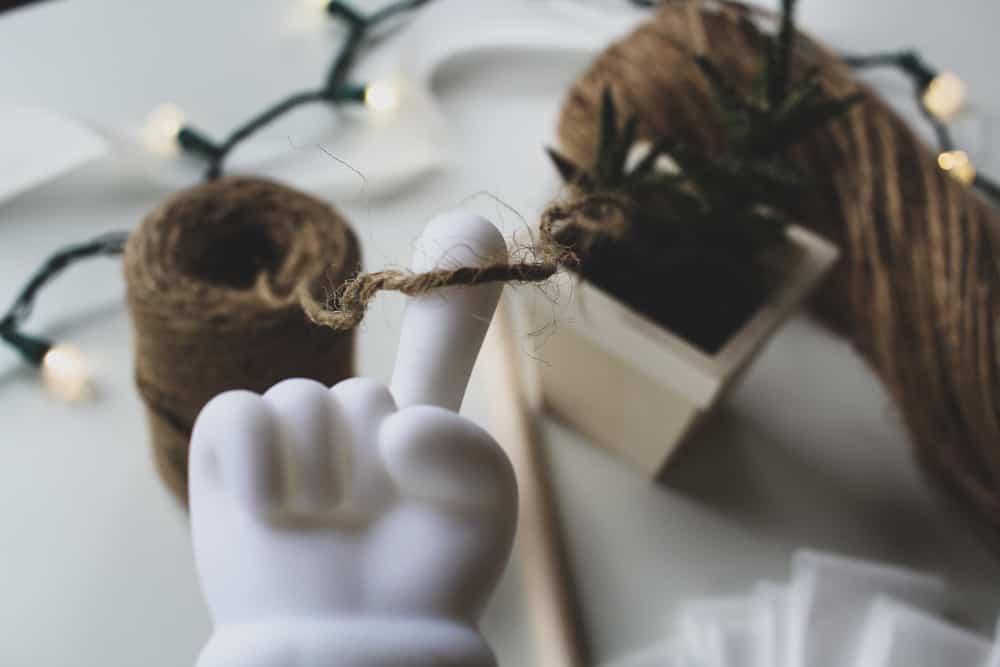
Lots & Lots of Jute
Every type of rope or thread has different weights/thicknesses – and so does jute, it’s called ply though.
In my kit, I used a 2 PLY. As the number of ply increase, so does the thickness. The jute I used and linked here has 400 ft, which will last you quite a while. But if you decide to go with a different jute, or a different rope altogether, just make sure you use a ply that isn’t too thick (too high of a number.)
The thicker it is, the more difficult it will become to tie your knots. It’s certainly doable if you use a thicker rope, but just more difficult, especially for someone new to macrame.
Want to hear something cool? The materials listed above can be used for many other macrame and fiber arts projects. Even the New Hobby Box “How to Make Kombucha” tutorial uses jute. Further on in this article, you’ll find additional macrame tutorials.
So just because you might be ordering half a dozen pots, or a dozen dowel rods, I wouldn’t sweat it. There are so many projects, macrame and otherwise, where those materials can go to good use.
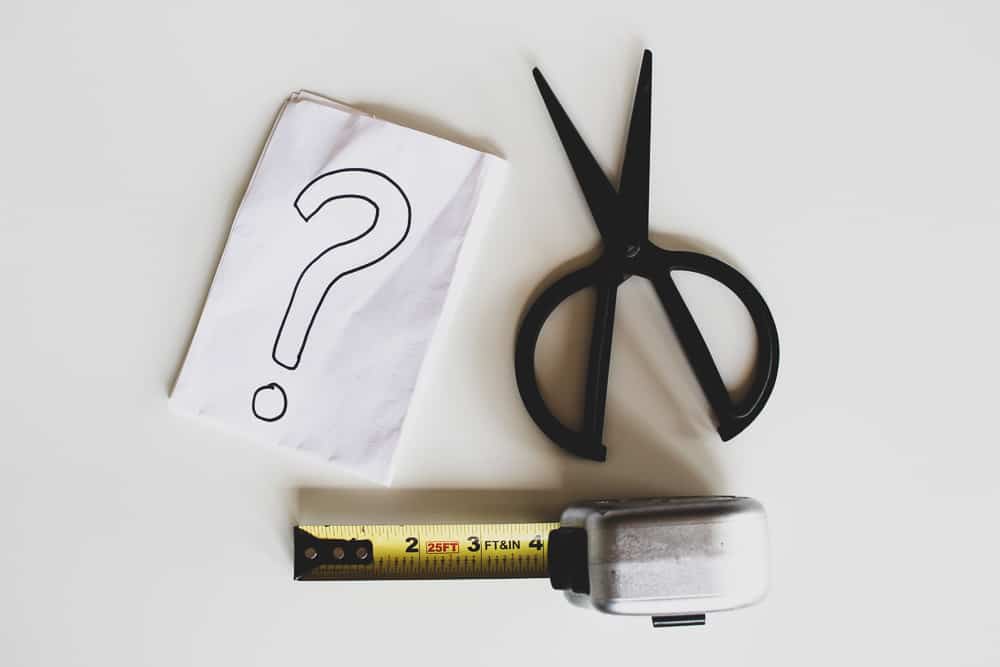
Tools for Macrame Tutorial
- Scissors
- Tape Measure or Ruler
Ok – have you collected your supplies or kits? You did? Great, it’s time to get knotting!
HOW TO TIE MACRAME KNOTS
If you’re new to macrame, I highly recommend practicing knots before you start any project. Knots are the foundation of any macrame project, and if you can learn the four knots below, you can pretty much do any macrame project.
I decided to focus this tutorial on knots for that reason. You’ll walk from this section being able to make a DIY macrame plant hanger rather easily, but also just about anything else in the macrame world.
Remember the white fabric? Its purpose is for practice. The fabric is easy to manipulate and much more forgiving if you mis-tie a knot.
Take your fabric and cut it into strips (whatever thickness you desire), and try to cut them to equal lengths. Once you’ve done that, move on to the next step where you learn the four pivotal knots of macrame.
How to Tie the 4 Basic Knots of Macrame
Once you’ve mastered these four basic knots, you can complete just about any macrame project.
Knots 2-4 are built off the Lark’s Head Knot, which is the first knot you’ll learn.
Important Note: The numbers in each of the four tutorials below, correspond to the cords hanging down, where cord 1 will be on the far left, and each number going up will be further away from the left.
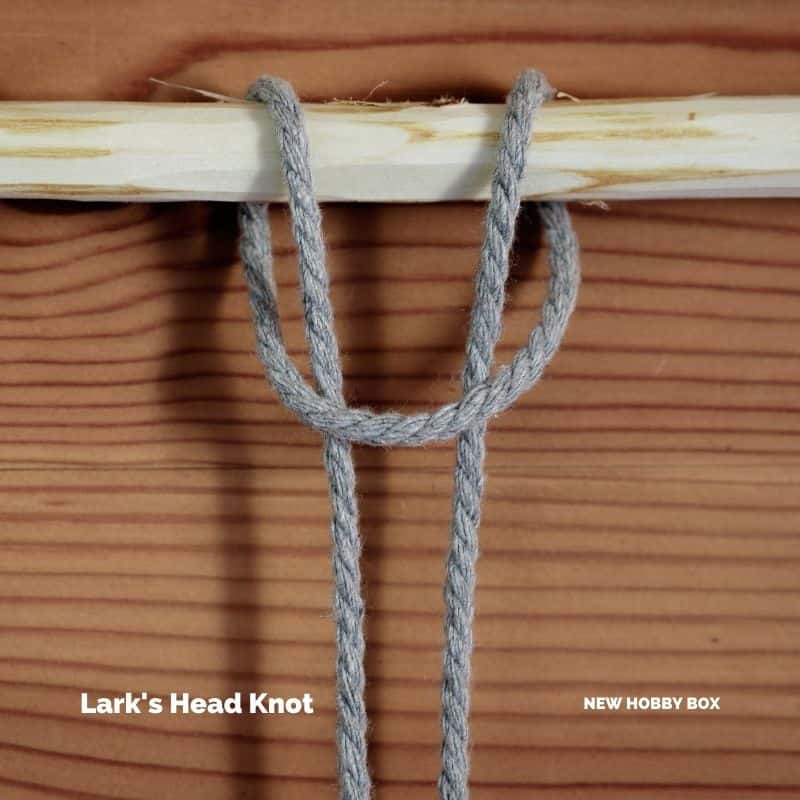
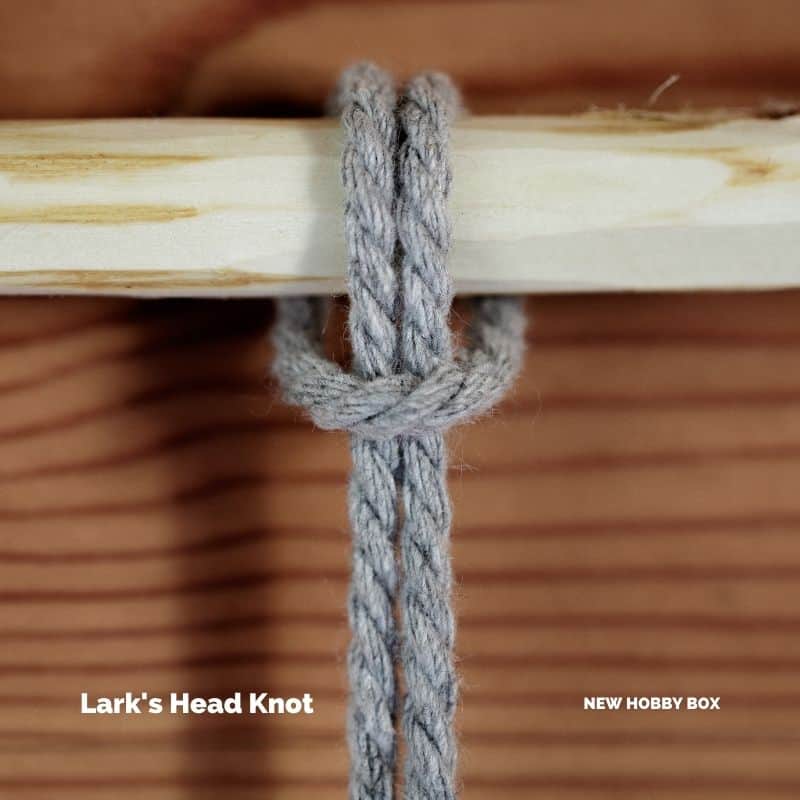
HOW TO TIE A MACRAME LARK’S HEAD KNOT
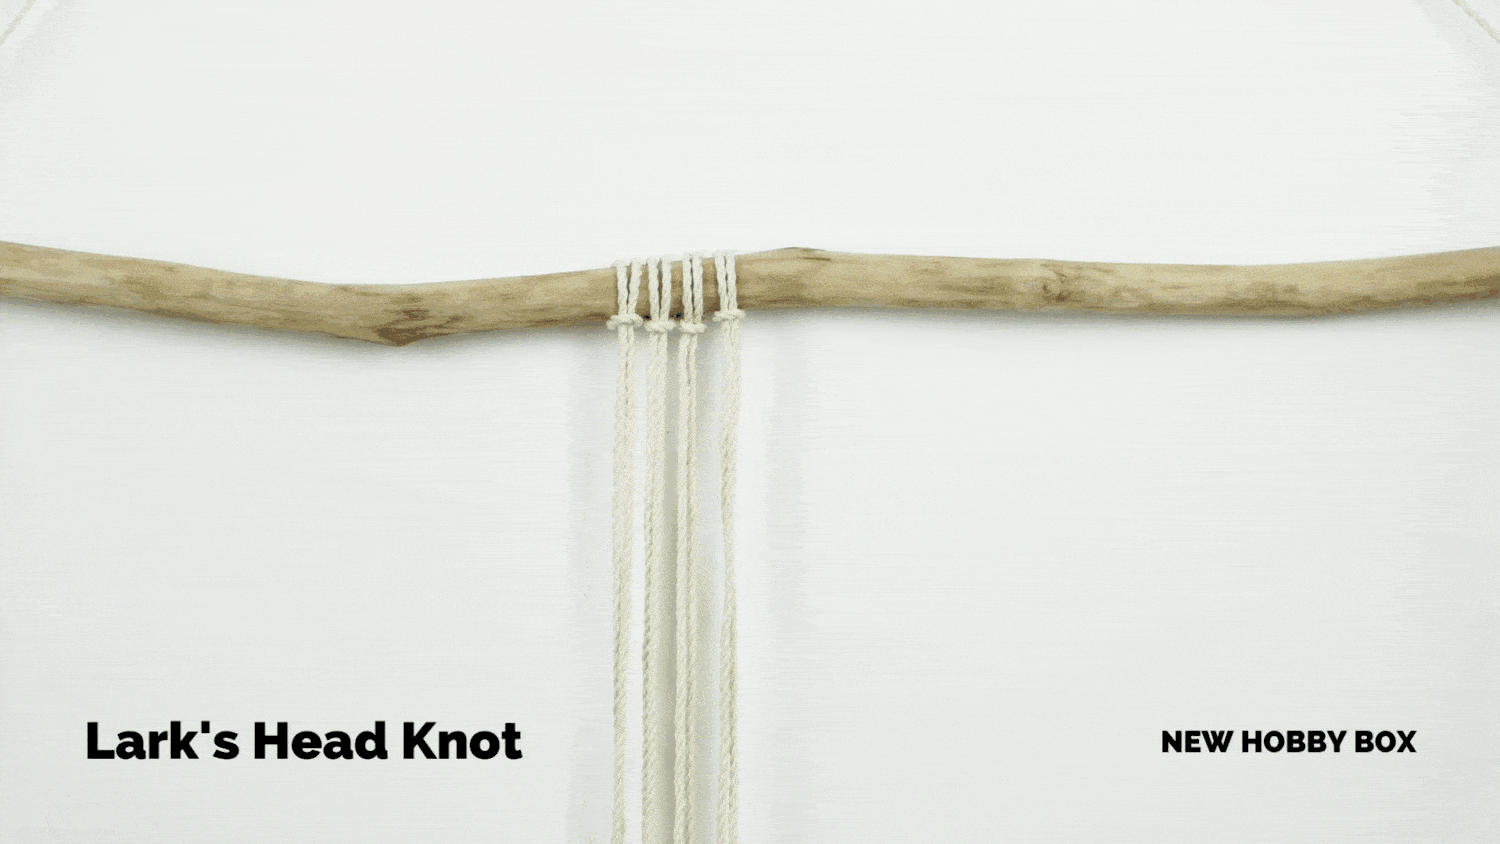
This is a rather simple knot to tie, but also the foundation for any sort of hanging macrame project.
1) Take one of your cords of rope, and hold it so that both ends of the rope are laying together
2) Hold this end position with one hand, then slide your other hand down the cords to find the halfway point, which will be a loop shape
3) Lay the loop over your dowel rod, and pull your hanging ends through the hoop to tighten the cord to the rod
4) Once tightened, the loop will be firmly attached to the rod, with the two hanging cords dangling from the rod
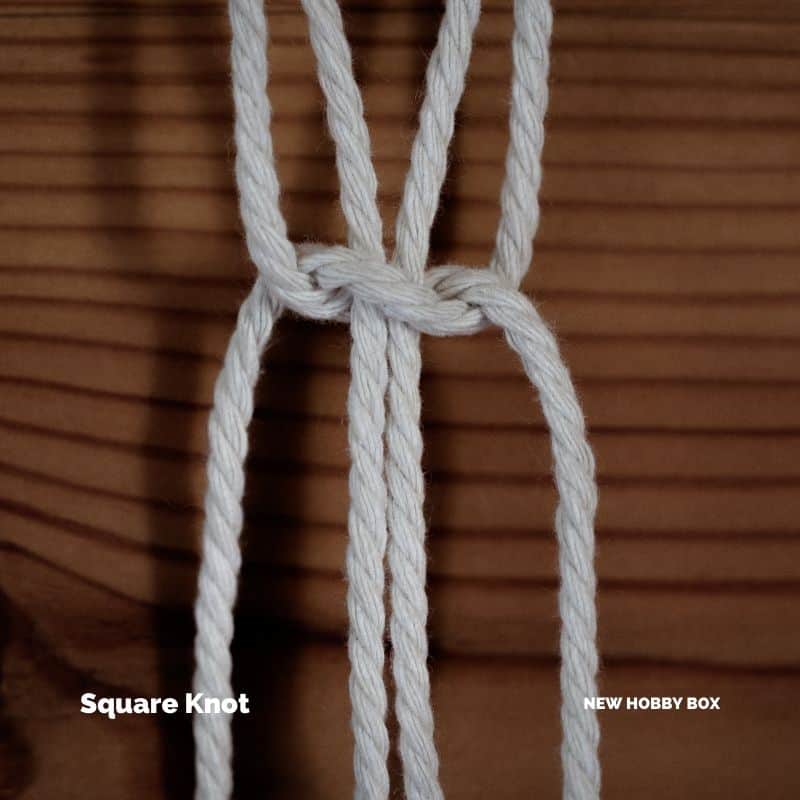
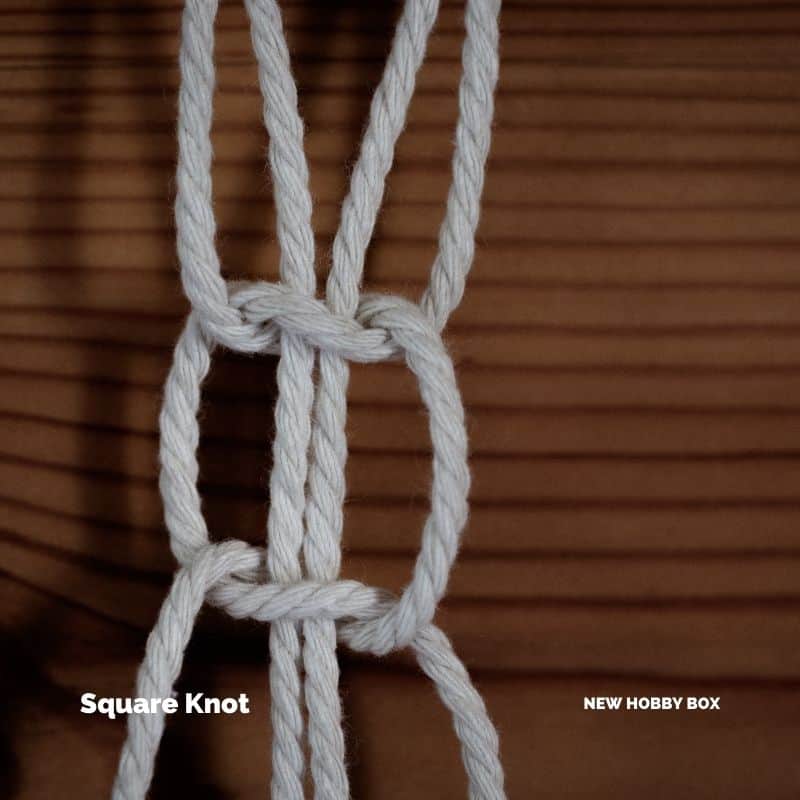
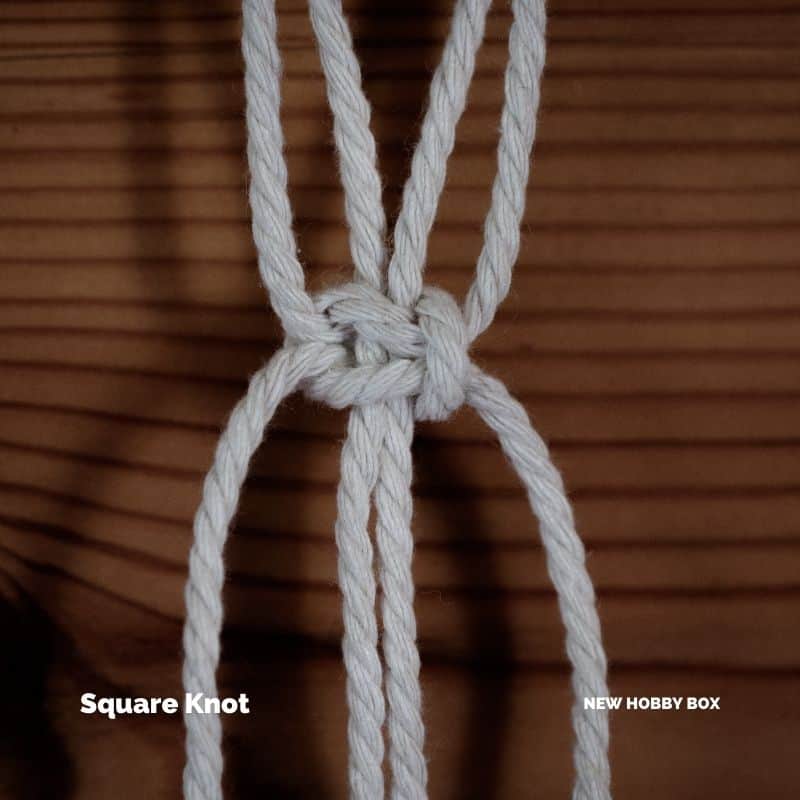
HOW TO TIE A MACRAME SQUARE KNOT (RIGHT HAND)
To do this, you need to have the Lark’s Head knot from the bullet points above completed. This is a Right Hand Square Knot, to do a Left Hand Square Knot, just reverse the directions below.
1) Tie two larks head knots on the dowel rod (each knot has two cords), as the square knot requires four total cords to complete – moving left to right those hanging cords will be referenced as 1, 2, 3, and 4
2) Take cord 1 and pull it perpendicular across the top of cords 2 and 3, then behind cord 4
3) Now, with cord 4 still laying over cord 1, pull cord 4 behind cord 3, then immediately over the top of cord 2 and pull it down over the top of cord 1
4) Pull cord 1 back across the top of cords 3 and 2, and then underneath cord 4
5) Weave cord 4 behind cords 2 and 3, and bring it out through the loop formed by cord 1
Tighten both ends to form the full knot
HOW TO TIE A MACRAME SPIRAL KNOT
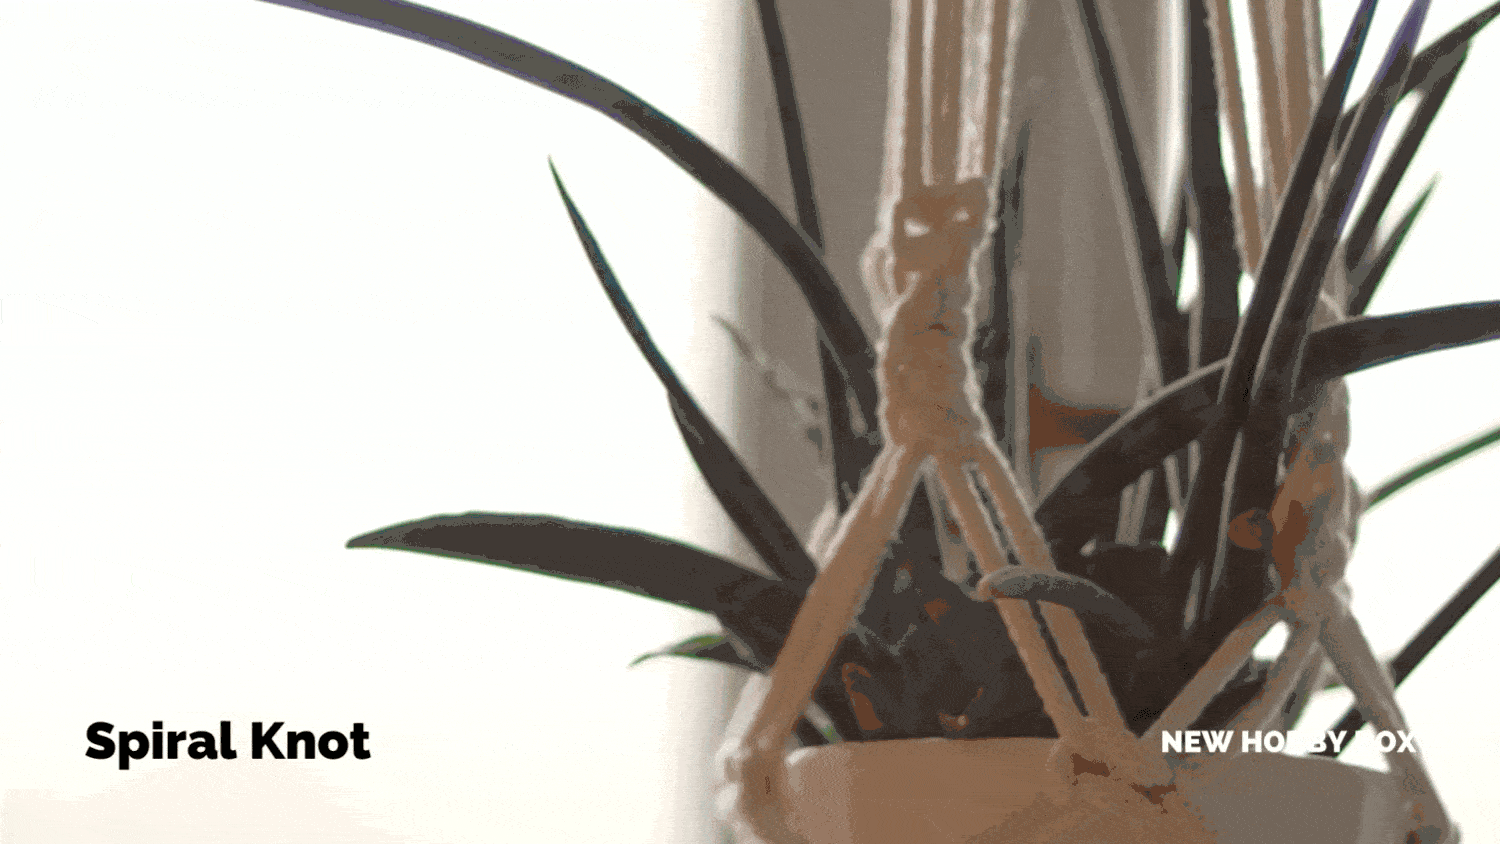
This is also a half square knot/spiral – so this will look familiar to the square knot above, are at least half of it.
1) Tie and hang two Lark’s Head knots on the dowel rod, moving left to right those hanging cords will be referenced as 1, 2, 3, and 4
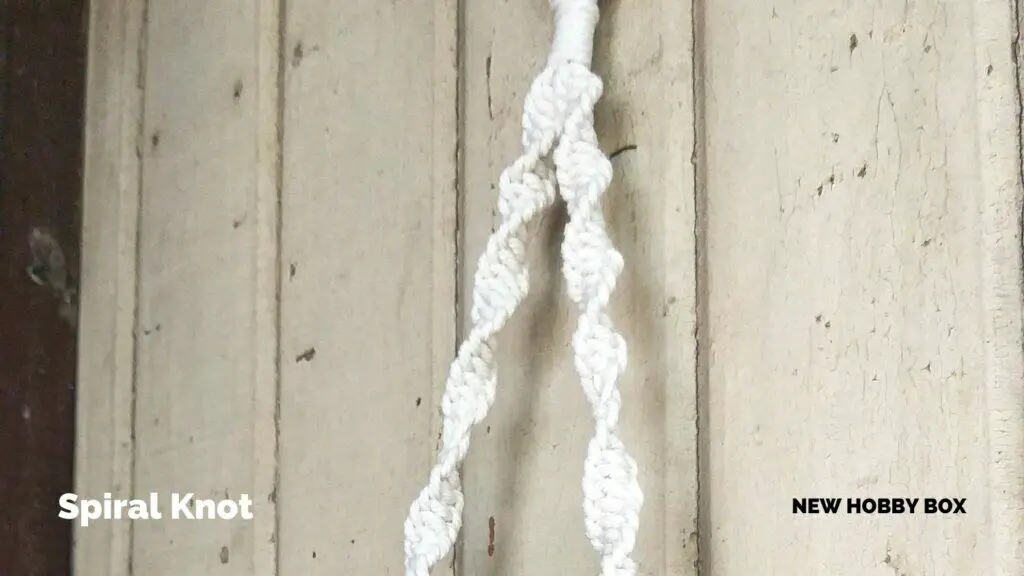
2) Pull cord 4 perpendicular behind cords 3 and 2, and then above cord 1
3) Similarly, take cord 1 and pull it perpendicularly across the front of cords 2 and 3, and behind cord 4
4) Pull cords 1 and 4 tight so they form a Half Square Knot
5) Bring the end of cord 1 back behind cords 2 and 3 and above cord 4 (which is now all the way on the left), then pull cord 4 back across the top of cords 2 and 3, but through the newly created loop of cord 1.
6) Pull cords 1 and 4, which will tighten a Spiral Knot
7) To create a Double or Triple Spiral Knot, repeat steps 5 and 6 two to three more times
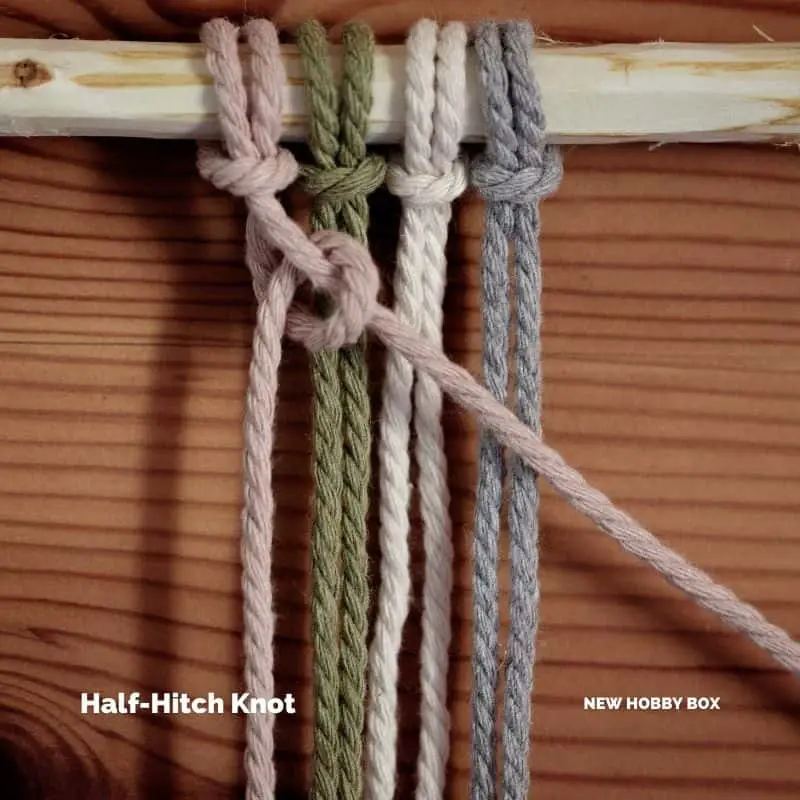
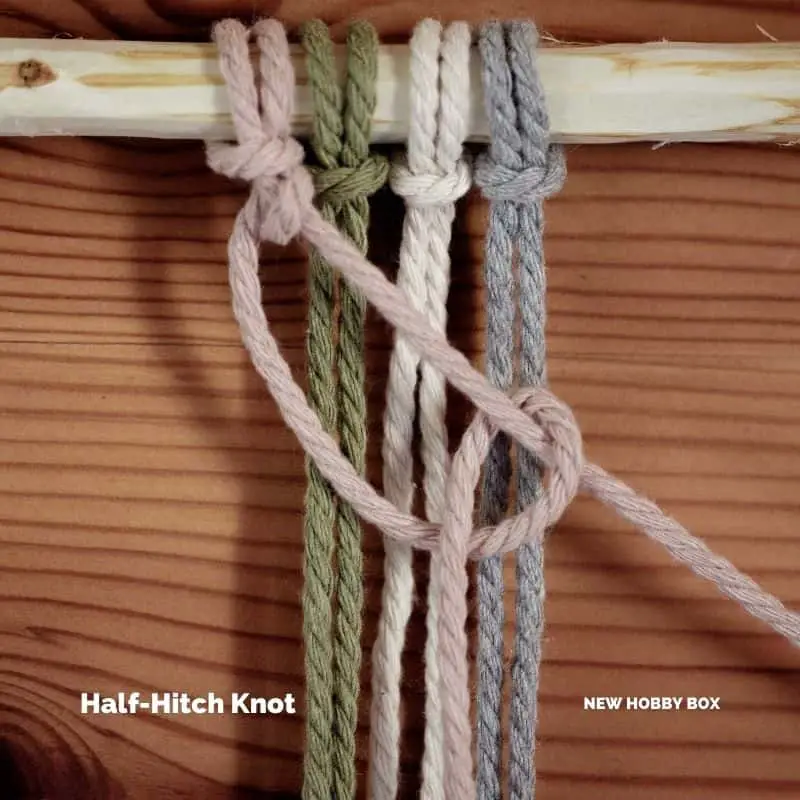
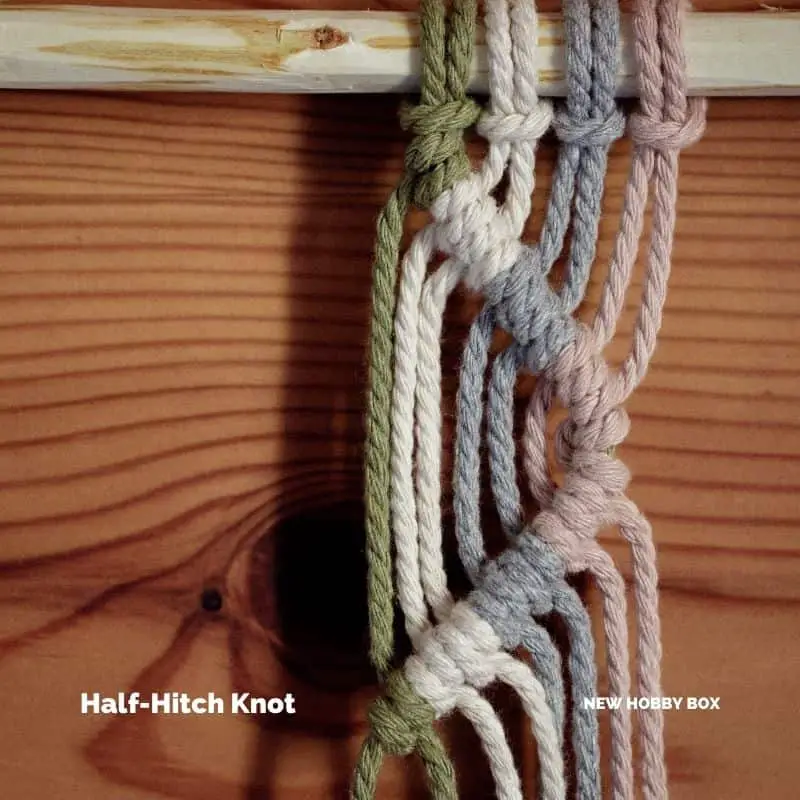
HOW TO TIE A MACRAME HALF-HITCH KNOT
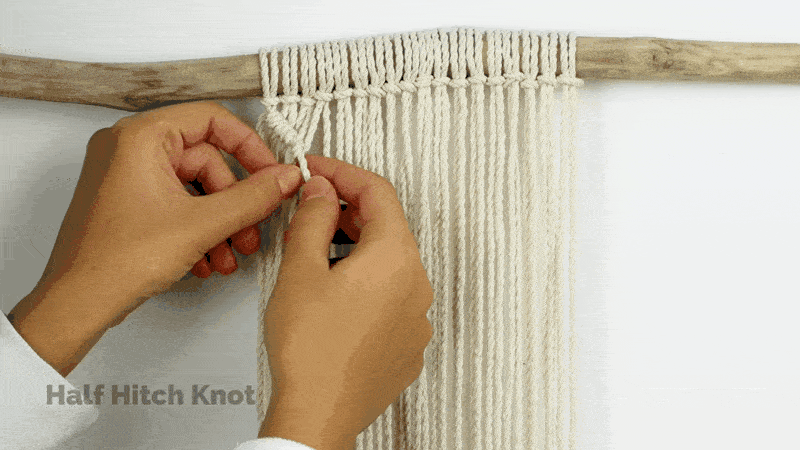
This is an iconic knot, that is what gives a thick diagonal cord moving up and down macrame.
1) Tie and hang three Lark’s Head knots on the dowel rod, moving left to right those hanging cords will be referenced as 1, 2, 3, 4, 5, and 6
2) Pull cord 1 down and diagonally to the right, on the top of cords 2 through 6 – and hold cord 1 tightly
3) Take cord 2 to the left and form loop shape, with the end of the cord being pulled towards cord 6, then weave the end of cord 2 behind the diagonal cord 1, but on top of cords 3 through 6
4) Pull cords 1 and 2 tight and repeat the first three steps until you have tight cords that stretch to cord 6
All Four Knots as Instructed by a Master of Macrame
Here’s a great video from hallmark that goes over the four knots above with additional instruction.
If you want to learn 6 other knots, jump into this video below, from Jotopie on YouTube – it’s really easy to follow along with, and if you’ve mastered the four knots above, you can learn some more advanced knots rather quickly.
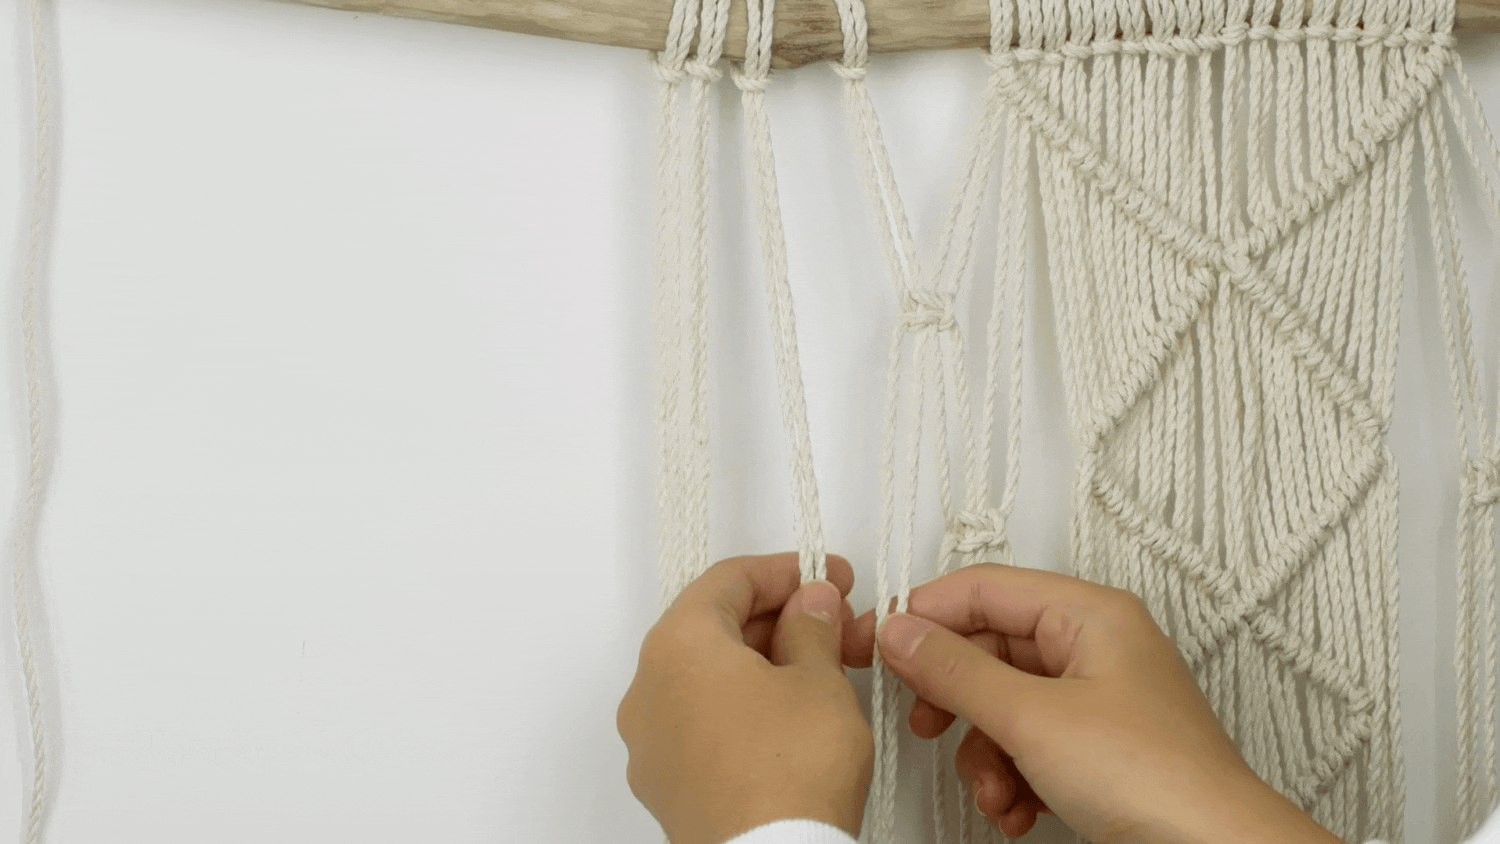
MACRAME PLANT HANGER TUTORIALS
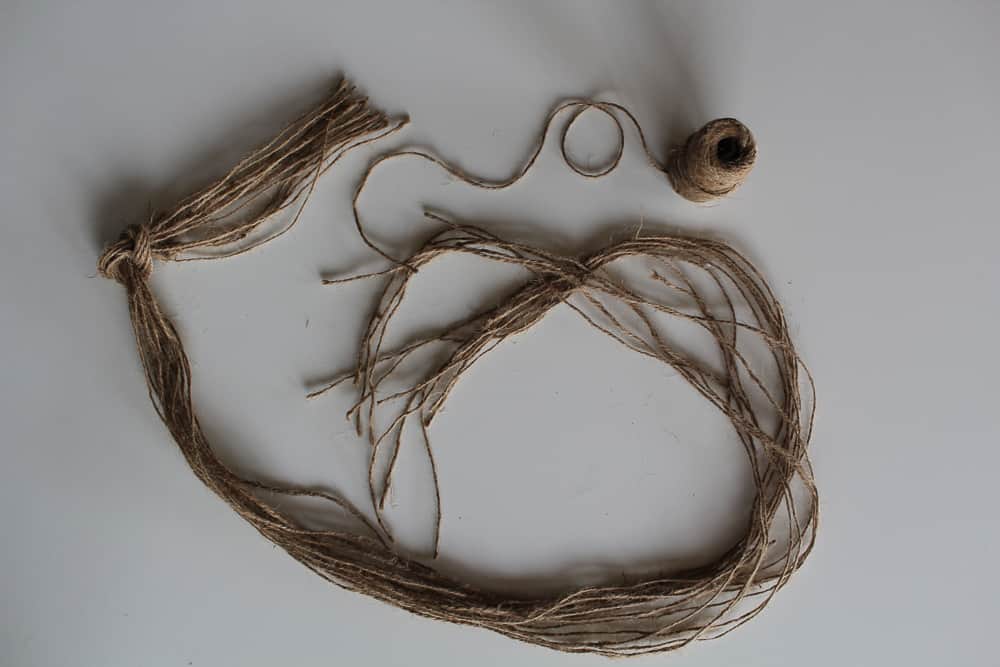
Remember how you could choose a dowel rod or a stick in the supplies list? You’re about to see why. I felt like this project was built for mother nature, so I chose to use a branch instead of the dowel.
I improvised on this amazing plant hanger tutorial from our friends over at Macrame School – now, you can use any sort of rope material, but I used jute. It called for 197″ and for 16 pieces of rope.
That’s a lot of rope, but if you purchased a spool of jute like me, you’ve got jute for days – there is so much rope in jute spools.
Macrame School on YouTube has some fantastic tutorials. This is the exact tutorial that I followed. It’s a painless 20-minute tutorial that will guide you through every step of the process.
And now that you know how to tie all the knots, you’ll be set to make a beautiful macrame plant hanger after following their tutorial.
Macrame Plant Hanger – The Final Product
So, what do you think? The one in the image here was made by a friend of mine, following this tutorial. And this was her first time ever doing macrame… so if she can do it, SO CAN YOU.
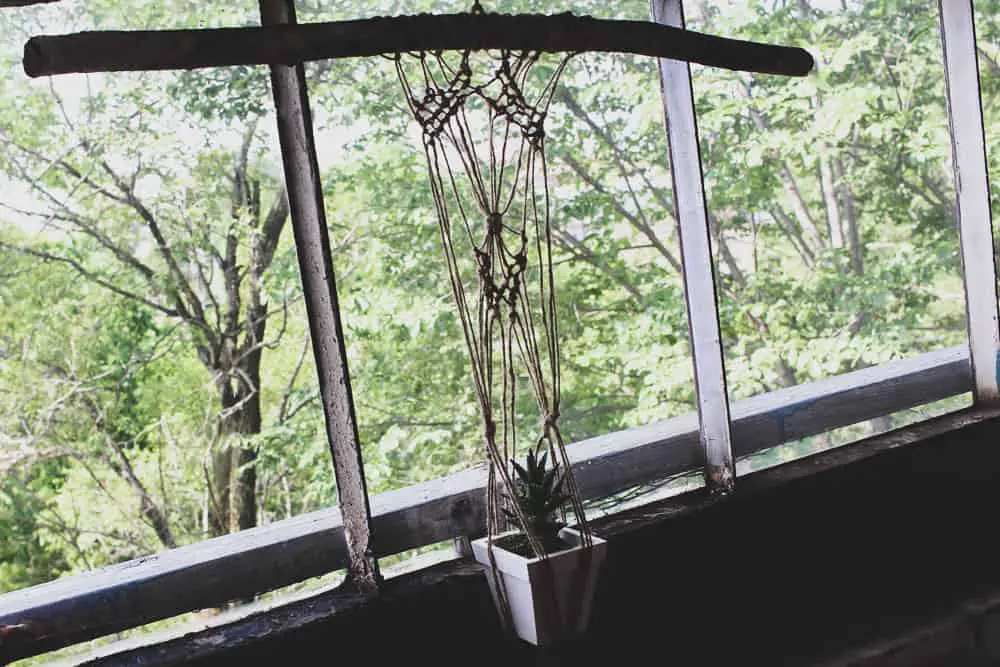
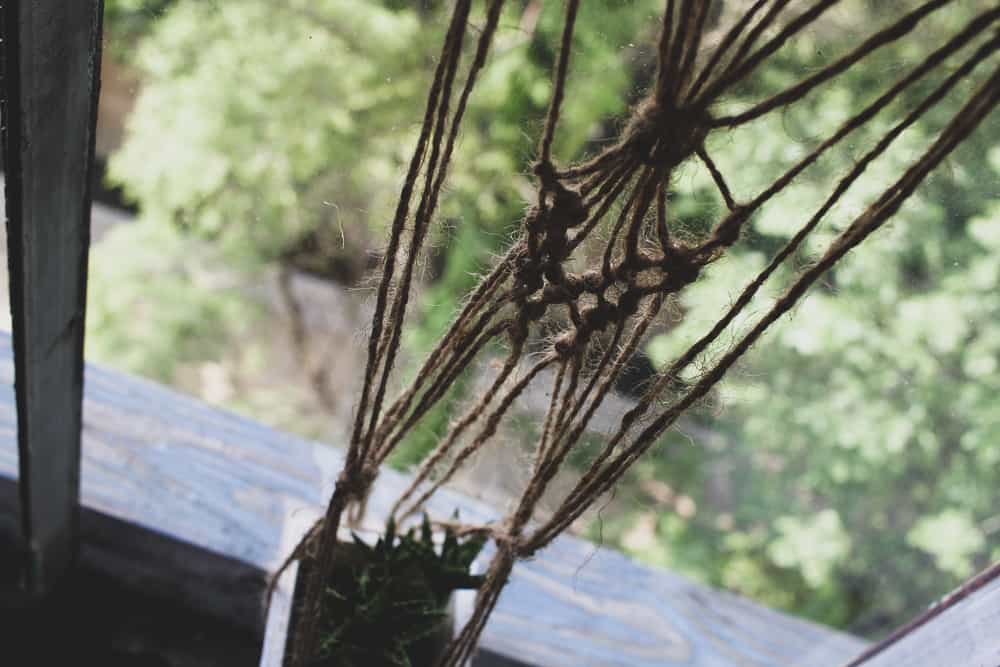
We chose to use a piece of foraged wood rather than a dowel for this one… and this is how it turned out!
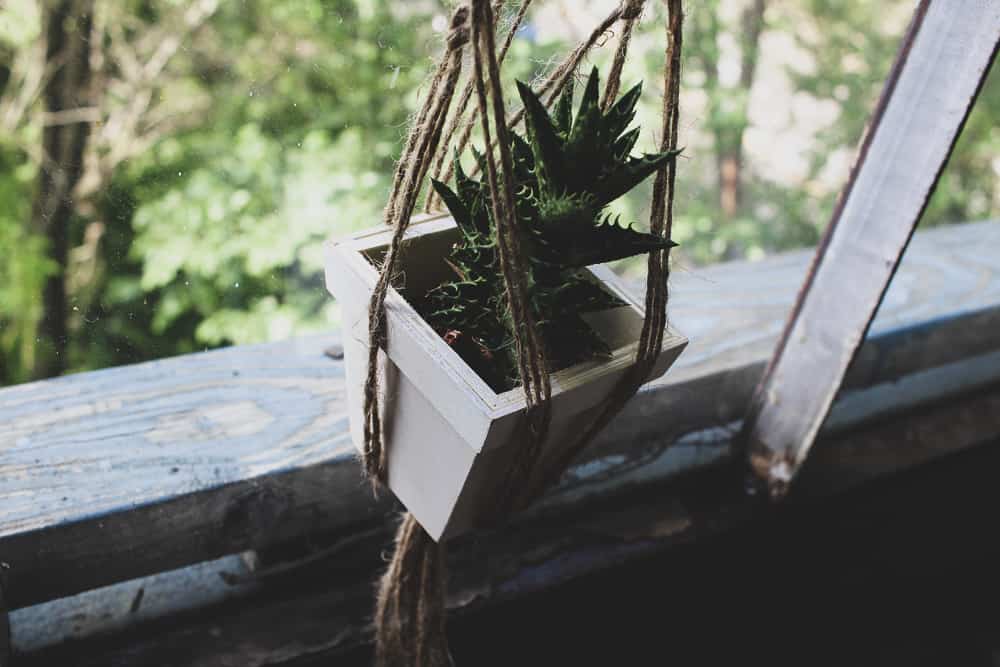
Note: We used the 2-PLY spool and still have this much jute left over.🙂
We also went ahead and painted our planter white and added a succulent.
I want to see what you’ve created. Tag @newhobbybox and show the world what you can do… of course, if you have any questions, please drop a line below.
In the meantime, I’ll leave you with additional tutorials and some frequently asked questions below.
Happy Hobbying!
MACRAME INSPIRATION
Whether you decide to make a tapestry, a plant hanger, or something else… it’s easiest to break any macrame project into small manageable steps, and even easier once you know the basic knots.
Each DIY video or blog about macrame will present a project in a different format so remember to just take it slow and even keep notes!
We’re lucky to have access to a treasure trove of free information via YouTube and Pinterest.
Best Macrame Tutorials on YouTube
Video tutorials are hands down THE BEST way to learn macrame because you get to see the nuances for each knot and how to weave cords together. I’ve compiled a list of my favorite videos.
As someone with hundreds of plants in my house, I naturally lean toward plant hangers, so you’ll find two of my favorite tutorials on plant hangers here, and then a beautiful tutorial on wall hangings as well.
DOUBLE PLANT HANGER MACRAME TUTORIAL
If you want to double down on the jute plant hanger, Ammie Harris has a great tutorial on making a double plant hanger. You’ll be able to use all the same materials that I used for the first one as well, which is always a bonus.
SIMPLE MACRAME PLANT HANGER TUTORIAL
If you’re interested in learning a new way to make plant hangers, but keep it simple, Tatiana Cm has put together a beautiful video (it’s stop motion) that is super easy to follow along.
She uses a more typical rope, but I’ve done this tutorial in jute (I just love the look of jute) and you could use any sort of rope you like. It will work out great regardless of rope you choose.
MACRAME WALL HANGING TUTORIAL
If you are interested in learning wall hanging, this video is perfect. And the supplies from earlier can be used for this as well.
The Best Macrame Tutorials and Ideas on Pinterest
Pinterest is also a great resource for macrame enthusiasts. I’ve compiled some of my favorite pins for you – you can find that in the New Hobby Box Macrame board here.
You’ll find a great mix of macrame DIY tutorials and some inspiration for so many types of macrame projects
MACRAME FAQ
How Much Rope Do I Need for a Macrame Plant Hanger?
If you’re creating a macrame plant hanger that requires folding cords in half, a standard rule is to use 8 times the length you want your finished plant hanger to be. For instance, if you want your macrame plant hanger to be 3 feet long, you would need around 24 feet of rope.
Are Macrame Plant Hangers Hard to Make?
In general, no, they’re not hard to make. In fact, many people find them quite easy. The most difficult part is often just figuring out the pattern you want to use. Once you have that down, the rest is simple. They can get complicated, but it’s something a beginner can quickly create something they’re proud of in the end.
Can I Use Regular Yarn for Macrame?
Of course! The great thing about macrame is that you can use all kinds of materials. You can use recycled fabric, yarn, string, twine, or even old t-shirts. Just be sure to choose a material that is strong enough to support the weight of your project.