If you’re like most people, you probably think of pickling and fermenting as something your grandmother used to do. And while it’s true that these old-fashioned methods of food preservation are making a comeback, there’s a lot more to them than just nostalgia.
Both pickling and fermentation offer a wide range of health benefits – not to mention some delicious flavors!
In this tutorial, you’ll find a list of all supplies needed to pickle and ferment food, kits that achieve the same results, and step-by-step directions on how to bring it to life. So grab a jar and get ready as we walk you through everything you’ll need to know about how to preserve amazingly tasty food.
Let’s begin by looking at supplies and materials you’ll need to start pickling today!
SUPPLIES NEEDED FOR PICKLING AND FERMENTING FOOD
Perhaps my favorite thing about preserving food is that many of the items needed to do it are readily available around the kitchen. And if they aren’t, it’s a quick trip to the grocery store. And of course, in terms of hobbies, it’s quite an affordable one.
That said if you’d rather skip searching for individual ingredients or items we’ve linked a couple of pickling kits that have everything you’ll need to follow along with the tutorial.
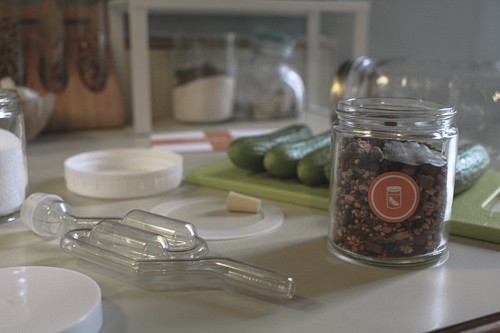
For those of you who want more of a pickled shopping list, have a look below for what you’ll need and where to get them:
- Wide Mouth Mason Jars with Airtight Metal Lids: You can choose any size you like, but the half-gallon jars we’ve linked here will give you a lot of flexibility to try different fruits and vegetables.
- Pickling Salt: We highly recommend using fine-grain sea salt because it dissolves rapidly and will improve your visibility into the jar during the process.
- Fermentation Lids for Wide-Mouth Jars: Normally we list out each item to purchase individually, but this kit has 4 items you would need to purchase individually, it has 6 of each in the kit, and it costs significantly less than buying the items on their own. The kit includes 6 BPA-free plastic fermenting lids, 6 airlocks, 9 silicone grommets, and 6 silicone rings/stoppers.
- Fermentation Glass Weights: You’ll notice that we didn’t use these in the tutorial, but I wish we had. They are on our shopping list, but having a nice glass weight for your jar is ideal. If you want to go scrappy like the tutorial, just find a food-safe item to keep things down – such as a shot glass, baby food jar, espresso cup, etc. We used a simple weighted plastic disc that was food-grade in this tutorial – and it works fine.
- Pickling Spices: The world’s your oyster here, but if you’re looking for some guidance on spices, there are two we would recommend. The first is pickling spice from SPICES VILLAGE and it has a mix of mustard, coriander, dill seeds, allspice, chilies, and more. It gives a zesty taste to whatever you pickle, but I would say it’s close to what you would expect a pickle to taste like. This might be a bit unexpected, but McCormick’s pickling spice isn’t what I would consider a traditional flavor. Don’t get me wrong, it’s quite delicious, but it’s a very forward cinnamon taste and that’s not for everyone. This adds a hot/spicy flavor to whatever you pickle in it. I would recommend this for fruits specifically.
- Fruits and Vegetables: And of course, you’ll need to source cucumbers or whatever vegetable or fruits you’d like to pickle. Go local if you can!
PICKLING KITS FOR BEGINNERS
Again, not everyone likes to purchase individual items to try a new hobby out. And often, purchasing a kit is less of an investment. We get it, after all, we used to sell kits as a full-time business, including pickling kits.
There are a couple of things we look at whenever we recommend kits.
- The first is how close the kit can be used to follow the tutorial. If it doesn’t mesh well, then we don’t recommend it.
- The second is about value. The kit has to be high-quality and reusable, but also not break the bank.
If a kit doesn’t fit those criteria then we aren’t comfortable recommending it. We’ve received a note or two asking why we don’t recommend Masontops kits. While we love the Masontops fermentation kits, the downside of them is beginner kits don’t include jars.
We’ve given Masontops as gifts before, so we know they are great, but if you’re someone who wants to pick up a tutorial, you need to have everything in one place. So that’s why we are only recommending one kit for the New Hobby Box pickling tutorial.
Yarwell Fermentation Kit: Best for Budget-Conscious
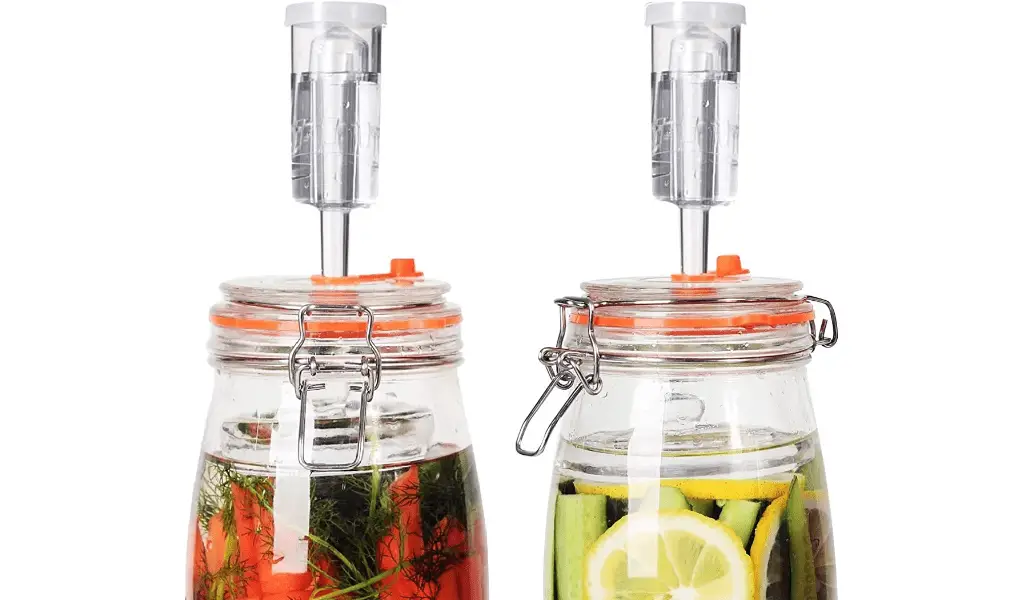
There’s nothing fancy about this kit (pictured above.) but it’s quality, quite affordable, and has everything you’ll need to follow along with the tutorial as well as continue after the lesson. A bonus is that the kit includes 2 jars with a volume of 1.5 liters, which is a little less than a half-gallon each. That’s great because you have a lot of room to work with different fruits and vegetables without having to buy new equipment. Also, it’s a swing top, which seals extremely well.
Now then, you should have everything you’ll need to start pickling. So without further ado, let’s get brining!
HOW TO PICKLE AND FERMENT FOOD
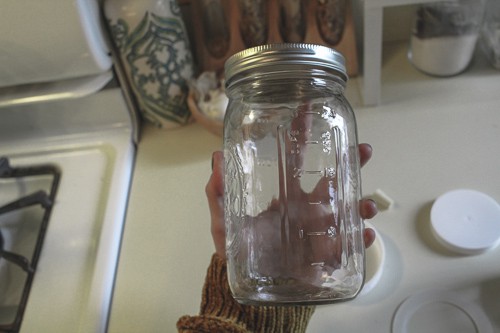
1. Sterilize Your Mason Jar
Remove the lid of your mason jar then run the glass jar through a dishwasher cycle with heated dry or boil in hot water.

2. Create Your Spice Jar
Time to create a mix of spices for pickling. Get creative here, add whatever you like into a jar, then shake and thoroughly mix.
We tend to use a mix with the following ingredients:
- Mustard Seeds
- Coriander
- Ginger
- Black Pepper
- Dill
- Cloves
- Allspice
- Chili Peppers
- Cinnamon
- Bay Leaves
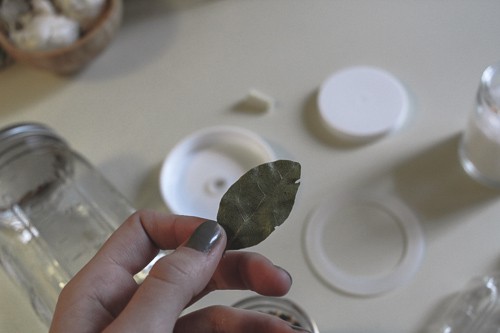
Do you like crisp pickles? If so, you can thank bay leaves and the tannins in them which are responsible for crunchy pickles. You can also use grape leaves and oak leaves for a similar effect.
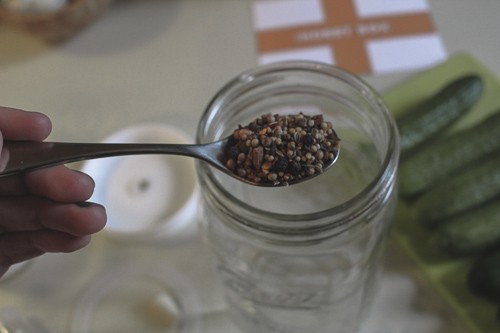
3. Add Spices to Empty Jar
Take 1 tablespoon of your custom spice mix and add it to the jar.
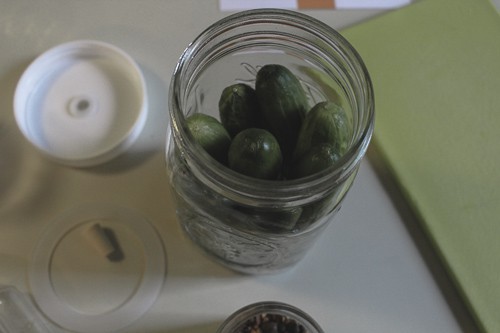
4. Add Cucumbers into Jar
Depending on the size of your jar, you will need to modify how many cucumbers you add. In the image above, we added 1lb. of seedless cucumbers – we highly recommend seedless cucumbers.
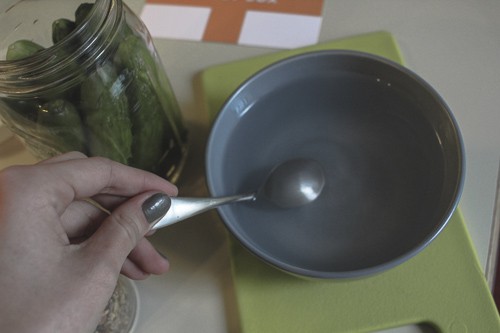
5. Prepare the Brine
Combine 1 quart of warm water with 2 tablespoons of salt. Stir until salt is completely dissolved.
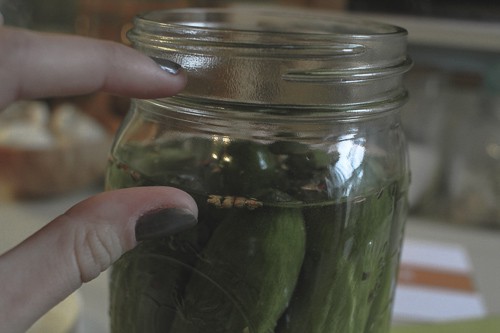
6. Fill Jar with Brine
Slowly pour your brine into the jar leaving about 1-2 inches of headspace.
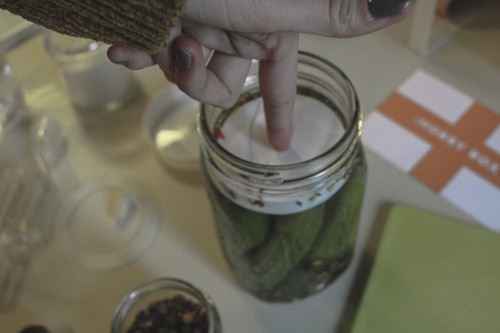
7. Fill Jar with Brine and Add Weight
Place weight on top of brine and cucumbers.
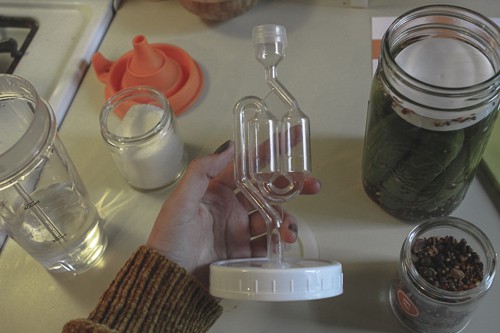
8. Assemble Fermentation Lid
Grab your twin bubble airlock, silicone gasket and grommet, and wide-mouth fermentation lid. Insert the grommet into the hole on the lid then insert the airlock into the silicone grommet to create an airtight seal. Place a silicone gasket on the inner liner of the jar lid.
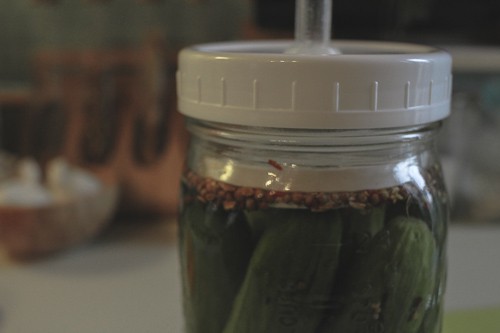
9. Fill Airlock with Water Then Screw the Lid on the Jar
It’s finally time! Open the top of the airlock and fill it with water to the max line of each chamber. You’ll most likely need to tilt it to get water to fill on both sides.
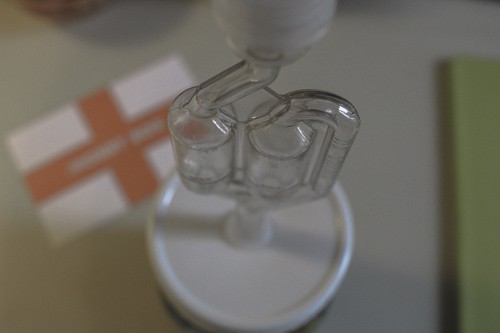
HOW DOES A TWIN-BUBBLE AIRLOCK WORK?
As healthy bacteria in a fermenting jar begins to grow, it releases gas in the form of carbon dioxide. This gas looks for an exit in the jar, and travels up the airlock, pushing through the water barrier and out. This pressure and water barrier prevent air, yeast, and bacteria from entering the jar.
Plus, salt water brine has a level of preventing the growth of certain bacteria as well.
Once you’ve got water in at the right level, screw the lid onto the jar.
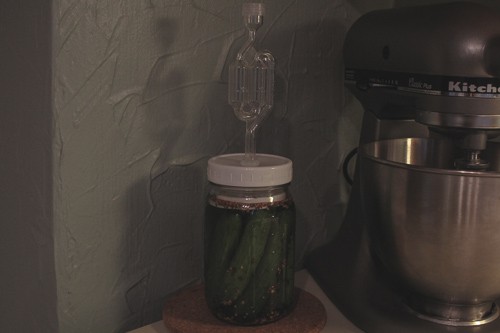
10. Find a Home for Your Jar
You’ll need to leave your jar in a dark place for 3-7 days, and make sure you store it at a temperature of 65-75 degrees. Pantries, cabinets, or basements are great spots for this.
If you don’t have a dark place, just keep it out of direct sunlight. After the 3rd or 4th day open up the jar and give your pickles a taste. You’ve earned it!
11. Wait for 48-Hours and Look at Airlock
Within 48 hours you’ll begin to see water pushing up into the chambers. Over time, as the gas bubbles rise, the water will push to one side. You will also notice the water turns cloudy- this is great! That means the process is underway!
12. Taste Test and Replace the Lid
After the 3rd or 4th day open up the jar and give your pickles a taste. You’ve earned it!
Once you taste and determine your pickles are just right, remove the lacto-fermenter to replace them with the mason jar lid. Next, store your sealed jar in the refrigerator – this stops the fermentation process.
This is optional, but leaving the sealed jar in the fridge for a few days is said to crisp the pickles even further, although this can be a topic of heated debate amongst die-hard picklers out there.
And that’s all it takes to magically turn cucumbers into pickles. If you want to learn about how to ferment kimchi and sauerkraut, some of the origins of pickles, and the benefits of pickles, keep reading.
Otherwise, thanks for joining this fun and tasty tutorial!
HOW TO MAKE KIMCHI AND SAUERKRAUT
Interested in kimchi and sauerkraut? You’ll be glad to know that the same supplies and processes to make pickles work for fermenting kimchi and sauerkraut.
The only difference is the ingredients required – you’ll simply substitute your cucumbers with different types of cabbage, depending on whether you want to take your dish to the Korean Peninsula or Germany.
If you wish to use the airlock from your pickling adventure in this tutorial, make sure you thoroughly wash it with soap and warm water!
Let the videos below guide you to delicious kimchi and sauerkraut.
Please note that if a cap is placed on the jar instead of an airlock system as shown in the kimchi video, you’ll need to burp your jar. This means every 1-2 days you need to open the jar and release gases.
If you don’t the gases will accumulate and push ingredients out or even blow the lid off.
We’ve got a few special things for you below, like the difference between fermenting and pickling.
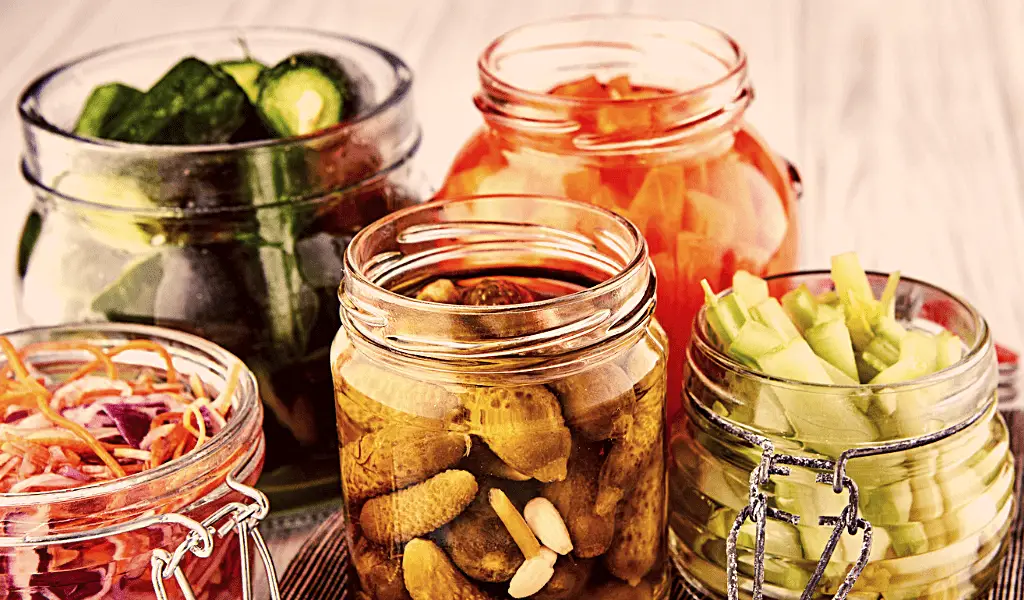
WHAT’S THE DIFFERENCE BETWEEN PICKLING AND FERMENTING?
The difference between pickling and fermenting foods is how each prevents the growth of harmful bacteria. In pickling, vinegar or acidic liquids are added to prevent the growth of harmful bacteria, whereas fermenting uses good bacteria and yeast to ultimately prevent the growth of harmful bacteria.
It’s a subtle difference but think of it like this. Pickling is like taking a shortcut and adding vinegar or brine to the mix. Fermenting, on the other hand, takes more time; it’s like letting nature take its course by allowing beneficial bacteria to do their thing.
The yeasts and natural bacteria in fermenting convert carbohydrates into lactic acid which fights off the bad stuff from growing. Pretty cool, right?
So when you read about pickling or fermenting further on in the tutorial, just know that they aren’t used interchangeably here. One is a shortcut (pickling) and the other is the natural process (fermenting.)
With the supplies in this tutorial, you’ll be able to ferment kimchi and sauerkraut, but the focus of this tutorial is specifically pickling.
When most of us hear the word pickle, cucumbers immediately come to mind. But a pickle can refer to any fresh fruit or raw vegetable that completes the fermentation process in an acid liquid until it’s no longer vulnerable to spoilage.
Benefits of Fermented Foods
Fermented foods are packed with health benefits thanks to the bacteria called probiotics. You can probiotics in all sorts of everyday grocery items, like yogurt and kombucha. Probiotics aid in digestion and can boost your immune system.
Speaking of which, if you love kombucha but hate the cost of buying it at the store, be sure to check out the New Hobby Box beginner’s manual on how to make kombucha.
A Brief History of Pickling and Fermented Foods
Fermented foods have existed across countries and cultures for millennia. With Kimchi originating in Korea, Sauerkraut in Germany, and Pickles in the Tigris Valley sometime around 2030 BC, preserved foods in some form or another have been around for a very long time.
The word pickle comes from the Dutch word pekel and their neighbors in Germany who used a similar word pókel which translates to “salt” or “brine.” And as you know, salt and brine are essential parts of pickling. So the word pickle is certainly an appropriate name!
PICKLE FUN FACTS
And finally, we leave you with some unimportant fun facts about pickles.
🥒 Cleopatra praised pickles as being one of her prized beauty secrets.
🥒 The average American consumes 8 pounds of pickles each year.
🥒 North Carolina and Michigan produce the most pickles in the US.
🥒 It’s been said, you can hear the crunch of a ‘good pickle’ at 10 paces.
🥒 In Fiji, men use pickle pits as a form of courting a woman- proving he can provide for the woman.
🥒 Nautical explorers such as Christopher Columbus, Amerigo Vespucci, and Captain Cook used pickles to help prevent scurvy amongst their crews.
🥒 Napoleon offered a large cash prize to who could find the best pickling method for his troops.
🥒 The US Supreme Court has ruled that pickles are technically a fruit, similar to tomatoes.
Happy Hobbying, pickle-people!

