Welcome to the wonderful world of scrimshaw. It’s challenging for sure, but an art-form worth mastering over a lifetime.
The great part about scrimshaw is that it can be as simple or complicated as you desire. I find this hobby extremely relaxing and fun – even though I’m not the greatest (you’ll see soon.) It’s one that I consistently come back to and continue to try and hone my craft on.
Today we will go through everything you need to know about how to scrimshaw – tools to use (and kits if you want to gather all the tools quickly), basics on how to get started, and two techniques, stipple and scratch.
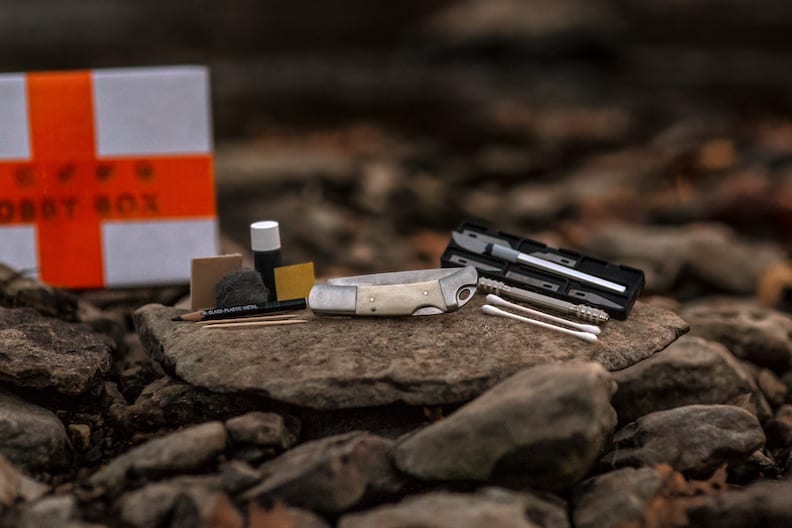
SUPPLIES NEEDED TO SCRIMSHAW
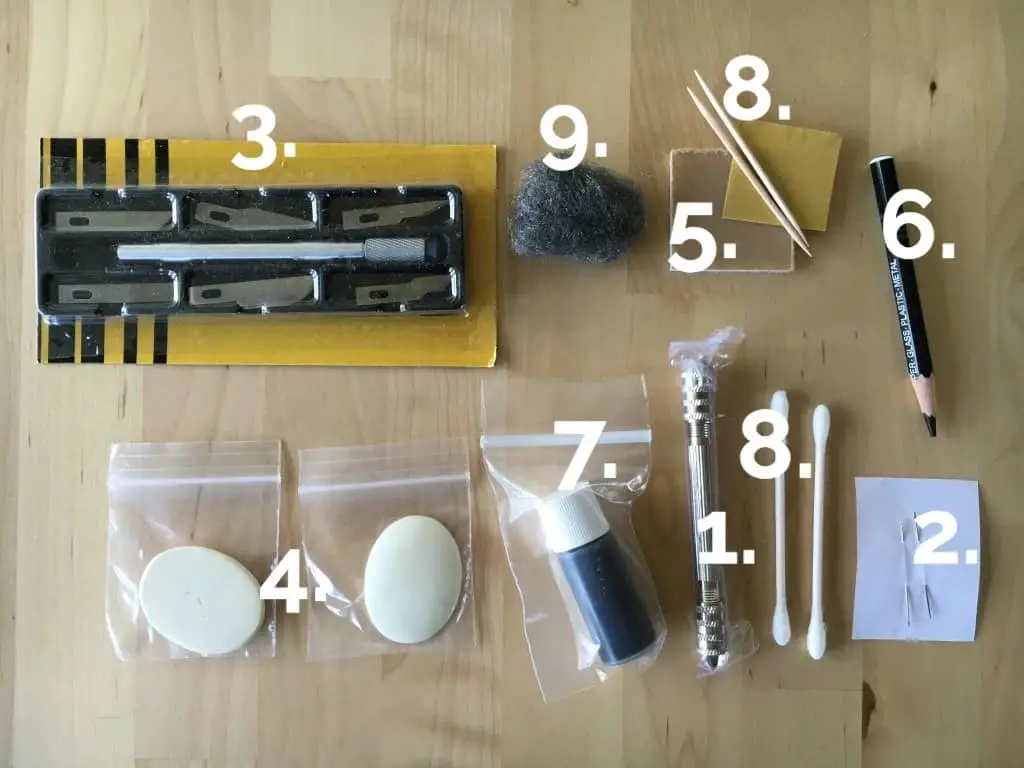
If you’re looking to be scrappy and use items around your house, or find pieces at local craft stores, this is what you’ll want to look for. Using the image above as a reference, the list below will have you covered on your journey.
If you’re looking for more premium tools, the kind that makes for a quality gift, check out New Hobby Box’s article dedicated to scrimshaw tools. It will guide you through what you’ll need and where to get it.
We’ve added some links here as well in case you need to just grab one or two items. If you want to skip this and purchase a kit that has everything, skip to the next section for recommended scrimshaw kits you can purchase.
- Pin vise tool (this is the silver tool with two ends in the image above)
- 2 scribing needles – needles of any kind here, so long as they are sturdy
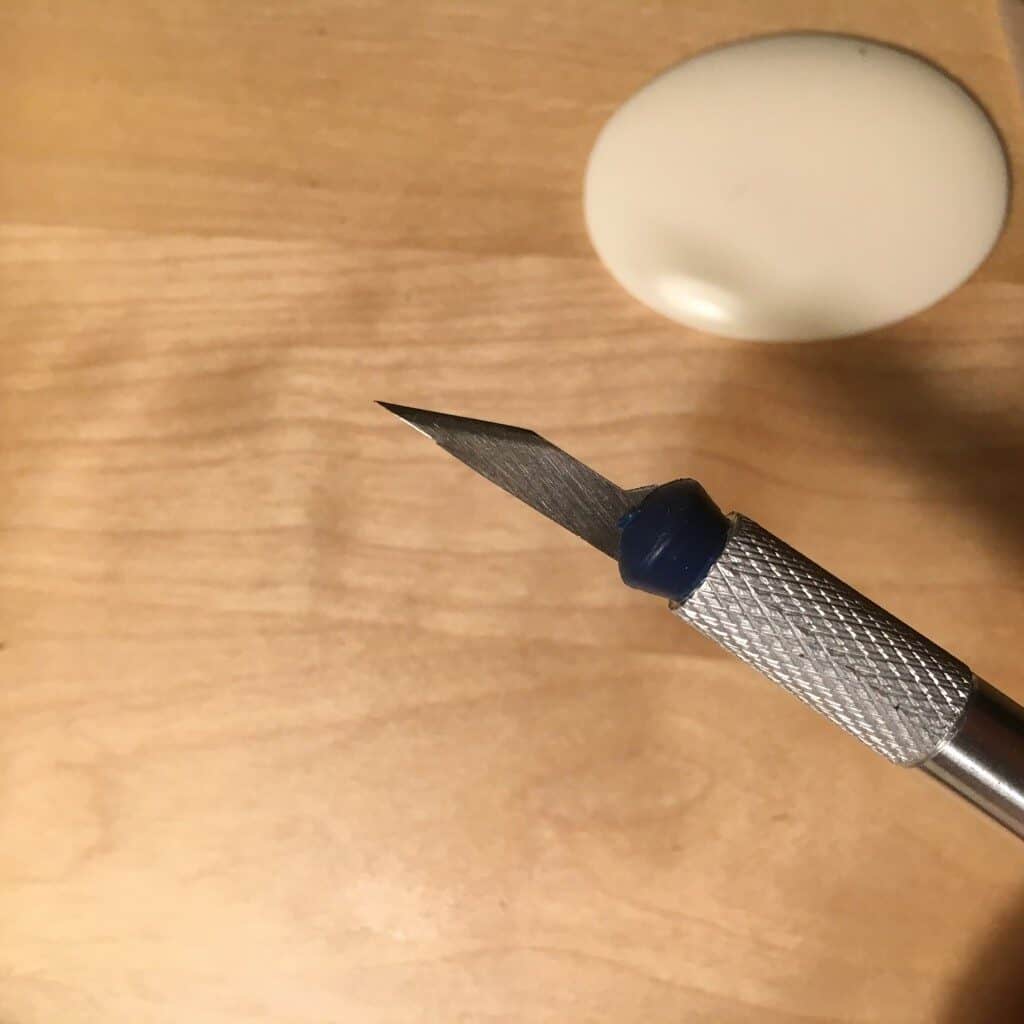
- Modeling knife tool set (blue tool) OR a scriber set (this is a decent option)
- 2 hand-cast faux ivory pendants, imitation ivory substitutes, or a faux ivory knife.
- Plastic practice piece (it’s the square, run through this tutorial on any spare plastic around the house before you go to the pendants or a knife)
- Glass marking pencils
- Black India ink
- Swabs/toothpicks for inking
- Sandpaper and fine steel wool for polishing (get sandpaper that is 300 grit or higher if you go that route)
Scrimshaw Kits We Recommend
So many options to consider here, but these are certainly cool ones that we think should be on your shortlist if you are in the market for a scrimshaw kit.
SCRIMSHAW KIT FOR BEGINNERS
The Rough Rider Scrimshaw kit is something else – it’s got some great stencils, a cool carrying case, and all the tools needed to scrim a super nice knife. Here’s what it looks like inside:
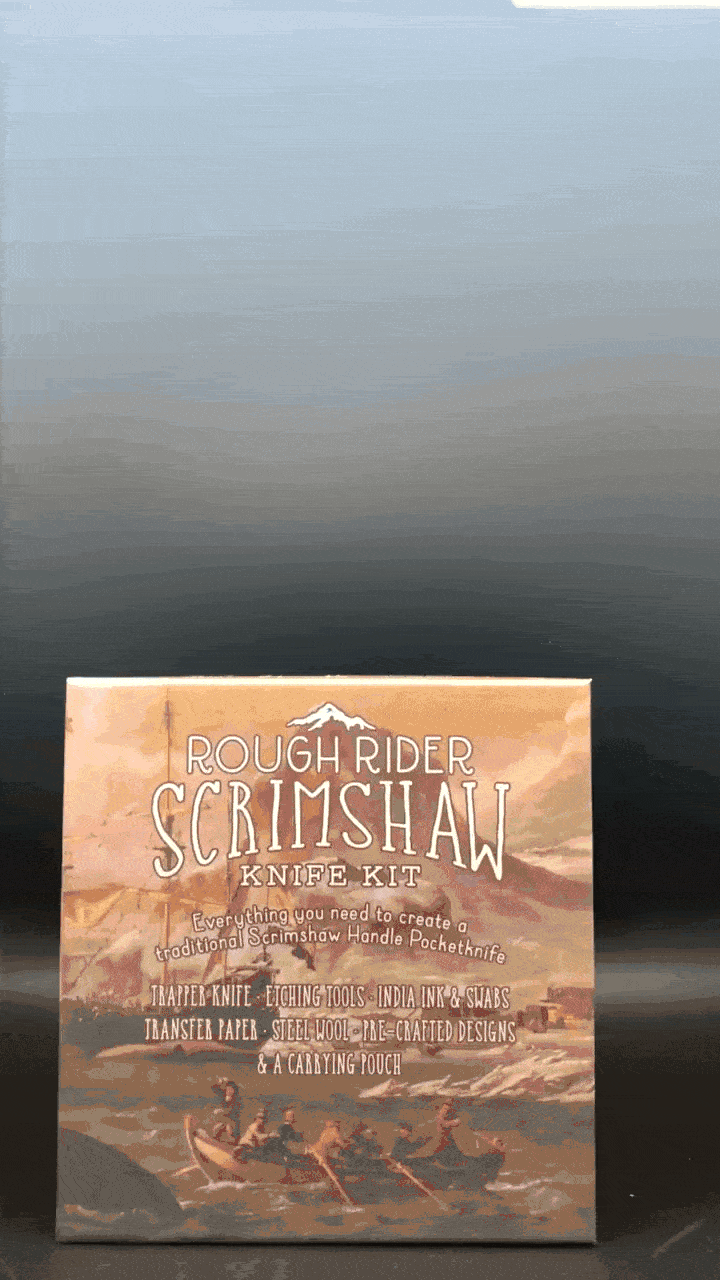
It does have a limited set of tools, but the instructions and stencils make up for that. This kit makes a nice gift for individuals – especially those who enjoy knives.
PREMIUM BEGINNER’S SCRIMSHAW KIT
I’m sure you know of Man Crate – they have all sorts of interesting products. They dabbled in the scrimshaw space and came up with a pretty nice scrimshaw kit for a knife. It includes everything you would want – including tools, pocket knife, black India ink, and more.
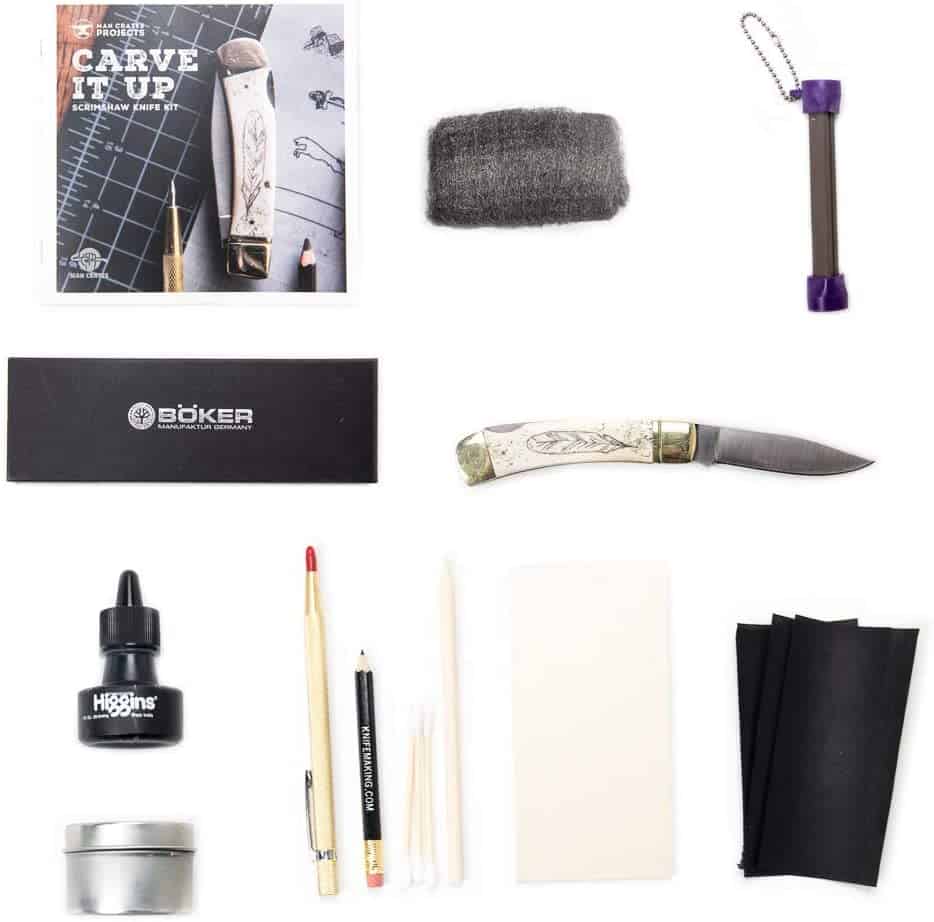
The price tag is definitely on the higher end, but it’s a comprehensive kit that does include quite nice materials. This one does seem made for a gift – but you must like really that person if you are dropping over $100 on them.
Joking aside, this is a solid option, just a little more pricey.
So, you have all your materials now, it seems like this is the right time to talk about what scrimshaw is – because, like all good things, there is an important history to it.
THINGS TO NOTE BEFORE YOU SCRIMSHAW
What is Scrimshaw?
Scrimshaw is the decoration of bone or ivory objects (faux ivory and acrylic are used today), such as whale’s teeth and walrus ivory tusks, with fanciful designs, traditionally carved by Anglo-American and Native American whale fisherman with a jackknife or sail needle and emphasized with black pigments.
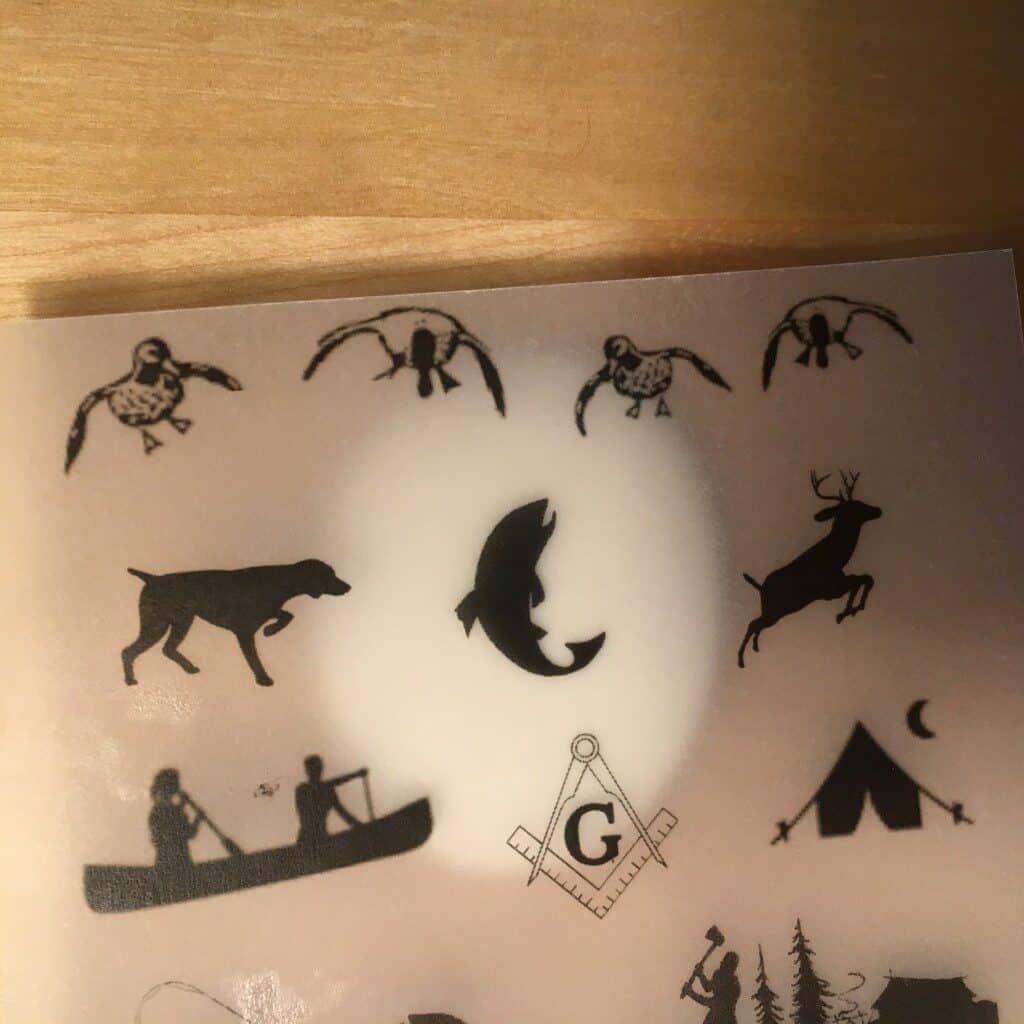
Among the traditional subjects are whaling scenes, ships, naval battles, Masonic emblems, coats of arms, and symbols from Irish heritage.
Scrimshaw became an American folk art form, with the earliest surviving examples date from the late 17th century, but the craft reached its peak in 1830-50. Check out the one below…
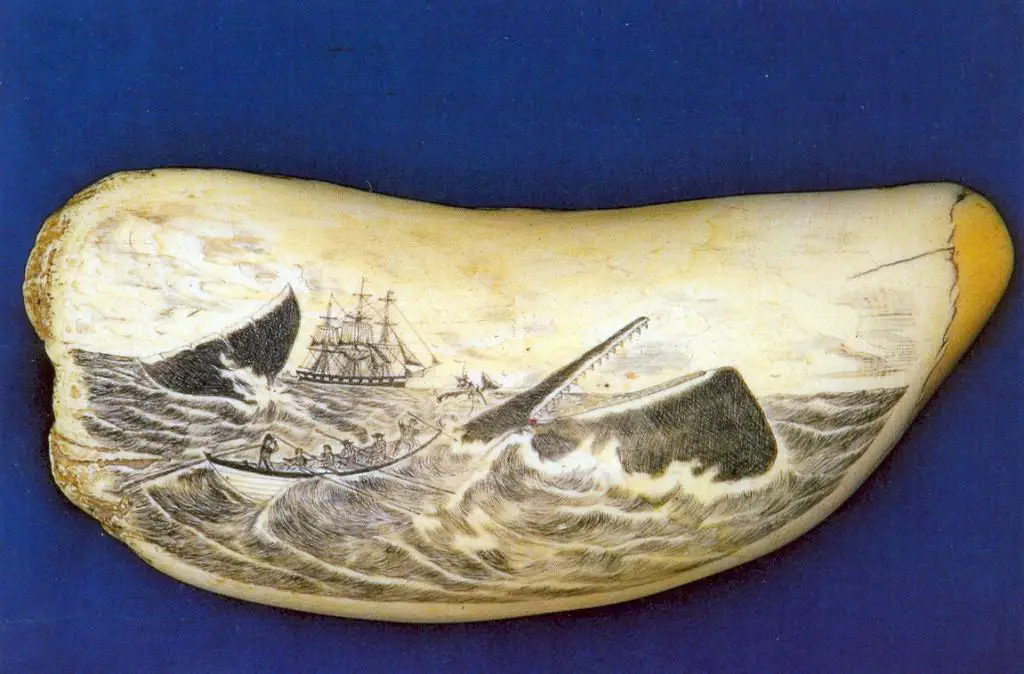
Mine doesn’t look anything like this, although I wish it did. This sailor had some serious skills.
If you want to learn more about the history of scrimshaw (which I highly recommend,) there are so many books out there on the subject. For a double whammy of history and how-to scrimshaw, check out “Scrimshaw: A Complete Illustrated Manual” by Steve Paszkiewicz.
Now then, let’s get to it and start our scrimshaw project.
HOW TO SCRIMSHAW – STIPPLE TECHNIQUE
1. Don’t Worry About Mistakes…
If you mess up, you can use the sandpaper in the kit to lightly sand your image off the bone, horn, or other hard natural materials.
After sanding, smooth away the scratch marks left on the surface with fine steel in your kit, they will develop a haze of scratches. This haze can be removed by sanding with finer and finer sandpaper until the scratches are finally gone.
You can then attain a polished surface by briskly buffing the plastic or resin with a soft resin, bone, horn, or real ivory to make it shine, don’t use metal polishes or colored jeweler’s rouge.
Instead, you can use a white or colorless jeweler’s rouge, an uncolored furniture paste wax, or even toothpaste to buff the surface until it shines. Once your material is polished, you’re ready to try again.
2. Setup A Great Light Source
When light strikes at the correct angle, etched lines and dots on the surface of the material become easier to see. Move your table lamp or scrimshaw material around until you find the best angles for viewing the surface of your material as you work.
Also, always wear eye protection in case a needle or blade tip should break.
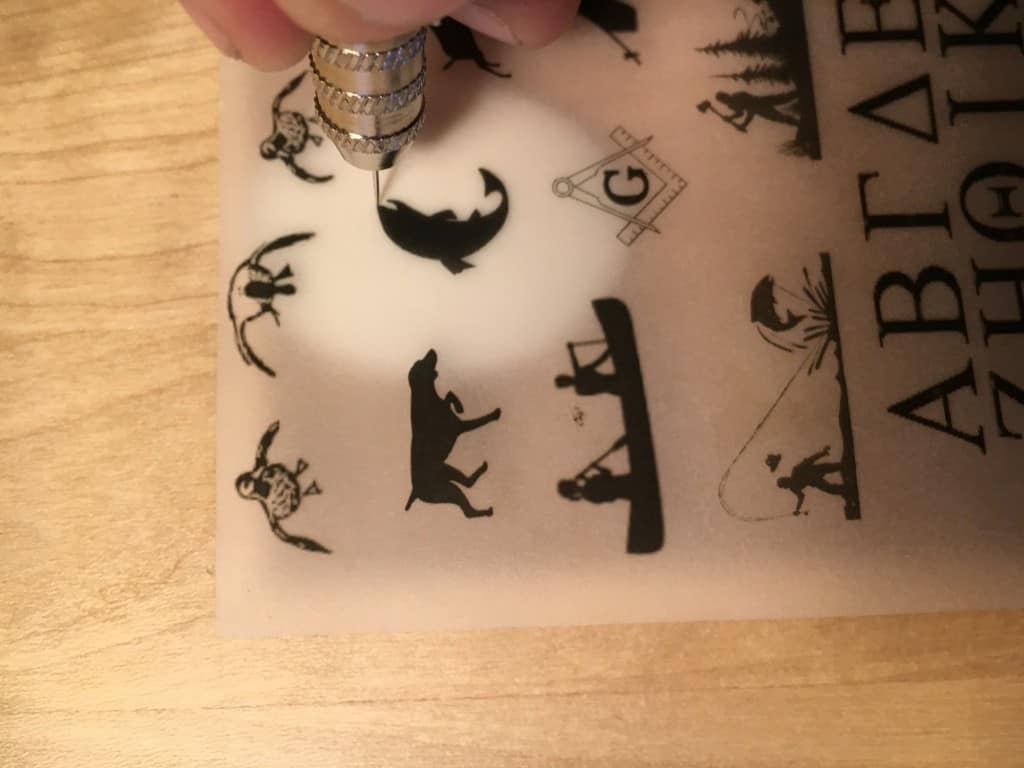
3. Transfer Or Draw An Image To Your Surface
There are many ways to get an image onto the surface of your material – you may decide to freehand or transfer an image so that you can scrim it (scrim is a scrimshaw term meaning “to etch the surface”).
If you have artistic talent, you can use the special pencil in the kit to draw directly onto the surface of your material. If the pencil marks don’t show up well, moisten the pencil tip and try again.
NOTE: we don’t have natural artistic capabilities – and this isn’t the easiest surface to freehand.
Here we just printed out shapes that we liked, like a fish. We just held it in place, but we would recommend fixing it to the surface you are using.
You can also use carbon paper to trace an image onto your material. Tape the carbon paper to the surface of your material, then tape a picture on top of it. Now trace over the picture and the image will transfer onto the surface of your material.
You can also glue a picture directly onto the surface of your material and scrim right through the paper. You can use any picture by resizing it to the shape of the pendant or pocket knife.
Pro Tip: Always keep a very fine point on the pencil so your lines stay narrow and sharp.
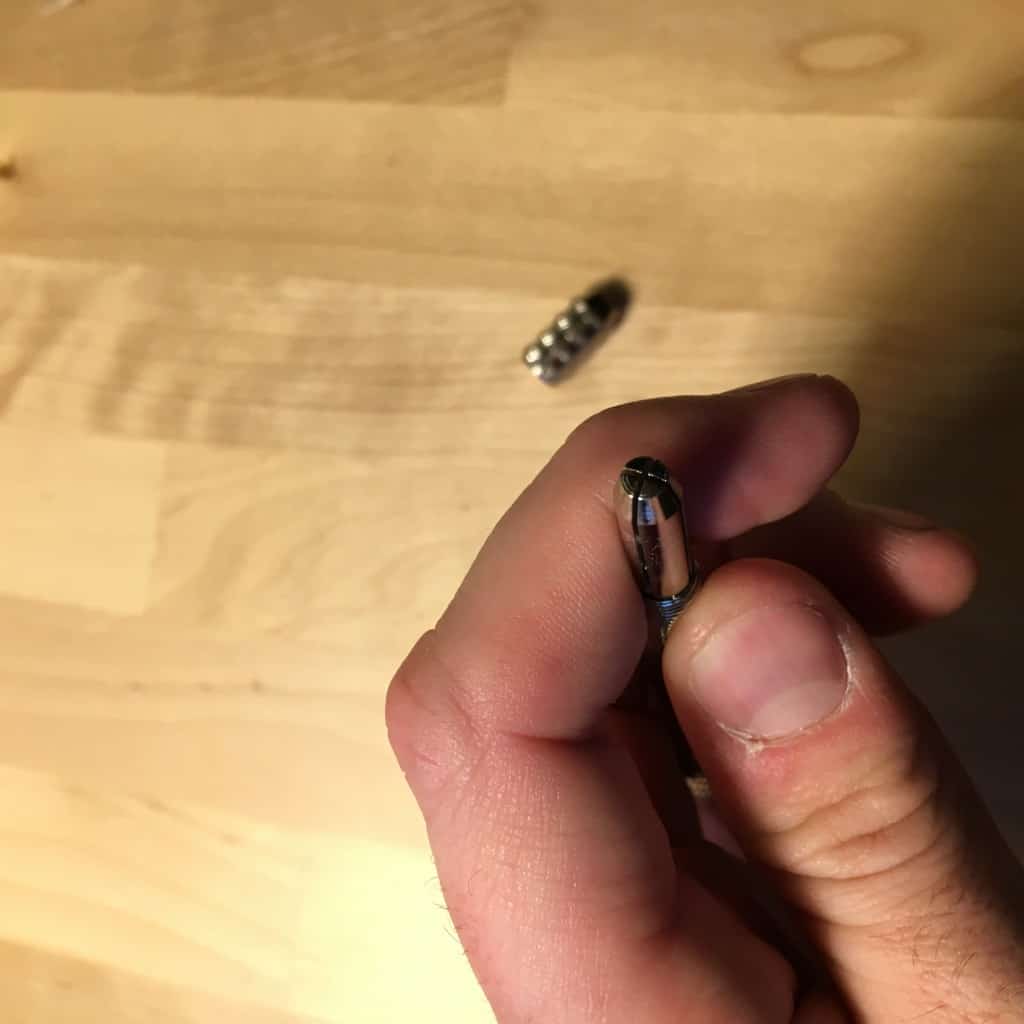
4. Put A Needle In Vise
The pin vise opens at both ends to reveal two collets that have a total of four openings to choose from.
If you unscrew either end of the pin vise, the small vise inserts (called chucks) can be pulled out and turned around. This gives you four different hole sizes to choose from. Use the smallest opening to hold your needle.
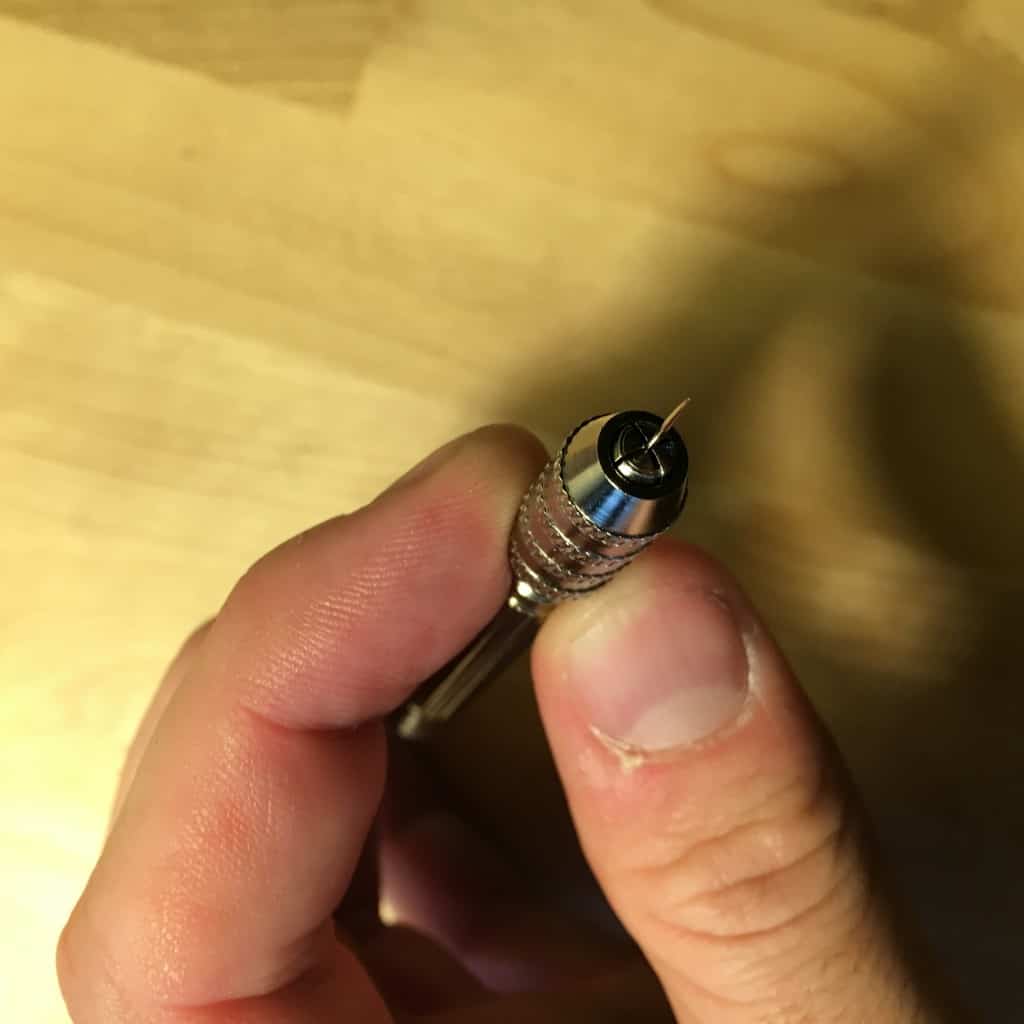
Put your needle in the smallest opening, leaving just the tip of the needle showing.
Tighten the cap firmly on the pin vise and you’re ready to begin.
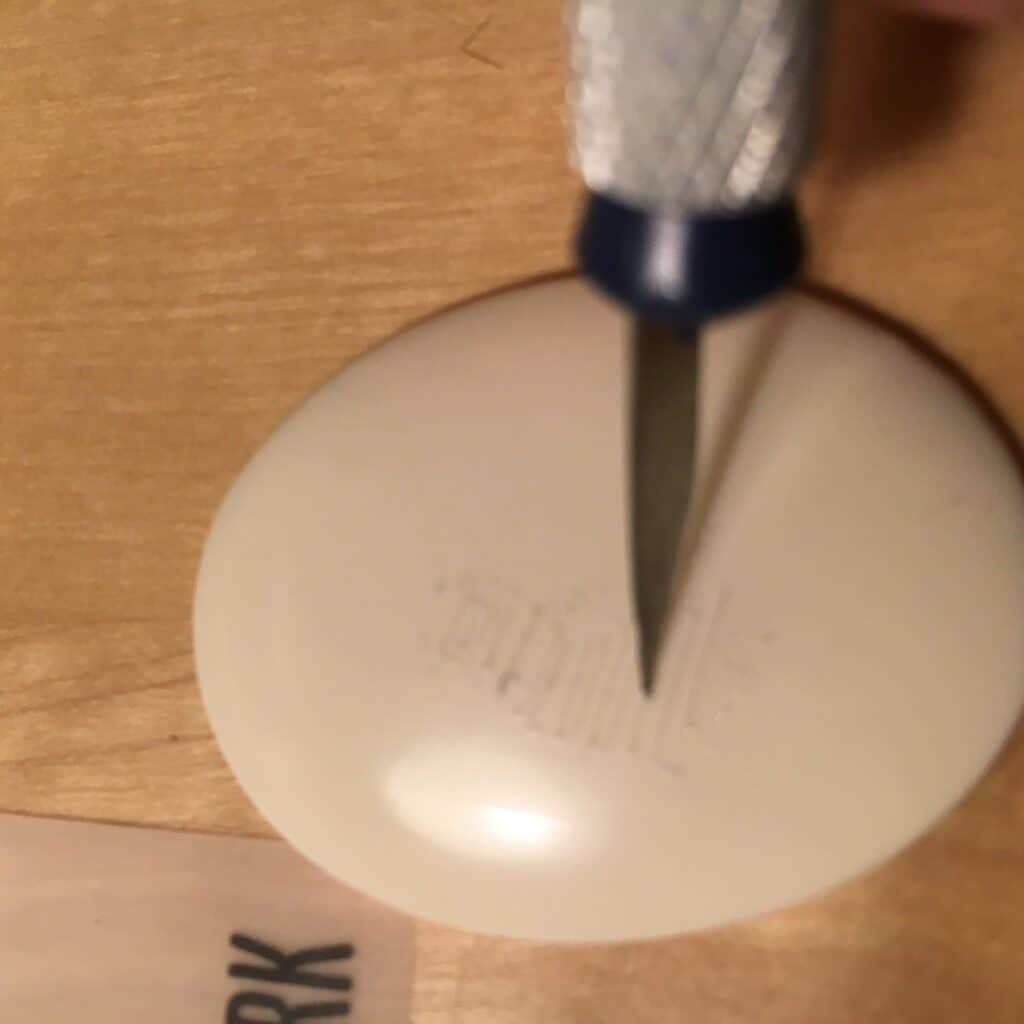
Go around your image pushing straight up and down with the tip of your needles. If you glued your image down, just push right through the paper and into the surface of the material.
Your dots only need to be a few hundredths of a millimeter deep to show up when inked so there is no need to twist or drill your dots into place. Just push slowly and firmly straight up and down.
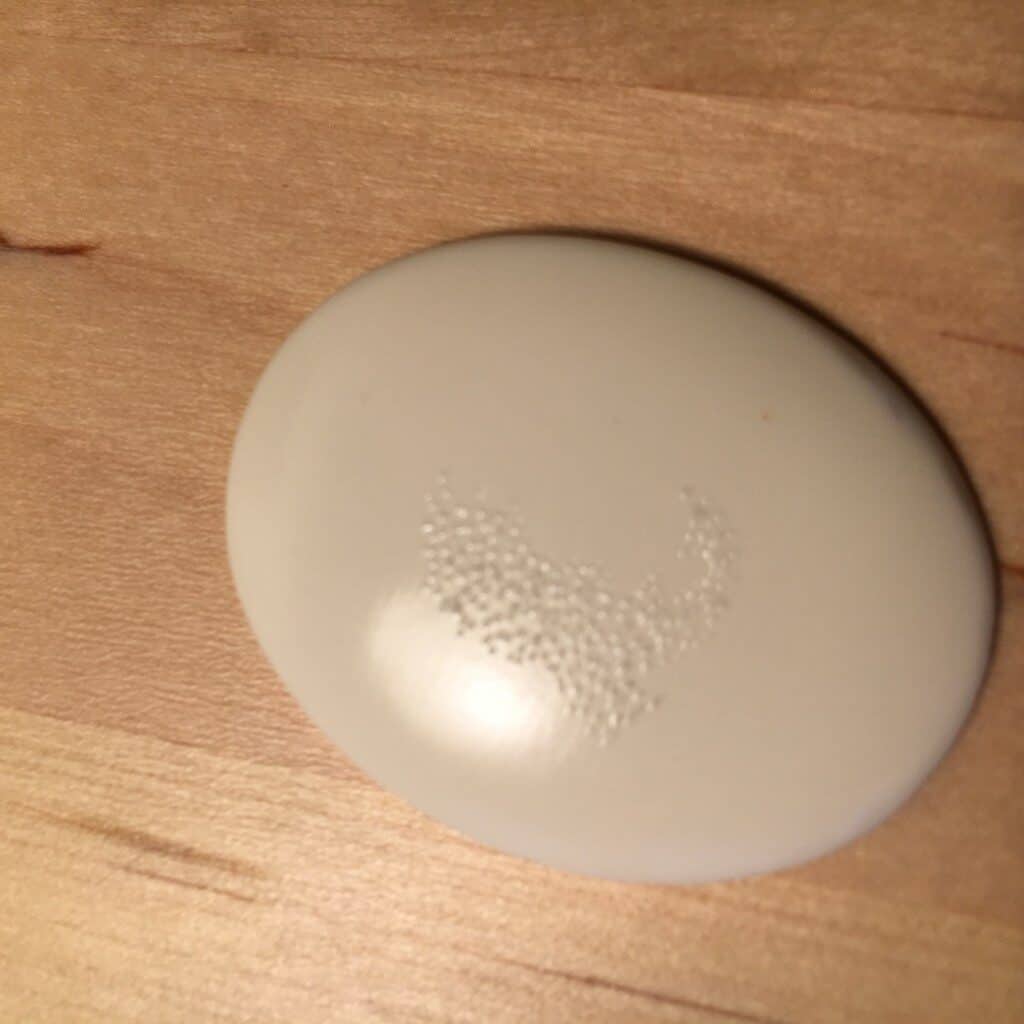
DOTTING A SURFACE LIKE THIS IS CALLED STIPPLE
5. Stipple An Outline of Your Image
Make sure you outline all the major details of your image, such as eyes, nose, mouth, lines, shaded areas, etc.
Keep your outlining holes very close together as you work.
6. Think Of Shading
For shading areas – it’s all about how close each stipple is, the depth of the stipple and the quantity of stipples in an area. Because, remember, in the end, we will go over the etching with dark ink to fill in these areas.
For an area that is a dark shade, create closer dots, make them deeper, and increase the quantity.
To create a lighter shade, make fewer dots, farther apart, and don’t make them as deep. The very lightest parts of the image and highlight areas require no dots at all.
Simple right?
Your outline is now complete, and it’s time to remove the paper and clean any glue residue off the surface.
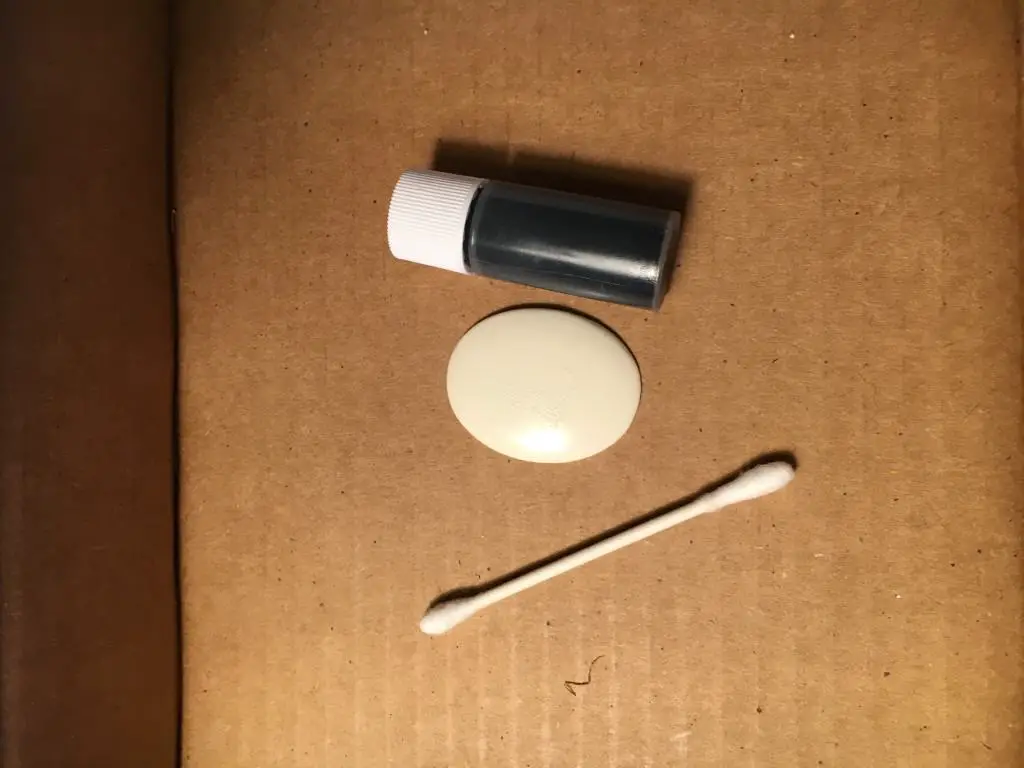
7. Grab Your Ink And Cotton Swab
Now, ink the surface using a cotton swab. Go light on the ink on your first pass – try to examine how the texture is pooling in the ink.
After inking, use a tissue or soft cloth to wipe away the excess ink.
“This stuff will not come out of anything” -Me
A box or cardboard acts as a great surface for this step – they contain any excess ink because this stuff will not come out of anything it gets on.
Seriously – just ask a few of my favorite shirts.
Pro Tip: A slightly moistened tissue or rag will often help remove the ink a little easier.
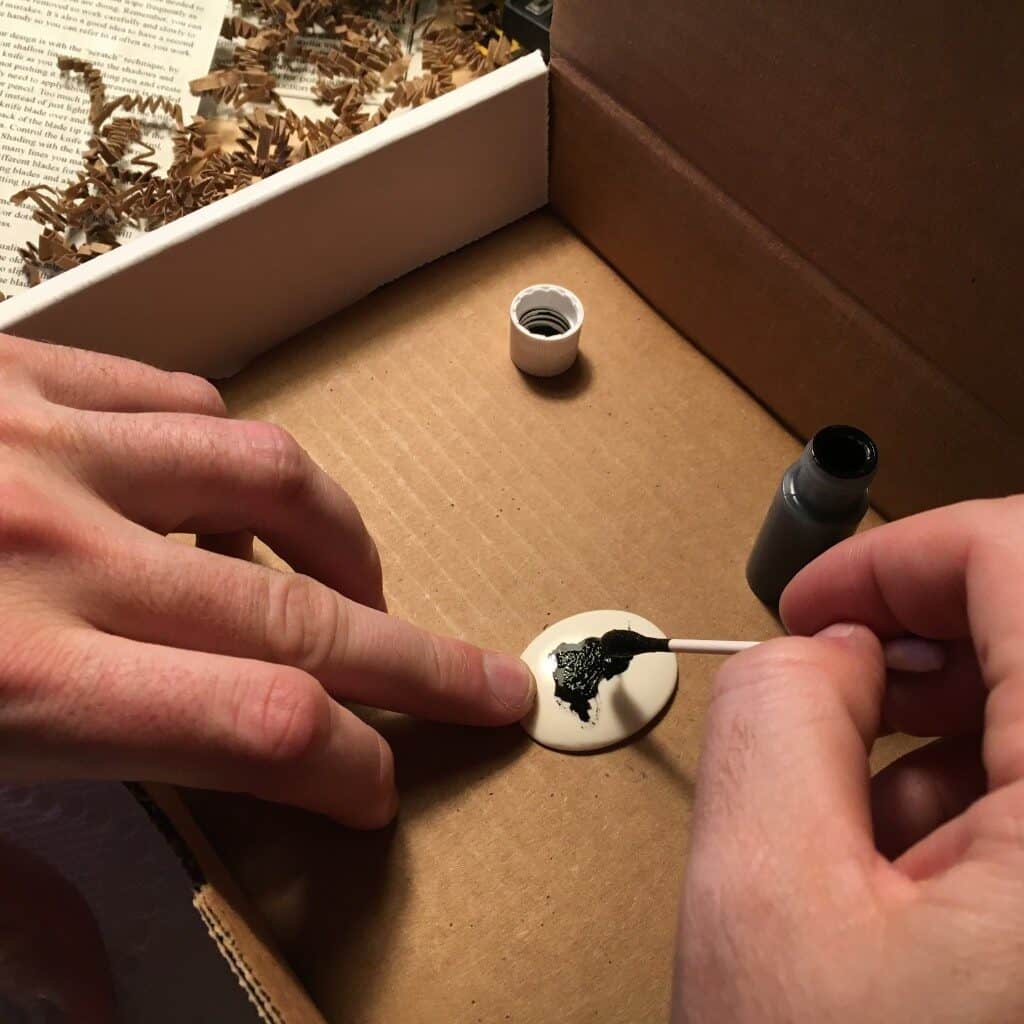
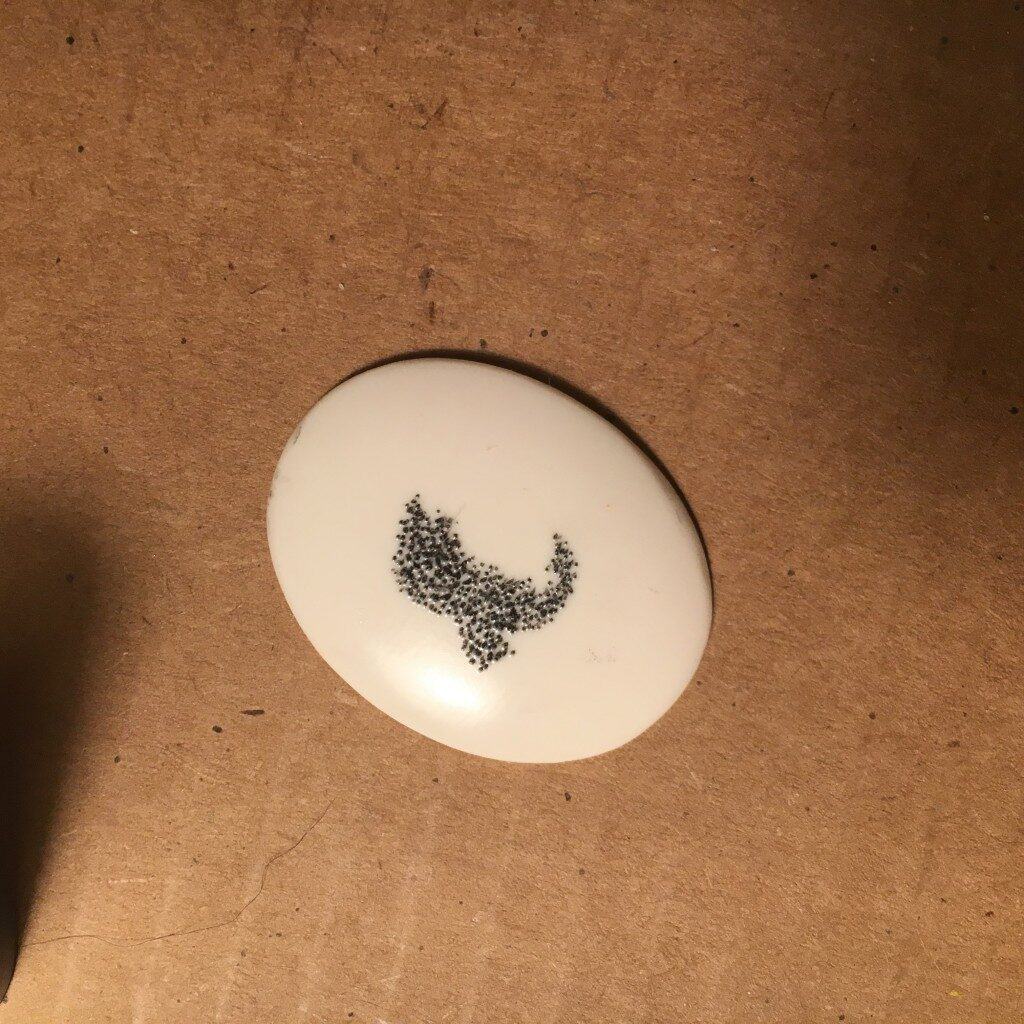
You are now looking at the first stage of your image made up of inked dots. Congrats!
Steel wool can also help remove any ink haze left on bone or horn – this isn’t recommended for faux ivory surface or resin though.
Rub away any ink or haze left on plastic or resin materials with a little rubbing alcohol applied to a soft cloth, so you don’t create a haze or scratches on the material.
8. Time To Refine
This will complete your scrimshaw by filling in more dots where needed, to darken and smooth out the look of your image. Just really look at the shade and darkness of your original image and try to mimic dark areas with more stipples.
You’ll want to ink and wipe frequently as you work so you can closely follow what you are doing.
Remember, you can always add dots, but they can’t be removed so work carefully and slowly to fill in your image and avoid mistakes.
It’s also a good idea to have a second copy of your original picture handy so you can refer to it often as you work. Don’t judge me – that’s a whale in the image below.
HOW TO SCRIMSHAW – SCRATCH TECHNIQUE
This is no longer the stipple/dot look – you will use your modeling knife to cut shallow lines that create the shadow and details of your image.
To start, hold the knife as you would a writing pen and create your lines by pulling the knife, not pushing it.
Little pressure is needed when cutting your lines.
You only need to apply about the same pressure you would when using a writing pen or pencil. Here we dug way too deep on this one – and we created far too many scratches at the first pass.
Go light and not too many lines each round, it will help you out in the long run.
When you use too much pressure, the knife blade tends to dig into the material instead of just lightly cutting or scratching it.
Some artists like to turn the knife blade over and use the back of the blade tip to cut with. They feel the back of the blade tip is easier to control, especially when creating curved lines.
Pro Tip: Control the knife with your wrist and fingers, not by moving your arm.
Shading with the knife is done by how close your lines are to each other, how many lines you make, crosshatching lines, and the depth of your cuts. Certainly similar to the stipple, just replacing dots with lines.
Try different blades for different cutting effects but always be careful when changing blades and always keep your free hand or fingers out of the way of your cutting blade when scratching lines.
Again, I made a ton of mistakes early on, like digging way too deep, and this one just couldn’t be recovered without sanding it down. It’s still worth showing you though so you can learn from my mistakes.
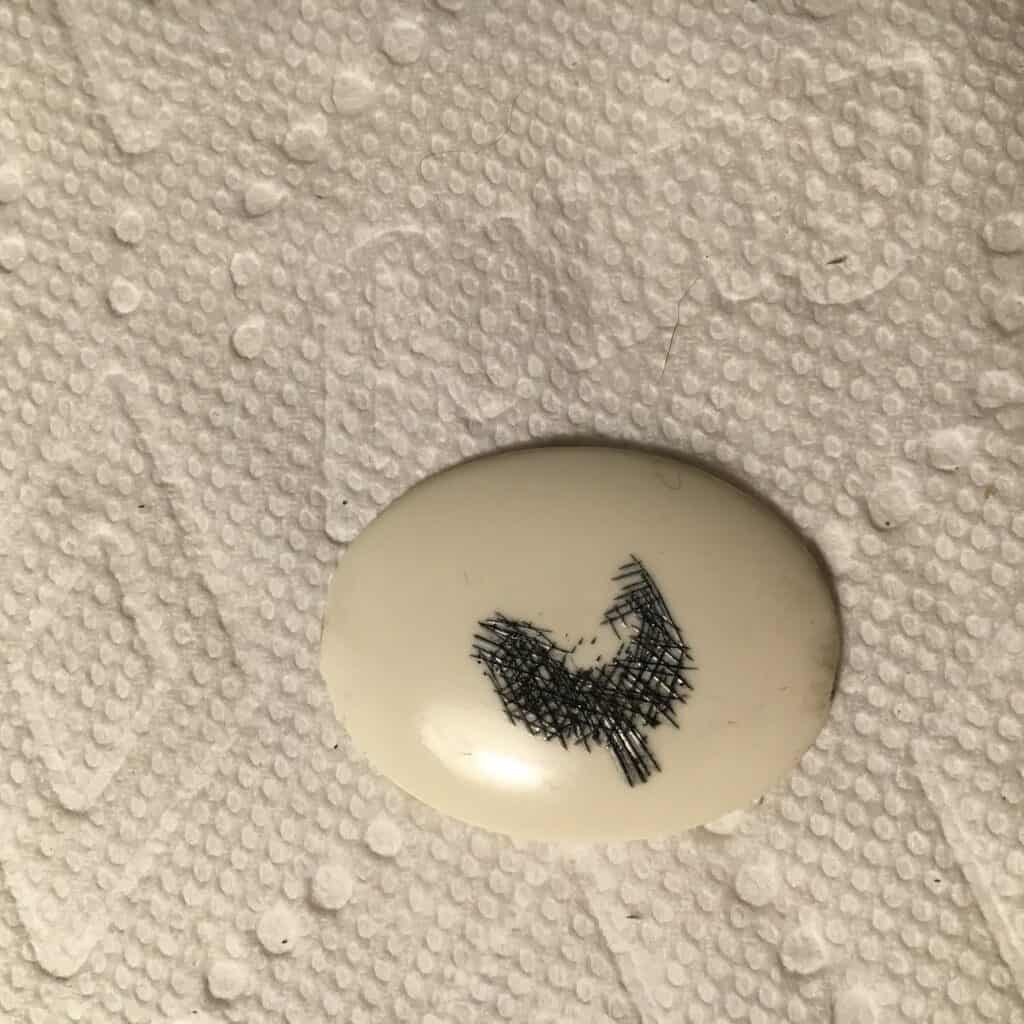
So… presenting to you a fish, from some alternate universe (and not sponsored by Bounty paper towels.)
TIPS FOR HOW TO SCRIMSHAW
Stipple or Scratch Technique – Which Should You Use?
You can use both methods, or both tools, on the same image. This is your hobby and your artwork.
But whichever methods you use, inking your lines and dots with a minimal application as you work will allow you to keep a close eye on your progress.
Sharp Tools Are Critical
Put a new needle into your pin vise for inscribing when you feel like the old one might be getting dull.
If the blade in your modeling knife tends to slip on the surface when you try to cut with it, it may be the time to change the blade.
Want New Textures or Looks?
Different textures and looks can be achieved by using a combination of light lines, deeply cut lines, crosshatching lines, dots arranged in different densities, and deeper or shallower dots.
The more detail you can work into a piece, the better and more professional it will look. It does, however, require patience. Most artists also feel it helps to use a magnifier.
A magnifier allows you to see and work between lines and dots that you may not see as well with just the naked eye.
Crosshatching – Watch Out For Animal Designs
Be careful when using crosshatching as a way to shade animals or birds as it seldom looks natural for fur or feathers.
Other types of lines or dots usually look better for fur and feathers. Also, when dealing with minor mistakes like a line or dot out of place, you can use the tip of your needle or the very tip of your knife blade to carefully and gently scratch the ink out of the line or dot.
With the ink gone, the mistake seemingly disappears. But wait until after you’ve completed your image and your final inking before working out mistakes, otherwise you will just put more ink back into the same mistake.
This was really challenging. MUCH respect for those who are masters of this craft. It’s truly an art.
Need proof? Check out this guy – he’s ridiculously talented.
SCRIMSHAW INSPIRATION
This person’s tutorial really clear to understand too – she is also talented.
Instructables had a really cool style you can see it here as step 5 & 6. Really cool approach.
We really hope you take this up or at least try it – and that you have a better grasp on how to scrimshaw after reading this. As always, thanks for trying new things with us.
If you tried scrimshaw and didn’t love it, before you abandon finding a new hobby altogether, be sure to hop over to our paper-making tutorial. It’s a stellar DIY that’s incredibly hands on. For people who dislike the pinpoint accuracy of scrimshaw, they typically love the messy and interactive process of making paper.
Happy Hobbying!