Are you someone who loves to be creative? Do you enjoy making things yourself? If so, then you’re going to love this step-by-step guide to DIY book binding.
This simple bookbinding technique is not only affordable but also a great project for anyone who wants to make something unique and special, whether as a gift or something to keep for yourself.
This is a fun skill that you’ll be able to take with you and make even more books in the future. As someone who keeps a daily and weekly “to-do” list, I initially decided to personalize this project for daily use.
And sure, there are many ways you can bind a book, some even more simpler than the method we’ll show you – but they certainly don’t look as beautiful or last as long as this method.
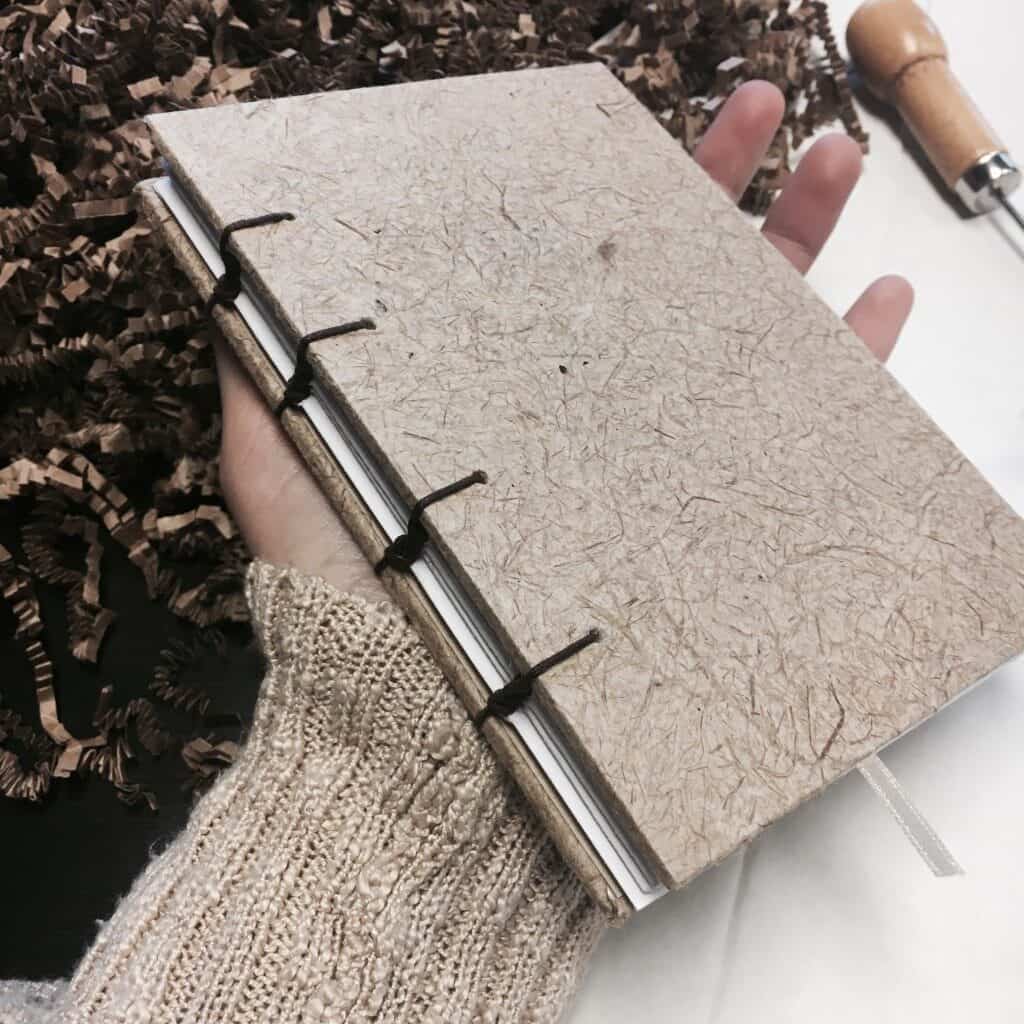
After making it though, I was so proud of the finished product, that I didn’t want to “only” use it for note-taking and scribbles. So, I decided to use it as a photo album instead. This easy-to-follow tutorial will show you how to create a one-of-a-kind journal or photo album that will last for years.
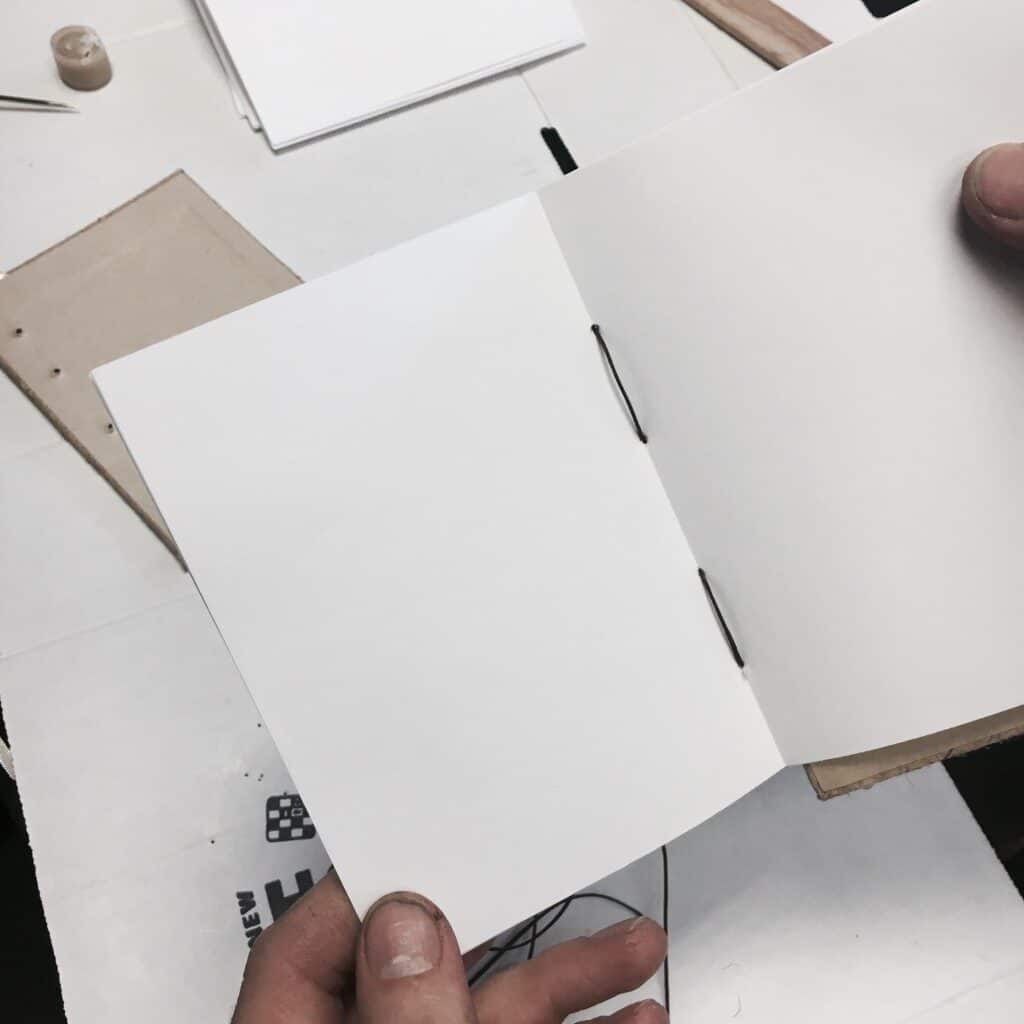
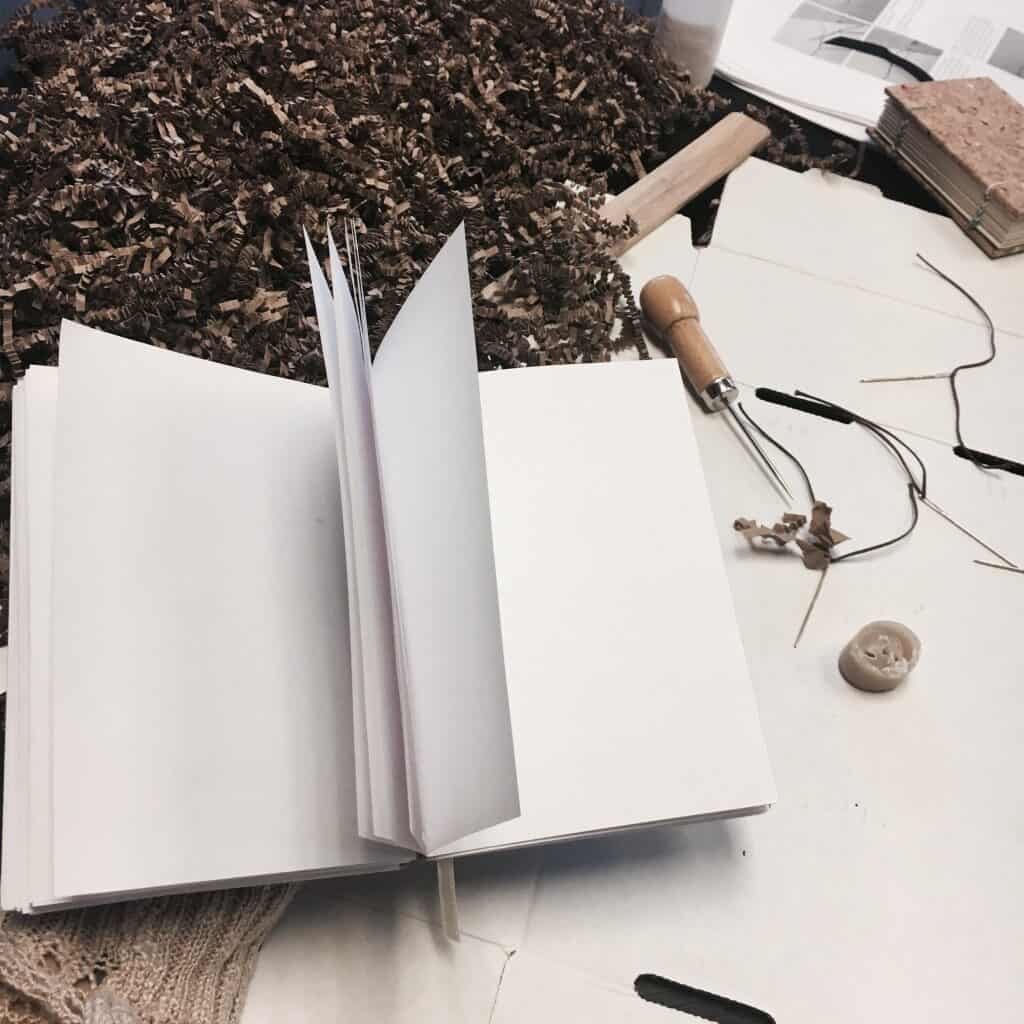
The finished product could be used for quite a few different purposes thanks to the Coptic stitch binding. This design is unique because when it’s open, the book lays flat.
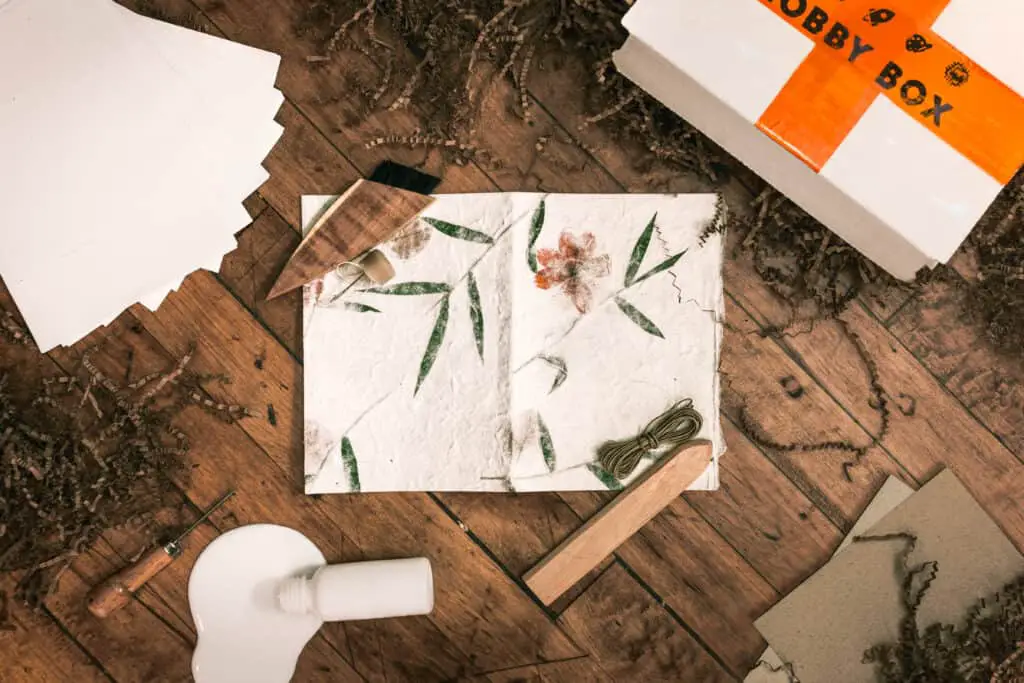
Which makes it a great option for sketching and doodling as well. Some other uses might include a recipe book, scrapbook, goal tracking, leaf or flower pressing, etc. And if you are in a real “handmade” mood, you can follow the New Hobby Box papermaking tutorial – they make fantastic book covers.
An important note about paper and hardboard sizes for this tutorial – since you are going to make this to whatever size you want your book to be, you’ll need to customize each item below to the size you choose.
Our items in the list are for a specific size, but if you want something smaller, just modify the paper/hardboard sizes. You can always cut down if you go too big.
Alright, all the prep notes are out of the way, here are the supplies you’ll need and where you can find them.
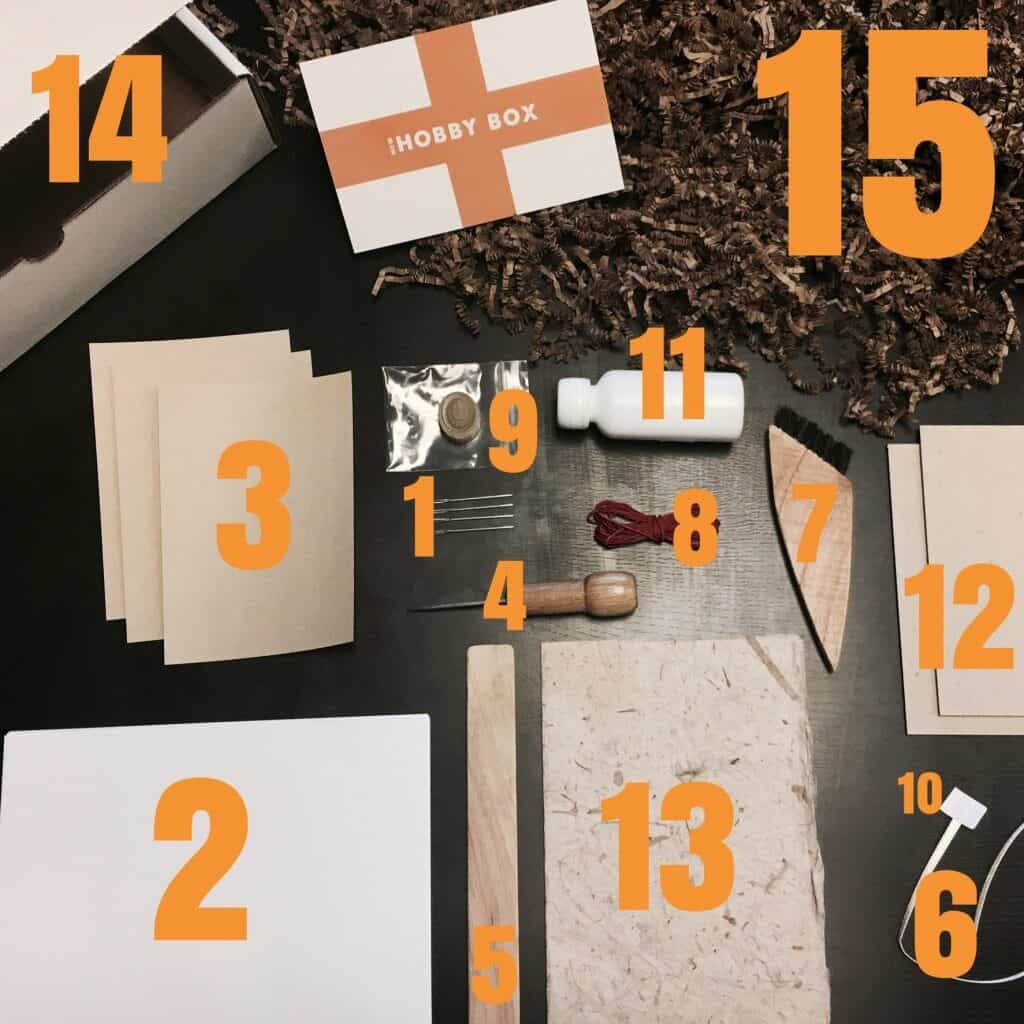
SUPPLIES NEEDED FOR BOOK BINDING
- Quantity of 4 round-point embroidery needles (size 18)
- Sheets for signatures – Signatures are multiple pages of paper that are stacked together and folded – quantity depends on pages you want in your book. You can use any sort of paper you would like here, the link is what I used (I had to cut it down in size.) Even printer paper you have lying around your house will be fine. I like 24lb for the inside though because it’s heavy enough to prevent ink bleeding through, but also flimsy enough to pierce with needles and turn pages easily.
- 3 sheets of craft paper (kraft paper sheets) or card stock (2 for inside covers, 1 as scrap paper and measuring template)
- Awl (Used for piercing holes)
- Bone folder
- Bookmark ribbon (Amazon has a ton of options, but I would recommend making it your own and using any sort of flat ribbon or string around your house for this)
- Glue brush – I used a handmade brush from Thailand that is difficult to source. I’m working on trying to get some ordered so that you can get them here, but in place of that, I recommend at least getting a natural glue brush.
- .5mm Cotton Thread – you can use a 35/3 gauge linen thread as well
- Beeswax
- Itsy bitsy little sticker (you can use tape as well, just some sort of adhesive tape from around your house will do just fine)
- PVA Glue – We’ll spare you the details on why PVA is the absolute best glue to use. If you’re curious beyond that statement, click here for all the reasons why, plus some alternatives to PVA glue.
- 2 hardboards for covers (if you shop this around, look for book boards – there are a lot of options here, 2mm is the thickness I used)
- Handmade paper (this is totally up to you on which to go with – here is a favorite store of mine though. If you want. to double down on this though, we also have a paper making tutorial on New Hobby Box – imagine making the paper for a book you made as well – that would be awesome.)
- Cardboard Box (cutting mat – just anything around the house to protect your table)
- Crinkle paper to play with! Okay you don’t need that, I just wanted the photo look prettier.
If you know you want to take your bookbinding hobby to the next level, be sure to check out our guide to bookbinding tools and supplies. It focuses on premium products that will last a lifetime and ensure the highest quality book. Everything in that guide is catered to Coptic binding, so it’s a perfect fit for this tutorial.
There are quite a few steps to book binding. Once you have your materials, it’s a good idea to either read through this tutorial in full, or watch the video below – which highlights all the steps you are about to go through.
HOW TO MAKE A COPTIC STITCH BOOK
Ok, you’ve got the materials, you’ve read the tutorial or watched the video, let’s get to it.

1. Prep Your Bookbinding Station
Unfold your box and create a flat surface to work on, then grab a pair of scissors. Put on some relaxing music, perhaps some tea…. Whatever puts you in the mood to learn and create.
You’ll be working with glue and sharp objects, so we recommend a cardboard box to protect surfaces.
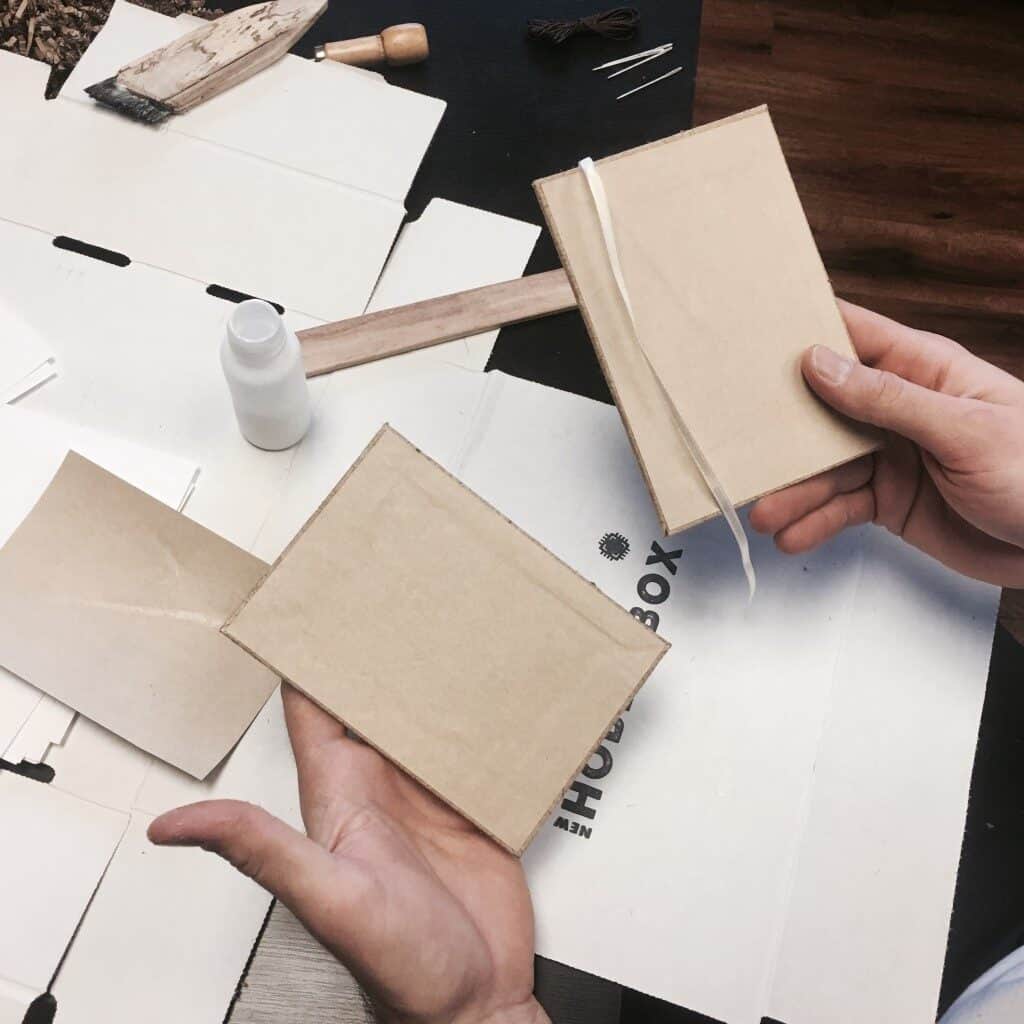
2. Choose Your Approach To Book Covers
You have a choice here – either break it in half and make one book cover at a time or create both at the same time. The steps are the same regardless of which path you choose.
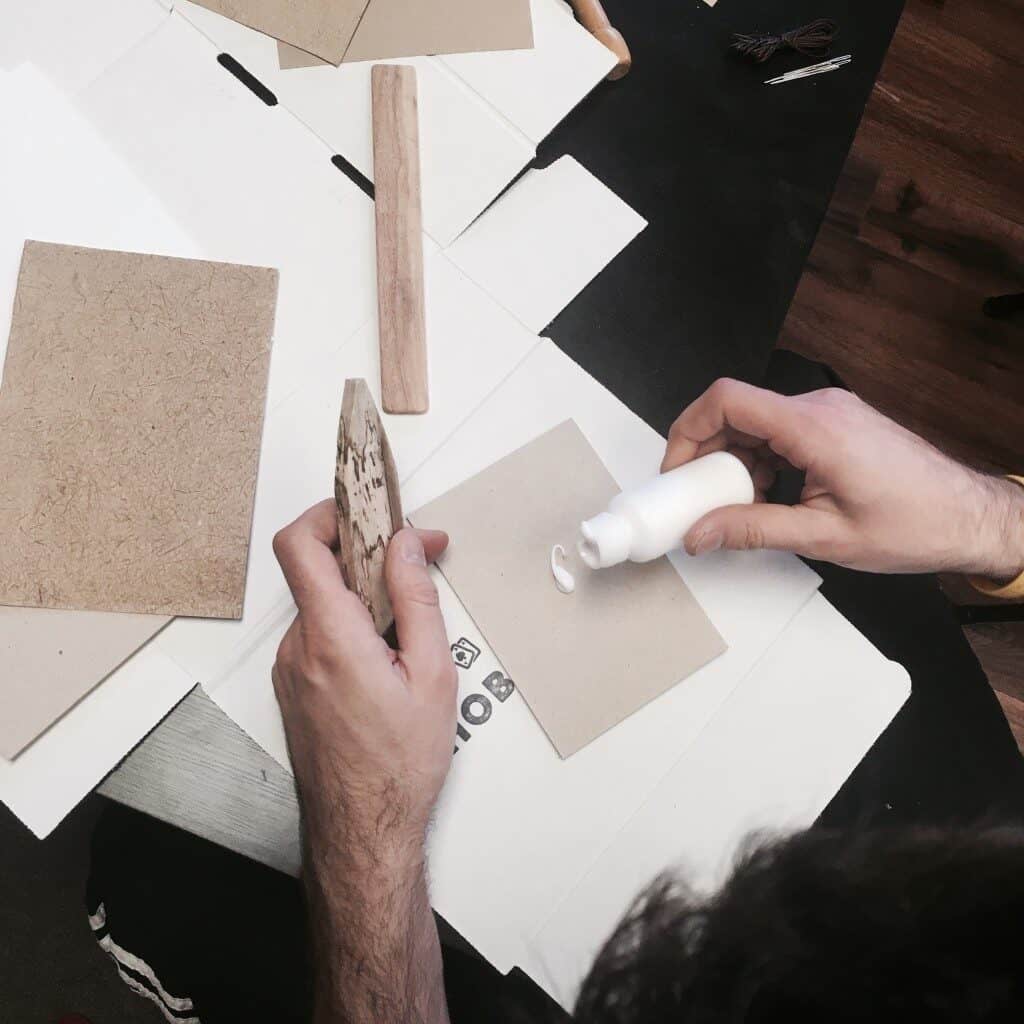
3. Cut Handmade Paper in Half, Apply Glue to Hardboard
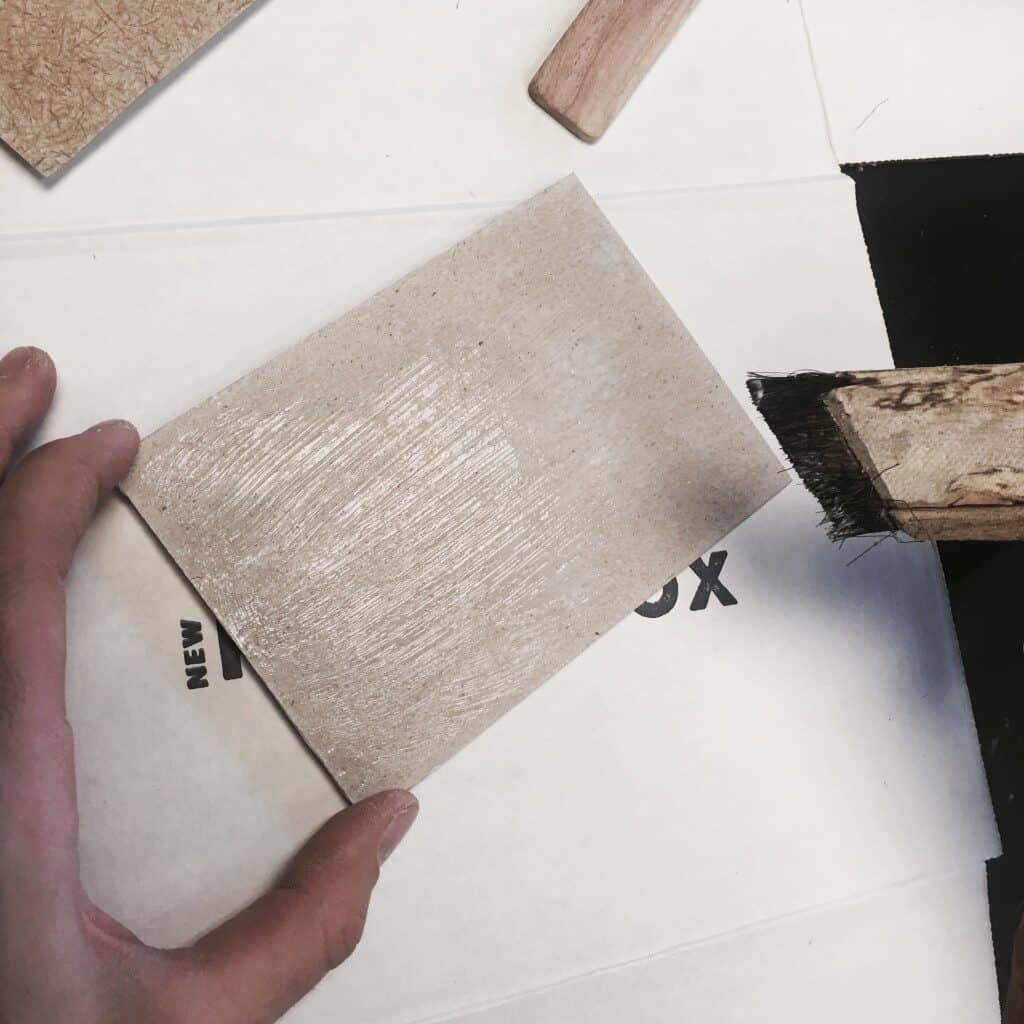
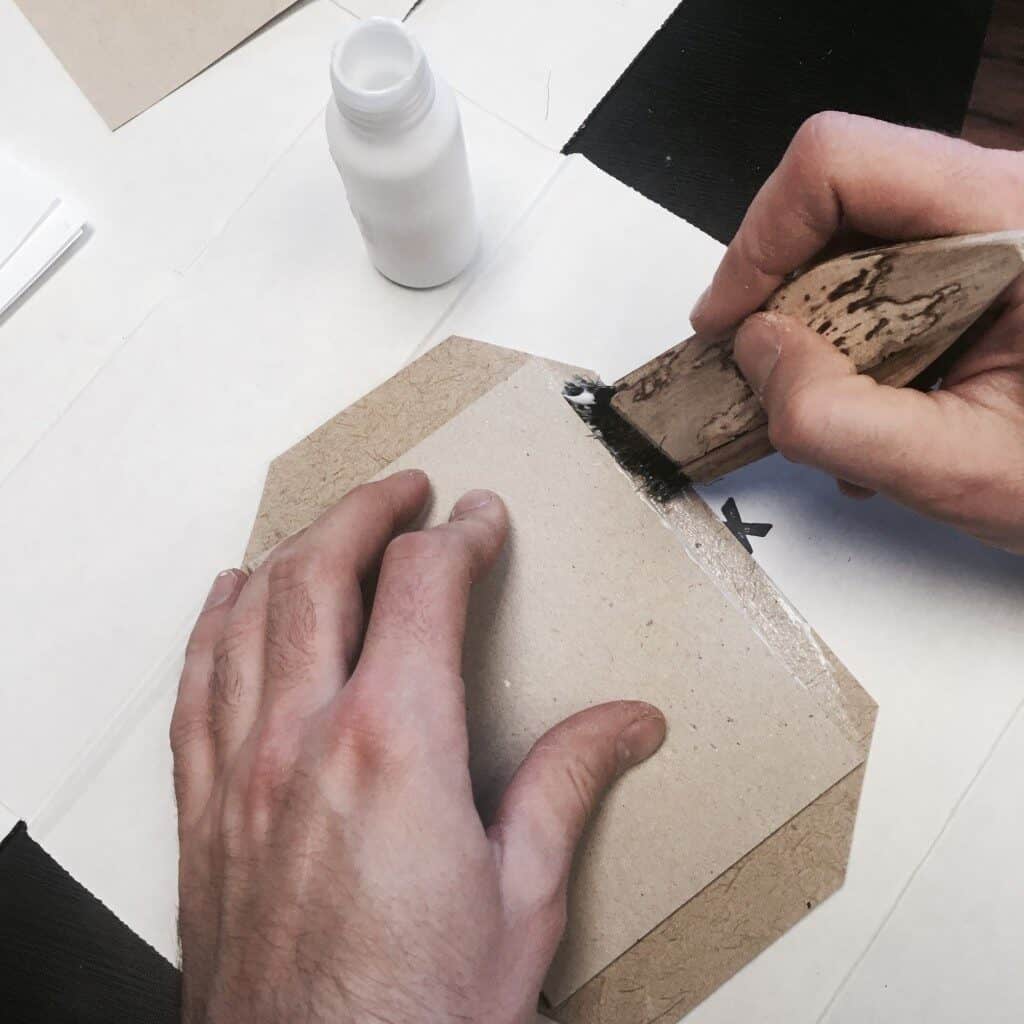
I’ve found that a quarter-sized glob of glue is the perfect amount. Spread out the glue evenly and across the entire side of the hardboard, using your brush.
4. Flip Hardboard Over, Lay Glued Side In Center of Handmade Paper
It will make your life easier if you can place it in the exact center of the handmade paper. Draw and place half markings with a ruler if you’d like.
As you press the hardboard to the handmade paper, press firmly in the center of the hardboard. The goal here is to make sure that both pieces stick to each other well.
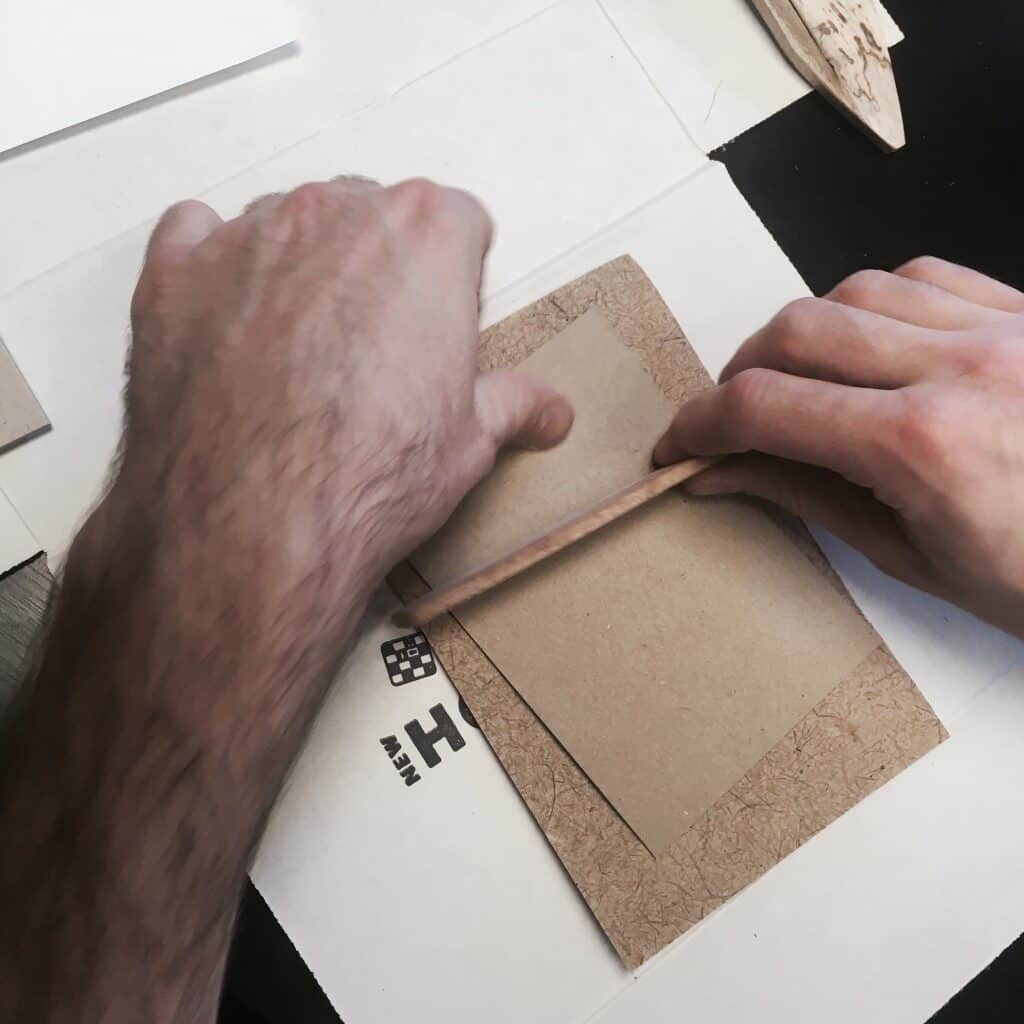
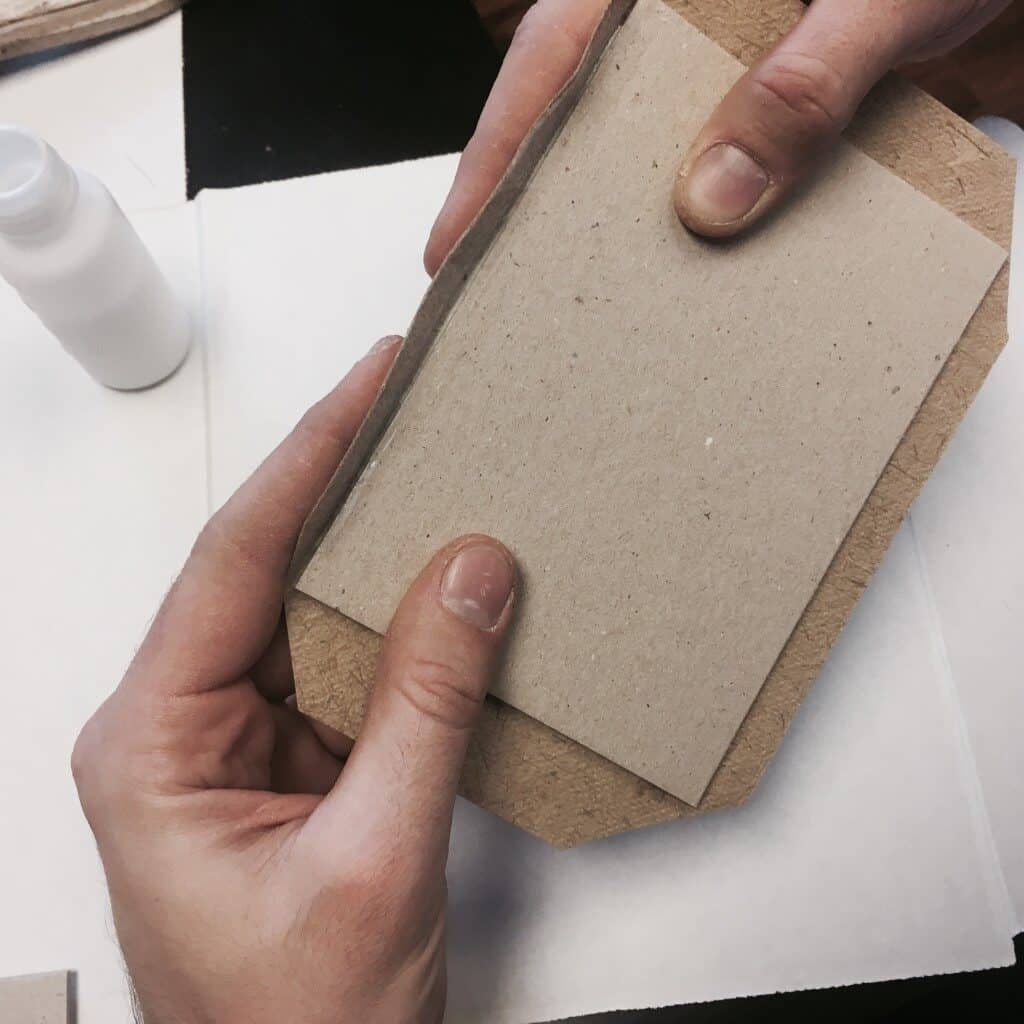
5. Flip Cover Over Again, Use Bone Folder on Craft Paper
Flip the cover over, grab one of the craft papers (which will become your scrap paper) from your workstation, and place it on top of the cover.
The craft paper used in this step will become your scrap paper throughout the tutorial – don’t stress too much about its appearance.
The handmade paper will now be facing you and the unglued hardboard side will now be facing the table surface. Then grab the bone folder, and smooth over the craft paper laying on top of the cover.
Remove any air bubbles between the handmade paper and hardboard. You want these two glued surfaces to be as evenly flat as possible. Once smoothed across the surface, move on to the next step.
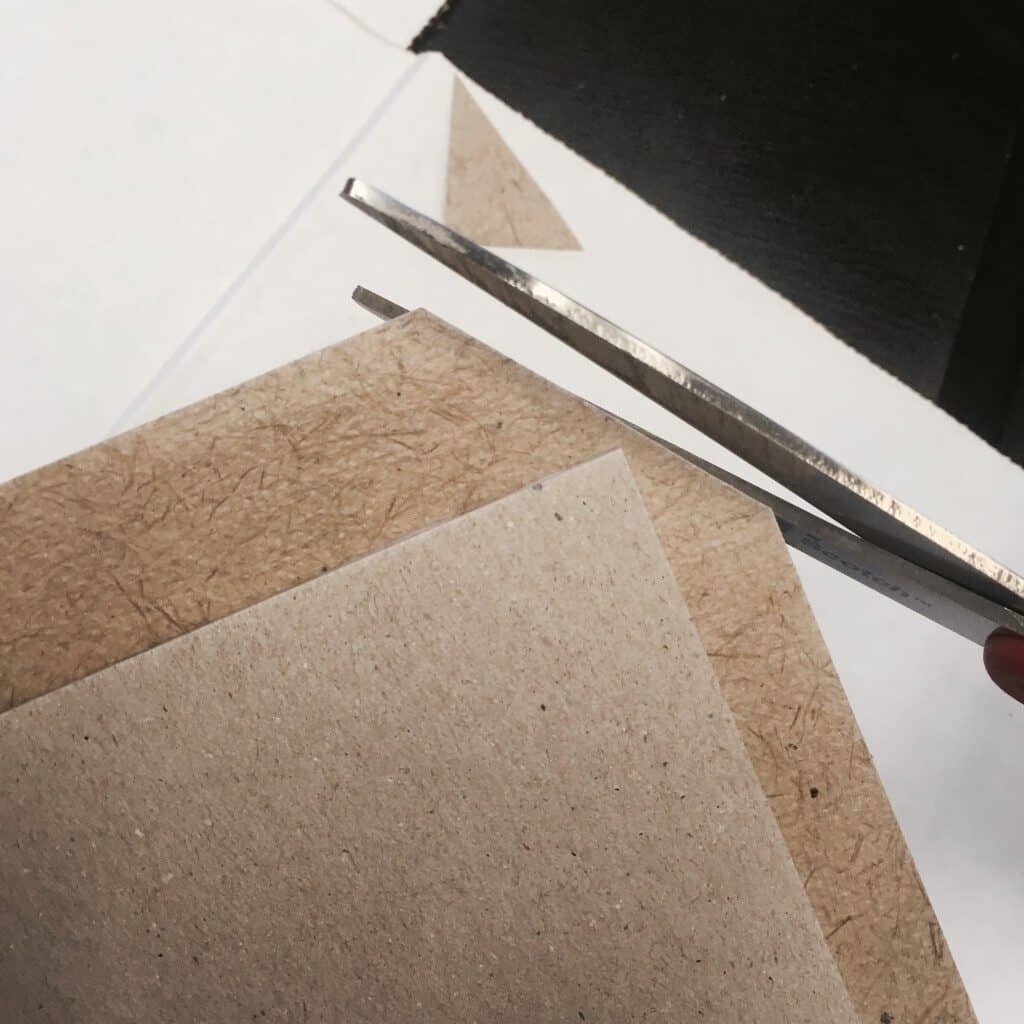
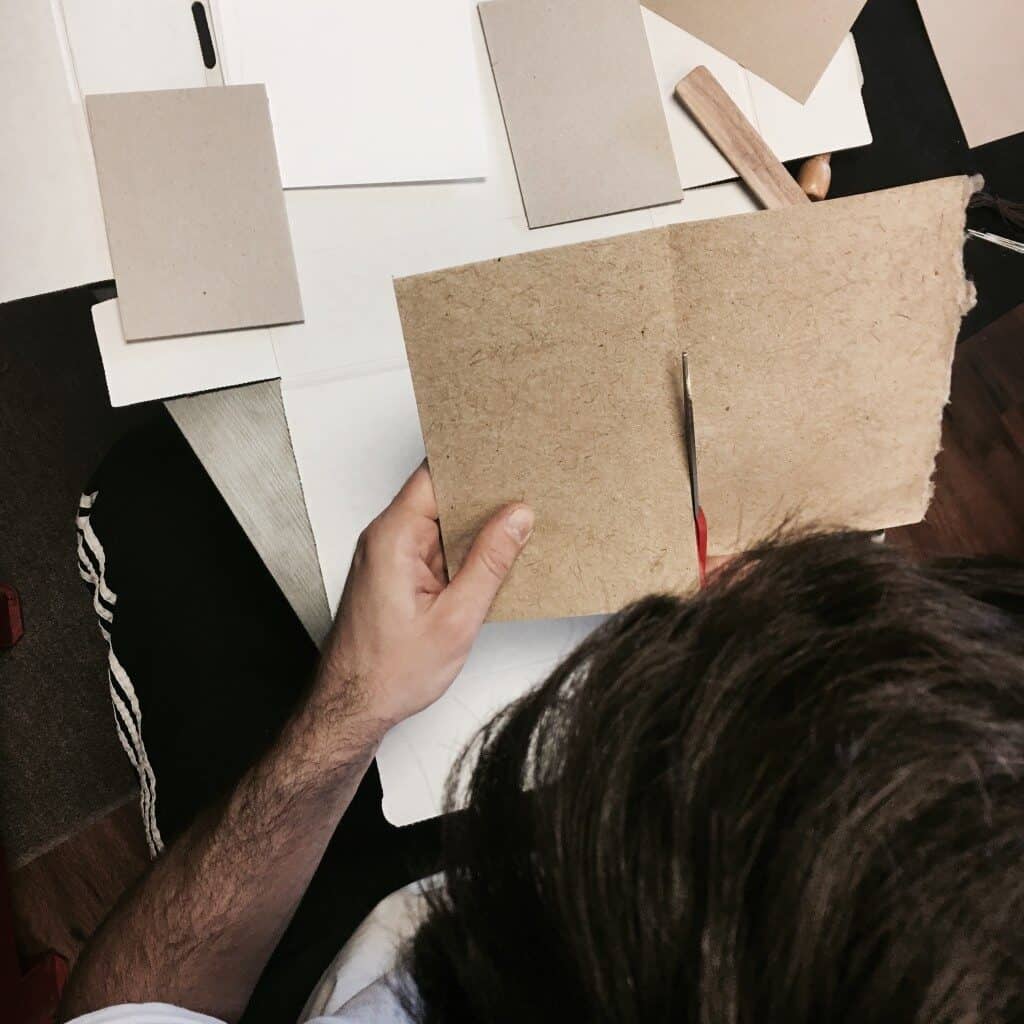
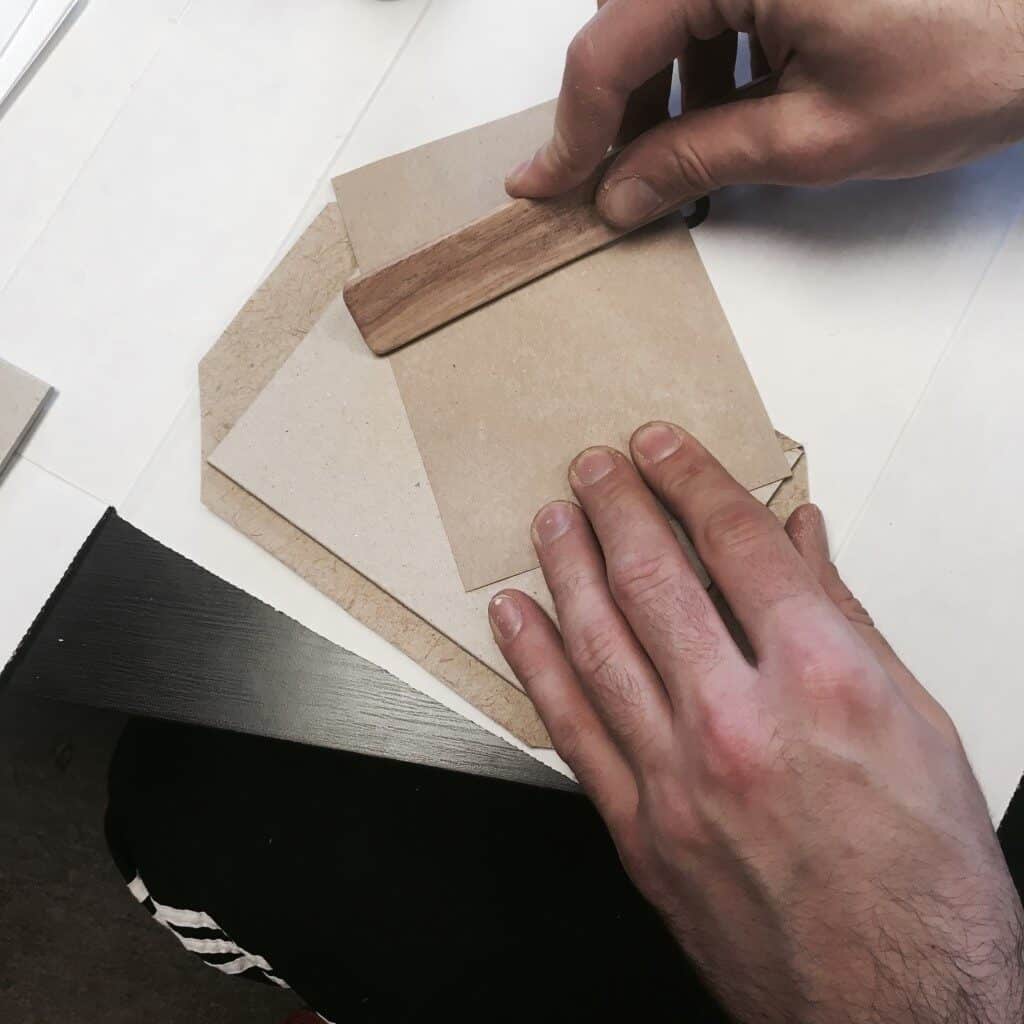
6. Cut Corners at 45-Degree Angles
Grab scissors and cut all corners at a 45-degree angle – leaving a little room when you cut.
You’ll want to leave a little less than 1/8″ between your cut and the hardboard edge. (For all the metric system folks out there, a little less than 1/8″ is around 2-3mm)
The goal here is to trim the excess handmade paper from the hardboard so that we can eventually fold it in, and look smooth on the edge.
7. Add Glue to Overhangs, Fold Overhangs
Apply glue to the overhanging paper (flap) and fold it onto the hardboard.Make sure that you are gluing the correct side here.
The hardboard should be facing you, and since it is a smaller size than handmade paper (which is further away from you), the handmade paper should stick out a little bit.
This is what I’m referring to as a “flap.” Just do one flap at a time.
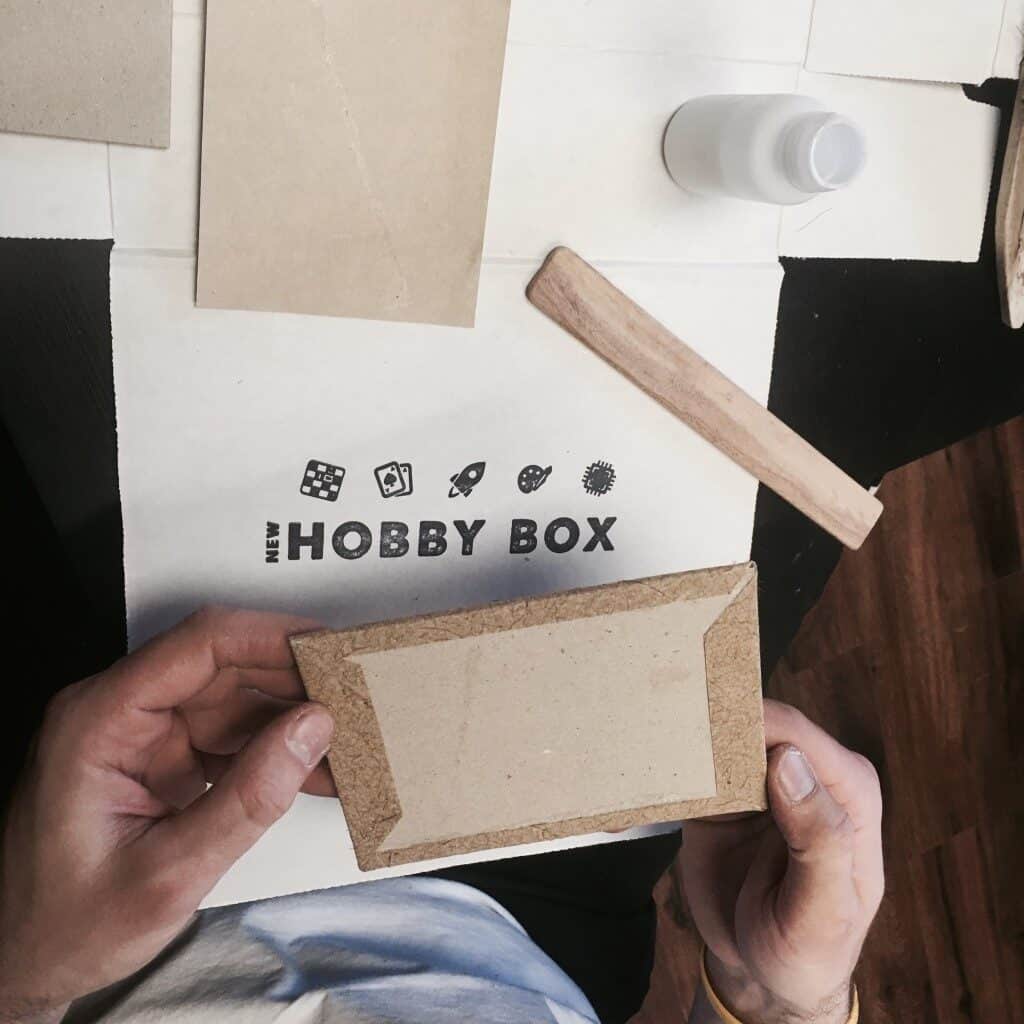
8. Use Bone Folder on Folded Flaps
Grab craft paper again, put it over the flap, and use your bone folder to smooth out this freshly glued flap. Since you might be reusing your craft paper, before you lay it down, make sure there aren’t remnants of wet glue on it.
You need to repeat this process for the other three flaps, until all four flaps are glued and folded to the hardboard.
If you haven’t made both covers, repeat steps 1-8 so that you end up with two book covers.
MAKING THE INSIDE OF BOOK BINDING COVERS
This is where the other two sheets of craft paper come into play. These craft paper sheets will be the inside sheets of the book cover and hide the flaps from step 7.
Before gluing both inside covers, make sure to attach the ribbon with the small sticker to create a bookmark on one of them.
9. Add Glue Craft Paper Sheet, Attach to Inside of Covers
Apply glue to one side of the craft paper sheet, then attach it to the inside of the cover. Carefully attach it to the inside of the cover by pressing the top left and right corners. The goal here is to get just a set of two corners in place, instead of all four at the same time.
This will keep everything as even as possible.
You want the craft paper sheet that is now on the inside of the cover to be about 1/32″ (1mm) away from each side of the cover. If you don’t have a way to measure, think of the tip of a pencil as the gap you want to leave.
10. Repeat step 9 for the bottom corners.
Make sure all corners are squarely aligned and the right distance from the edge. Place scrap paper (any leftover paper) over craft paper on the inside of the book, then smooth with the, you know what… it’s two words, the first word starts with a “b” and the second word with “f.”
(See a pattern here?)
And that’s all you need to complete the inside of the book cover – just repeat the inside process for the other cover.
If you haven’t placed the bookmark, do that on this second one.
MAKING SIGNATURES AND HOLES
Remember, signatures are just a fancy way of saying pages that are stacked and folded to become the body of all the pages in a book.
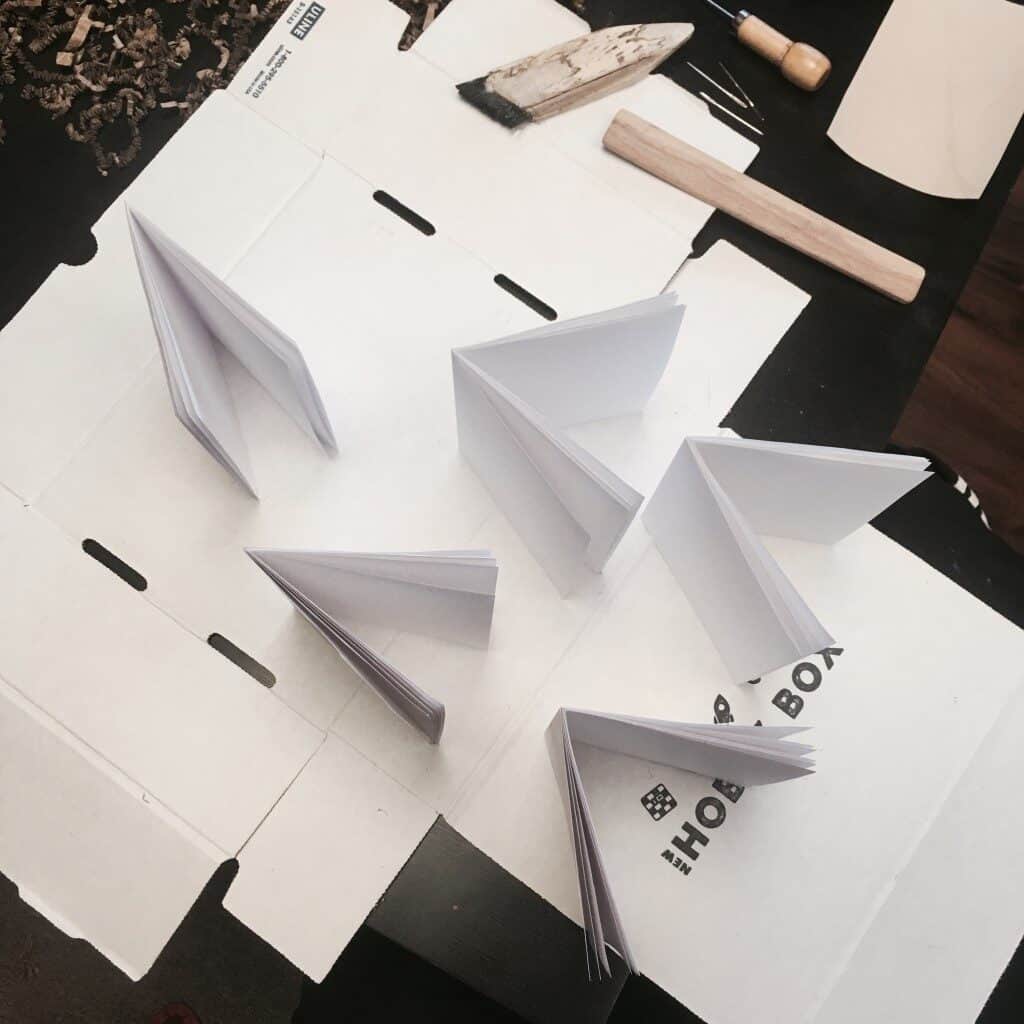
11. Fold White Sheets Into Groups of 5 Sheets
Fold each sheet of white paper, then place it into groups of 5 or 6 sheets.Have a lot of paper on hand for this. If you make a mistake folding any pages, use it to doodle on later in the day – then grab new pages and try again.
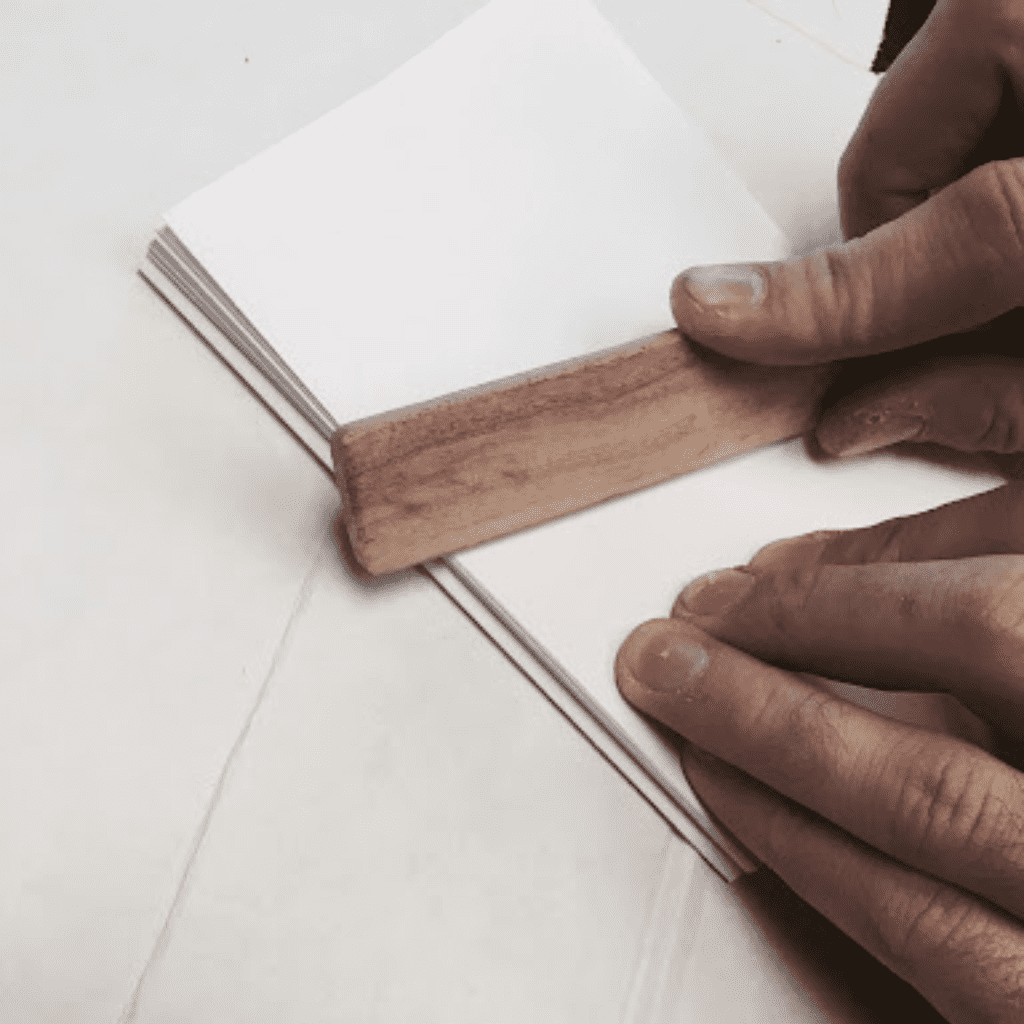
And then… you guessed it! Smooth out the edges with your bone folder 🙂.
Now it’s time to make a measuring tool. The measuring tool will be used to measure the areas where holes need to be punched.
Grab the third piece of craft paper you’ve been using your bone folder to smooth out areas throughout this tutorial.
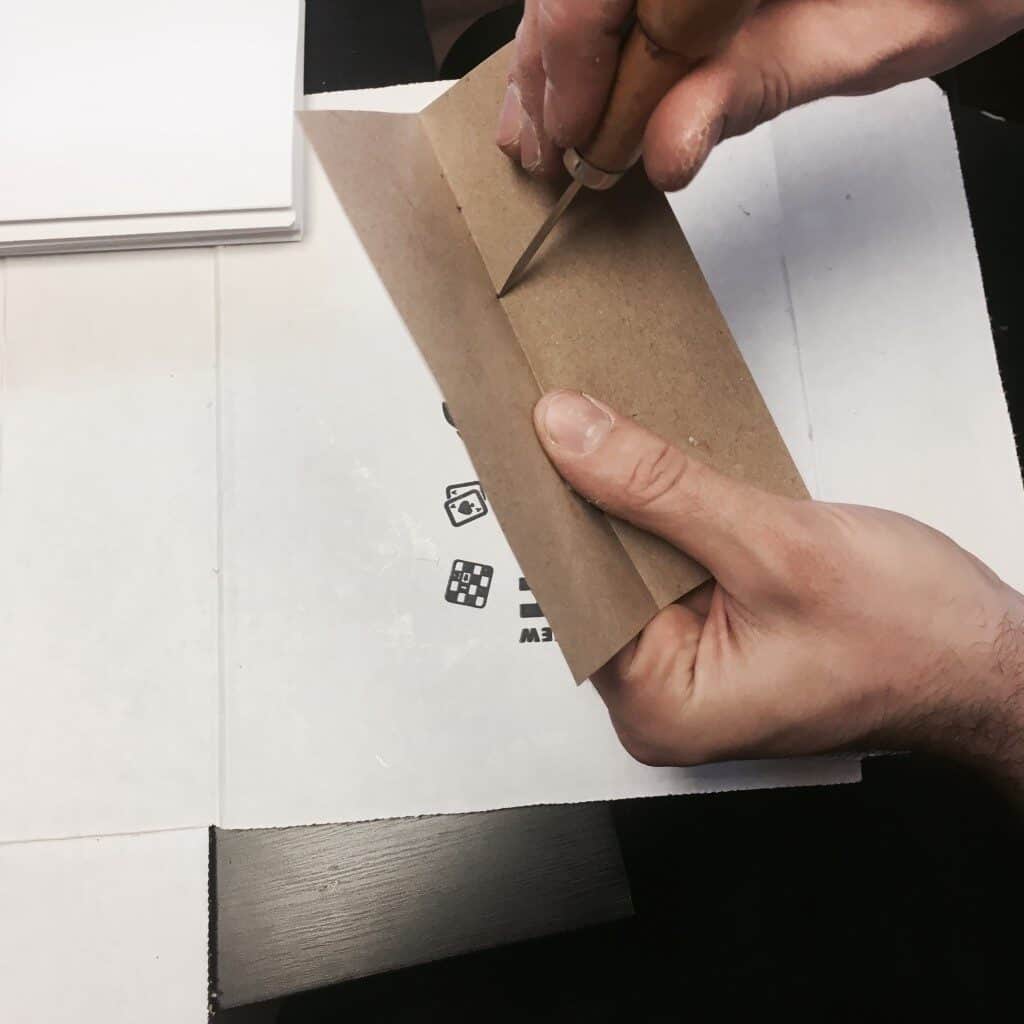
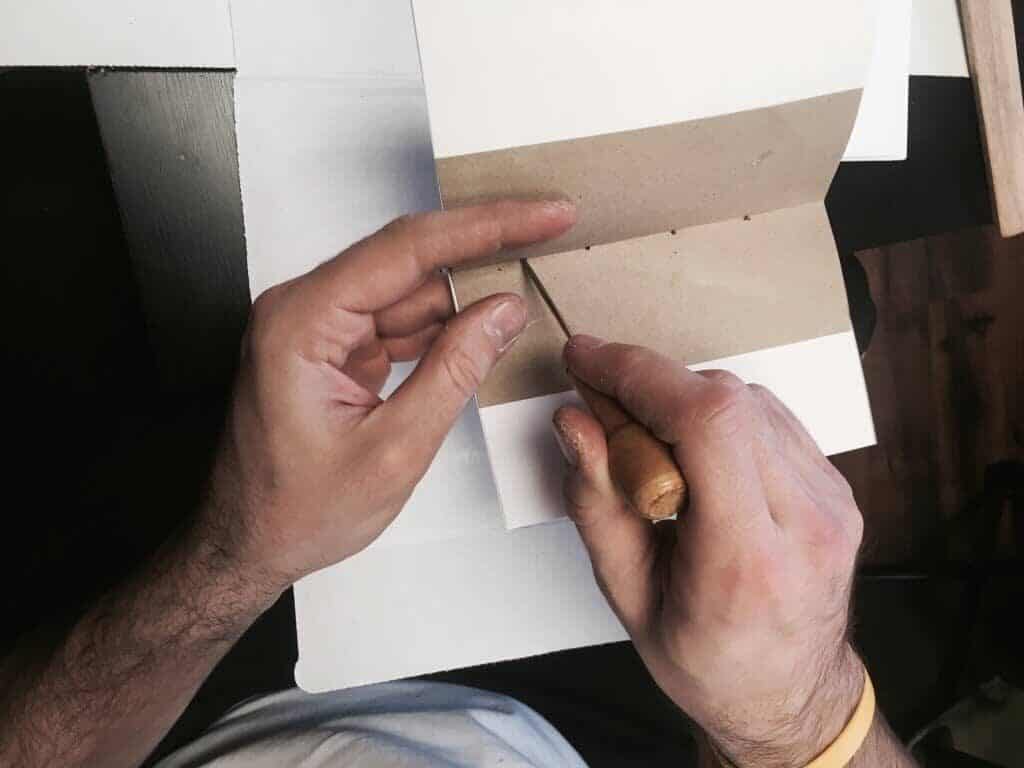
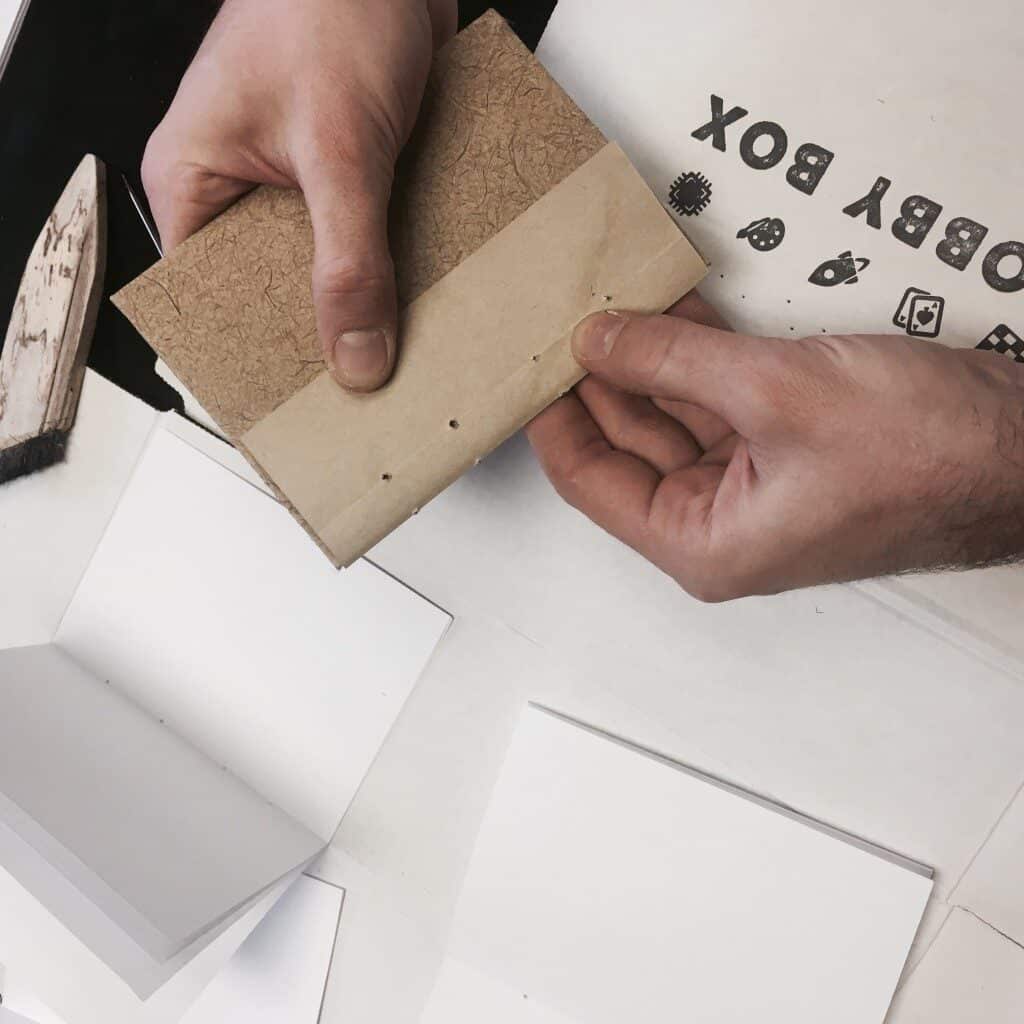
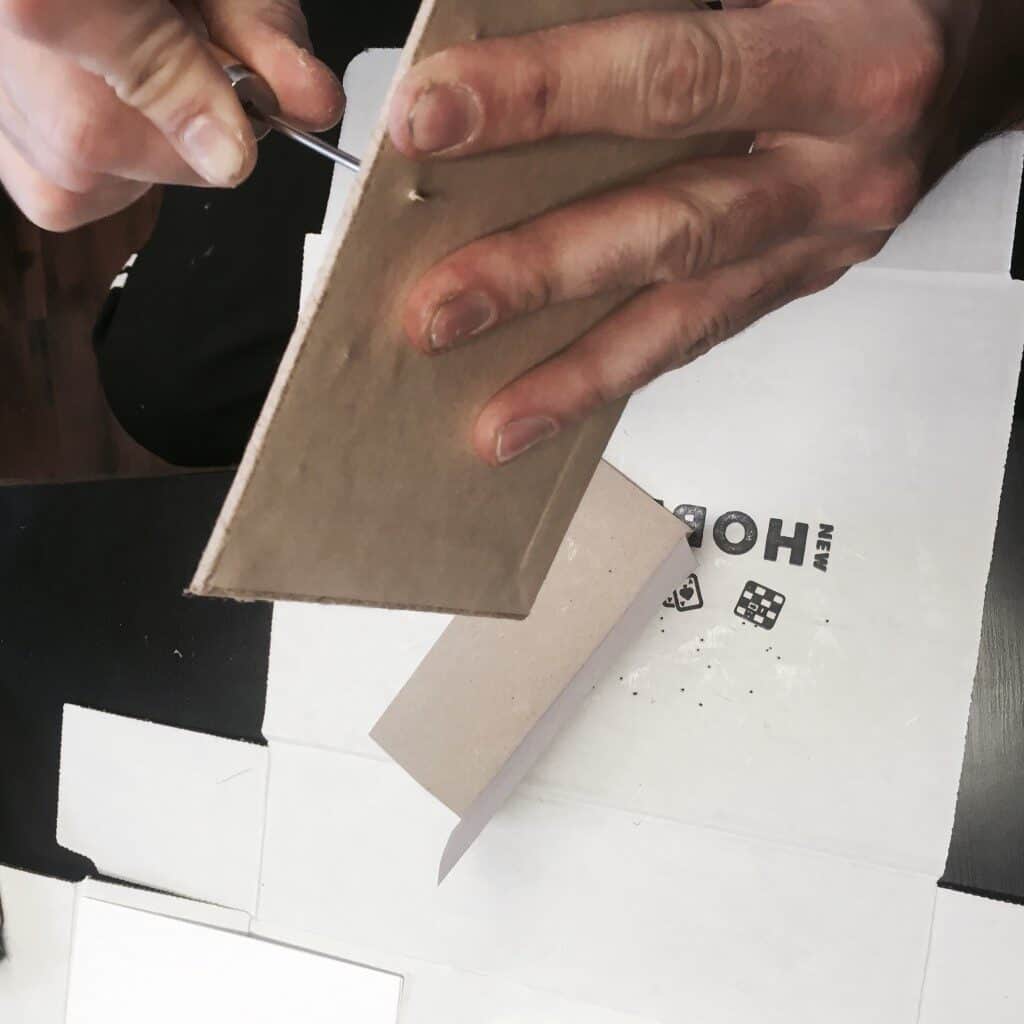
12. Fold Craft Paper in Half, Poke 4 Evenly Spaced Holes
Fold your third piece of craft paper (leftover paper) in half, then create 4 evenly spaced holes with your awl. If you have a ruler or a straight edge, create the same size distance between each hole, then use pencil marks to draw out the 4 points.
It’s beneficial to have a crisp fold for this part since it will be used for multiple signatures and the pages can wear it down after use.
Push from the inside of the crease to the outside.
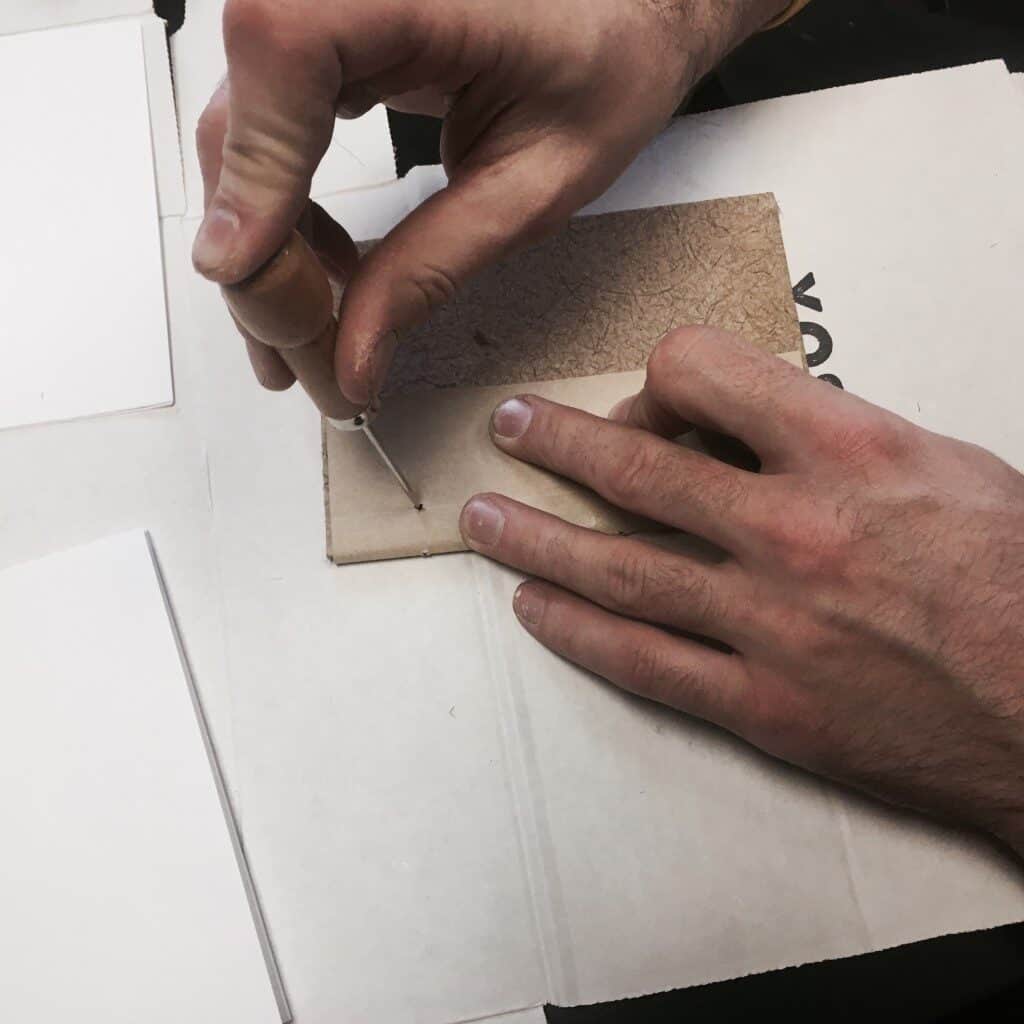
13. Pierce holes into the signatures.
Place the measuring template on the inside of each signature (groups of all the pages), then from the inside, use the awl to pierce holes into the signatures.Do this with all of the pages within the signatures.
Tip: Mark and pierce all signatures in the same position – if not, your pages won’t align and the book might turn out crooked.
We need to modify the measuring tool now.
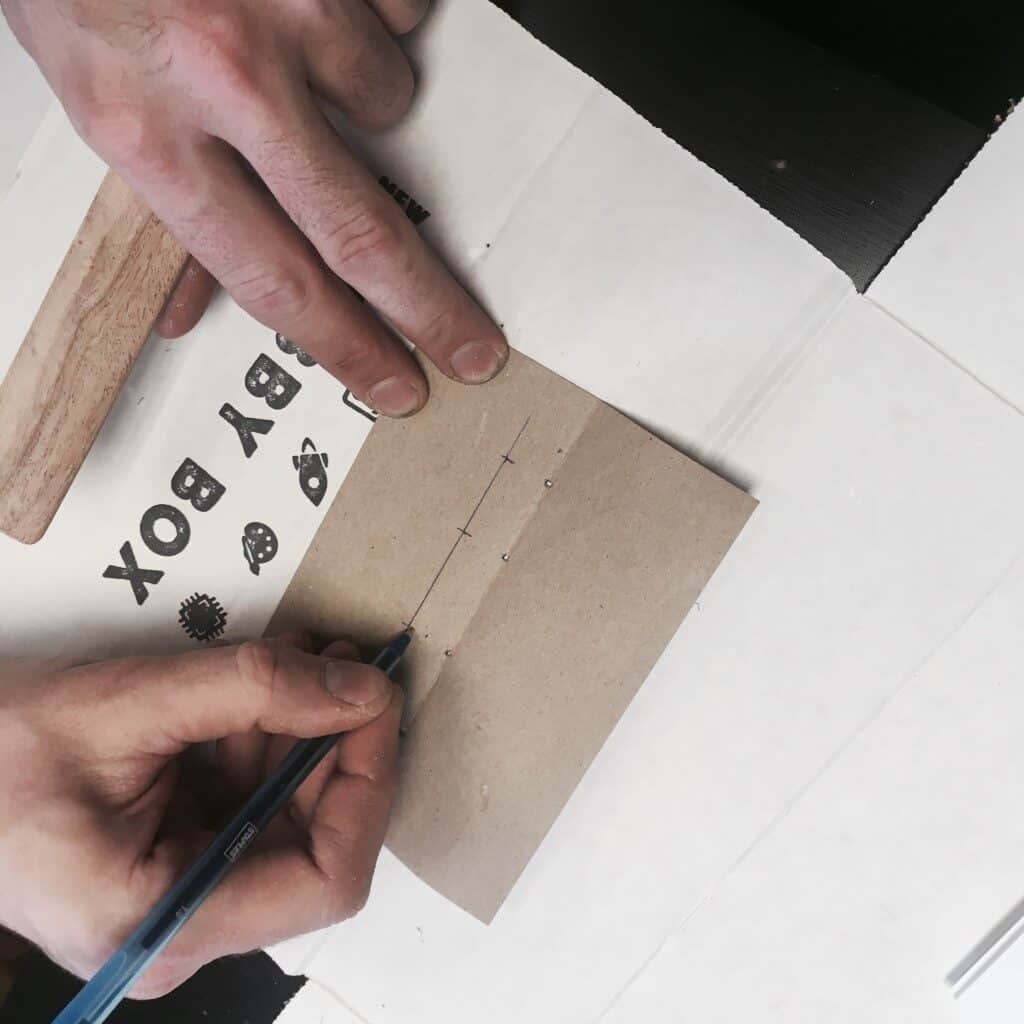
14. Create Measuring Tool for Covers
Using a straight edge draw a line about a half-inch (1/2″ or 13mm) from the fold – make new holes the same width apart that you did in the old set. Grab the front cover (outside facing up) and align the measuring template with the old line on the cover’s edge.
Punch holes along this newly drawn line. The measuring template should be evenly placed – so that the space between the top and bottom is even.
15. Mark and Pierce Holes Into Covers
Take your awl and mark where you need to make your holes – remove your template, then create holes with the awl. Plan out how your covers will be arranged ahead of punching holes to prevent yourself from having your bookmark in the wrong spot (you want the bookmark on the top of the back cover.)

BOOK BINDING, COPTIC STITCH STYLE
This is the most difficult, yet rewarding part of the bookbinding process – binding your book!
There are many different styles and interesting ways to bind books – I hope that after learning the Coptic technique you become interested enough to learn other bookbinding techniques.
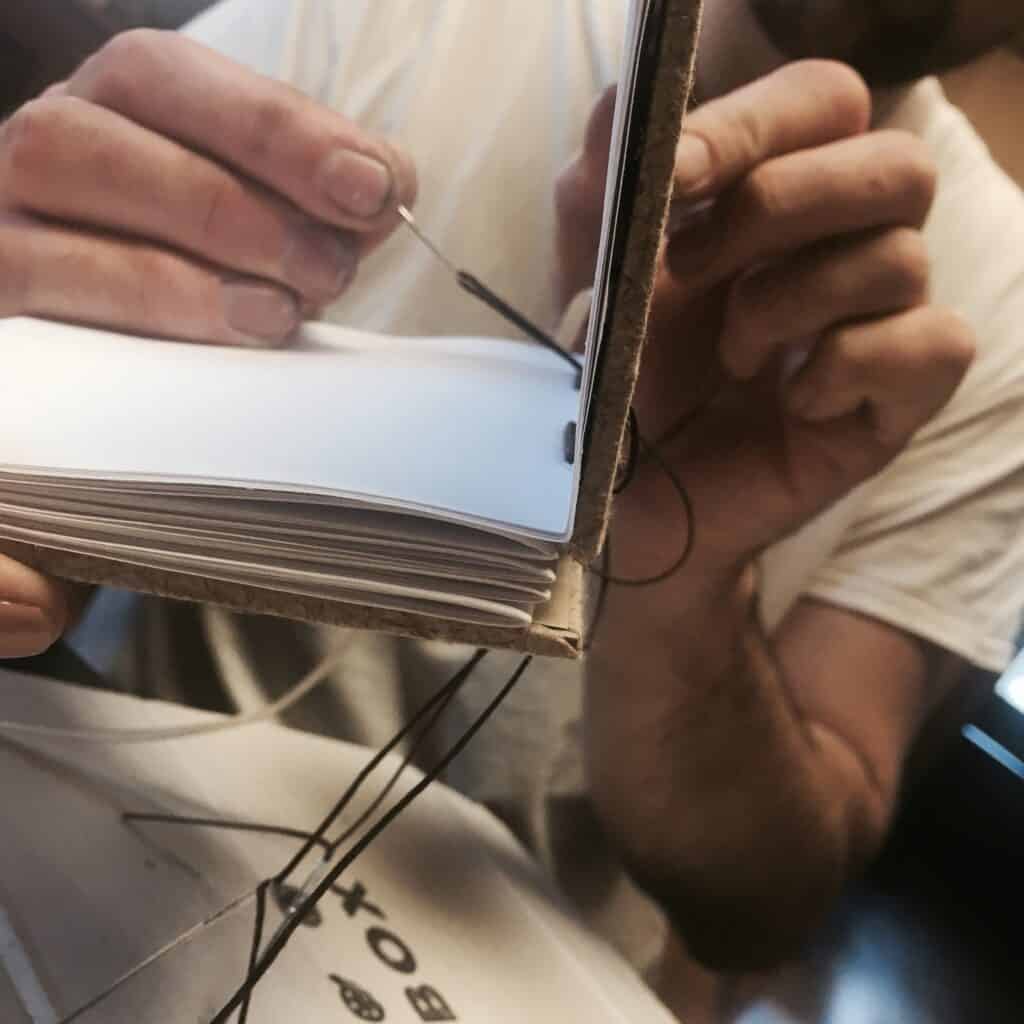
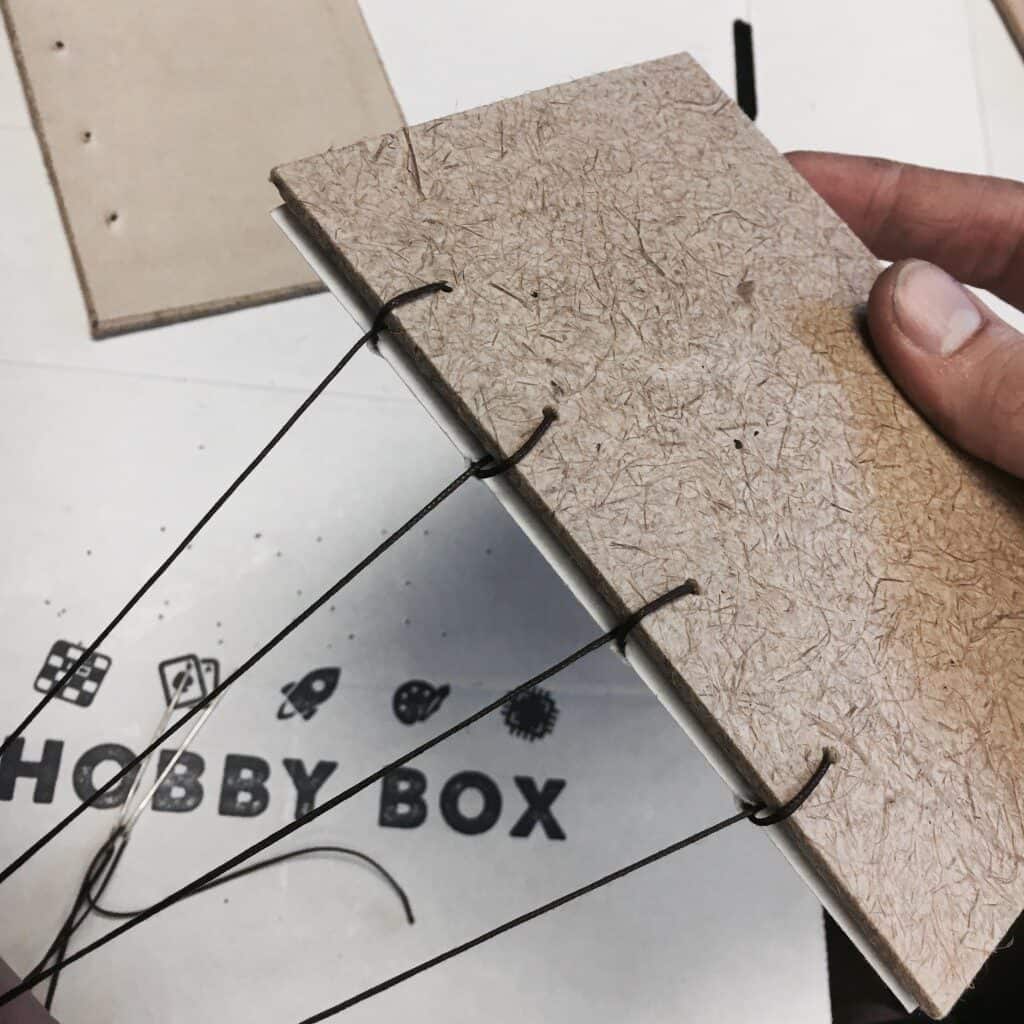
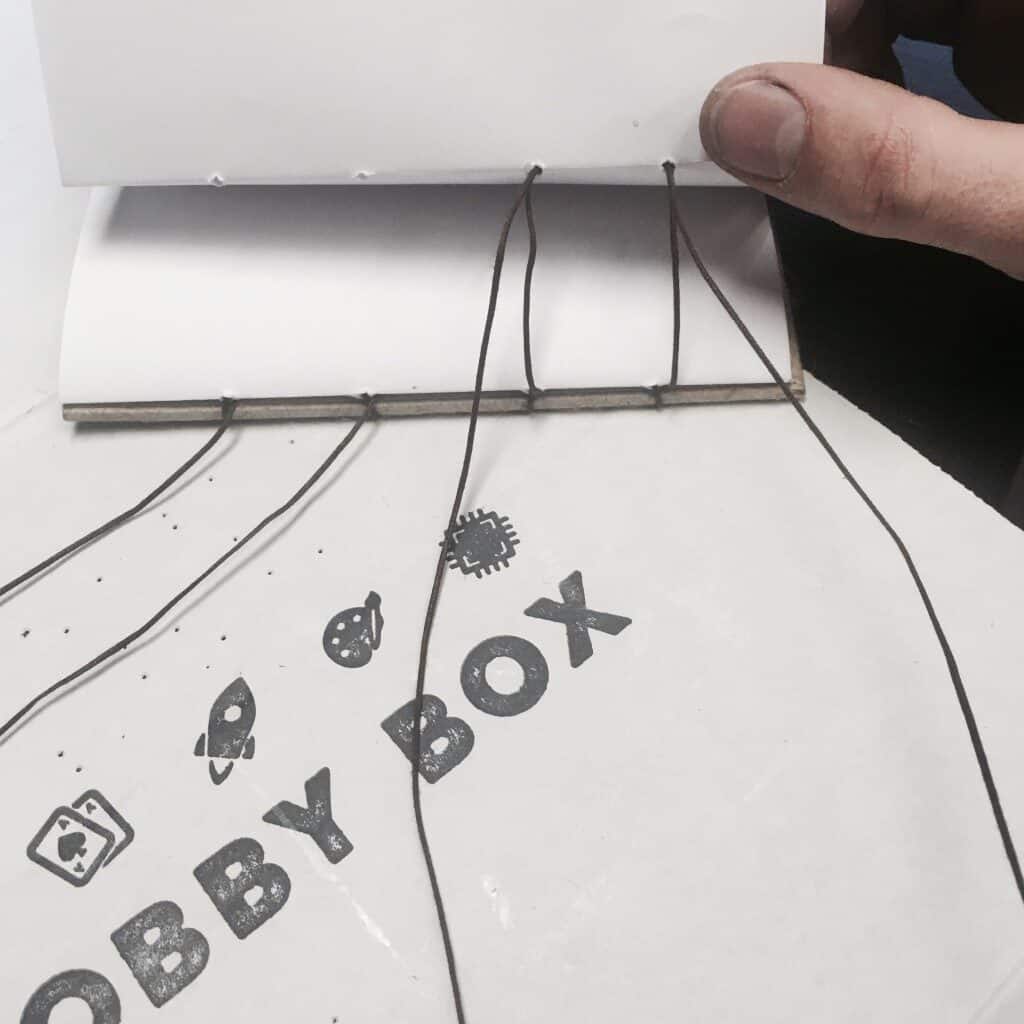
Before I delve into the specifics… Please have a gander at the image below and notice how the bind looks ‘braided’.
This is the desired look of the Coptic stitch. I hope this image helps you figure out this technique because it can be tricky to follow. (Took me 4 times to get it right.)
You’ll need to grab your thread – we’ll be making two cuts of the same size. Each cut will have a needle on BOTH ends 🙂.
Your book’s cover will now become your measuring tool.
Use the following formula to figure out the length of thread you need: [(length of cover x amount of signatures) + 1 length of signature.]
Thanks to Kristina from Georgia for that pro tip equation.
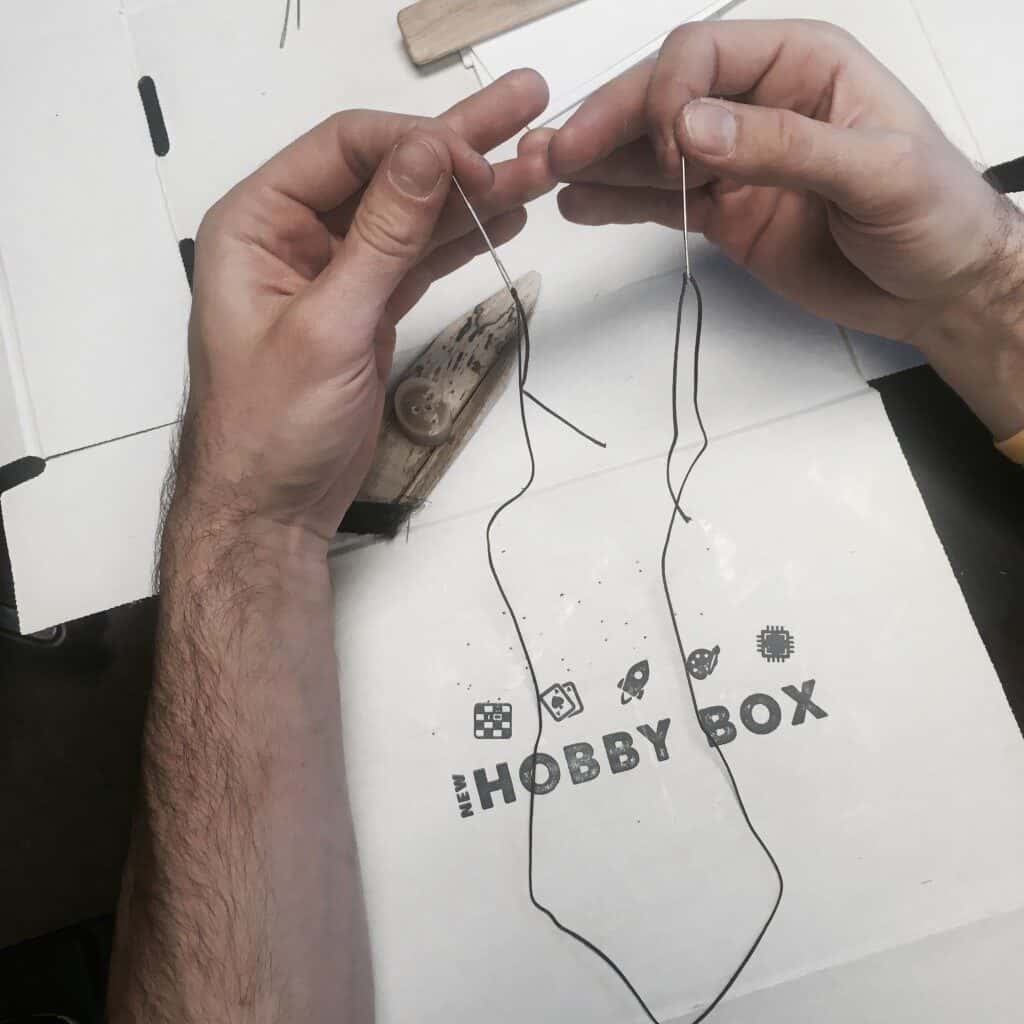
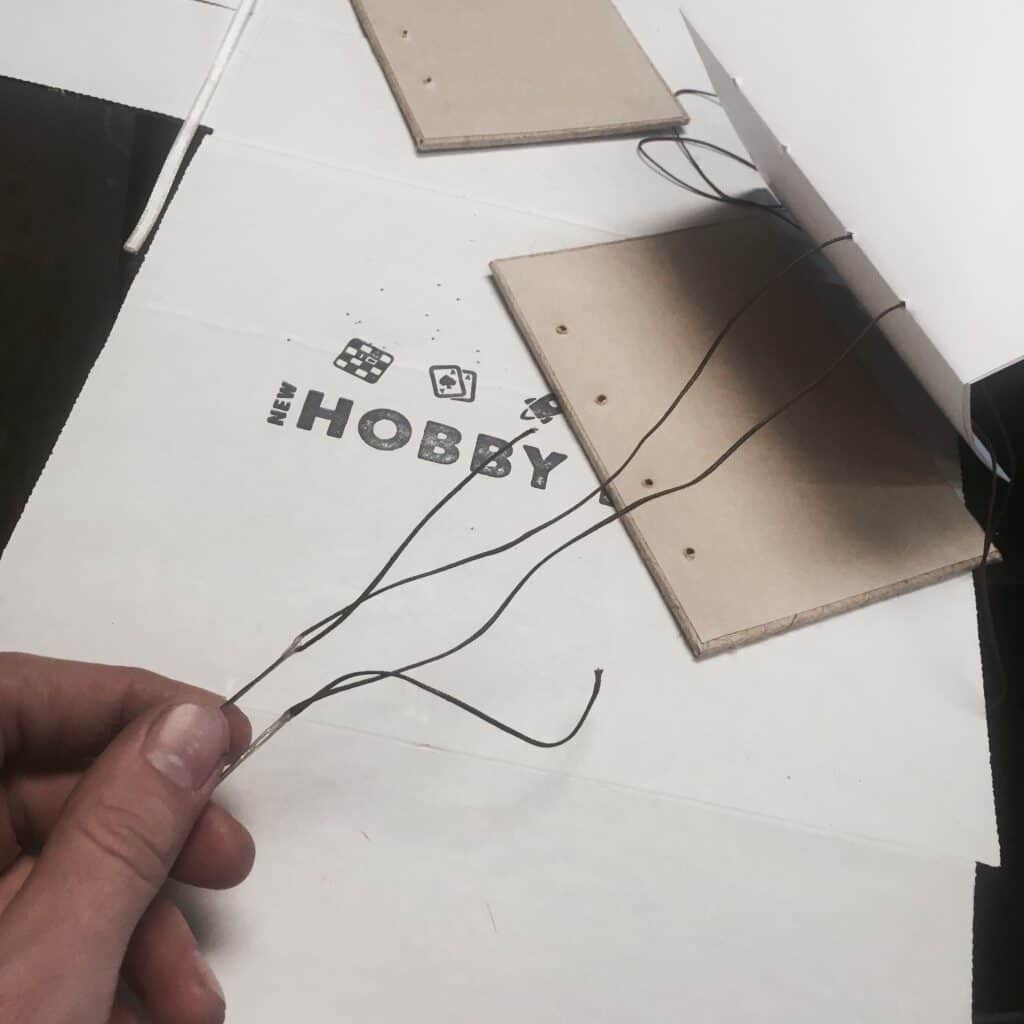
16. Cut Thread for Stitching
Cut your thread to a total length of your cover multiplied by the number of signatures, plus one length of signature.
Now thread both ends through your needles, leaving about a 4″ (10cm) trail. Do this for both lines of thread.
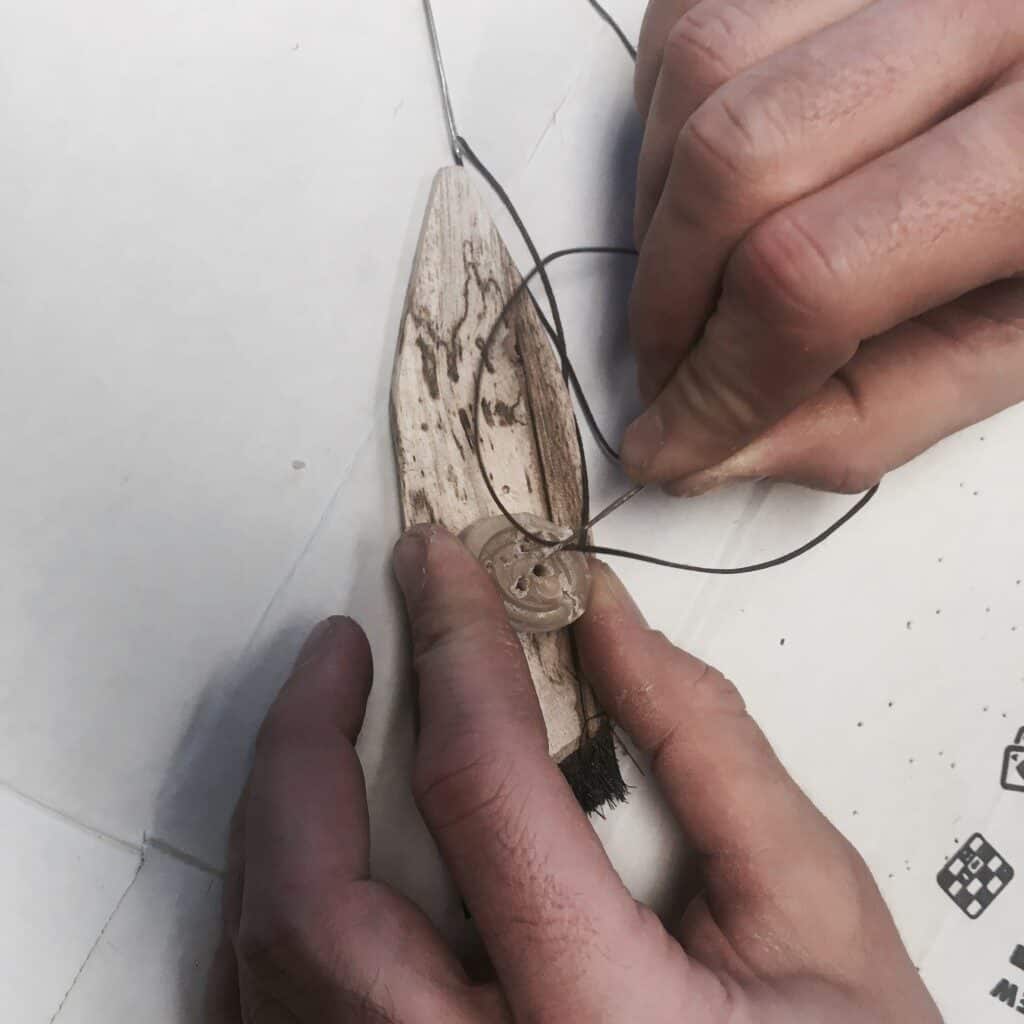
17. Place Wax on Eye of Needles
Place beeswax on top of your brush handle and stick the eyes of your needles into the wax. You’re doing it right if you have little boogers clogging up the eyes so your thread stays in place 🙂.
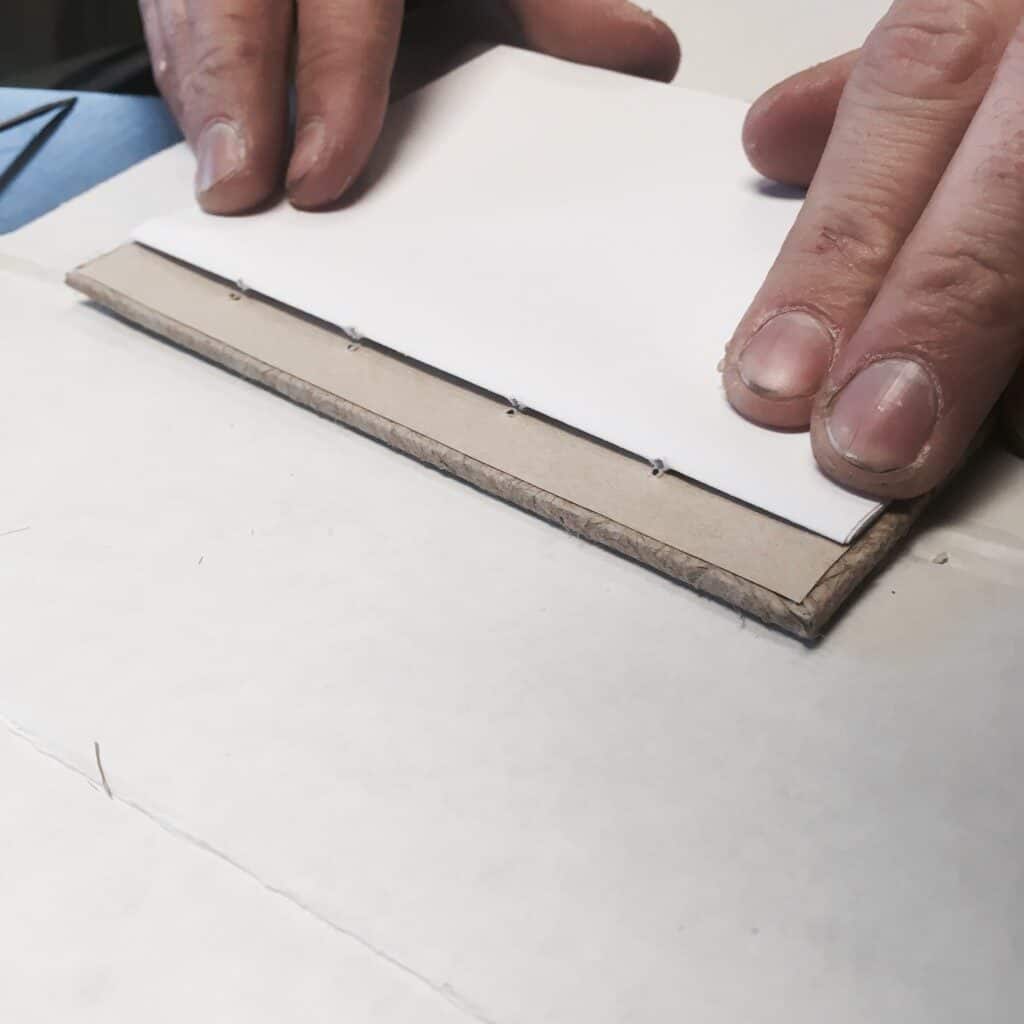
You’ll then stack your first signature on top of the front cover with the inside of the cover facing upwards. Make sure your holes align.
18. Sew the First Signature Into Book Cover
Sew the signature in the book by inserting the first pair of needles into the first two holes from inside the signature.
You’ll keep moving along the – inserting the second pair of needles into holes 3 and 4. (The below photo shows holes 3 and 4).
You need to close the first signature when you get to the end by pulling the needles and thread lines through the holes.
This includes the thread lines being pulled through too – make sure they are equally long.
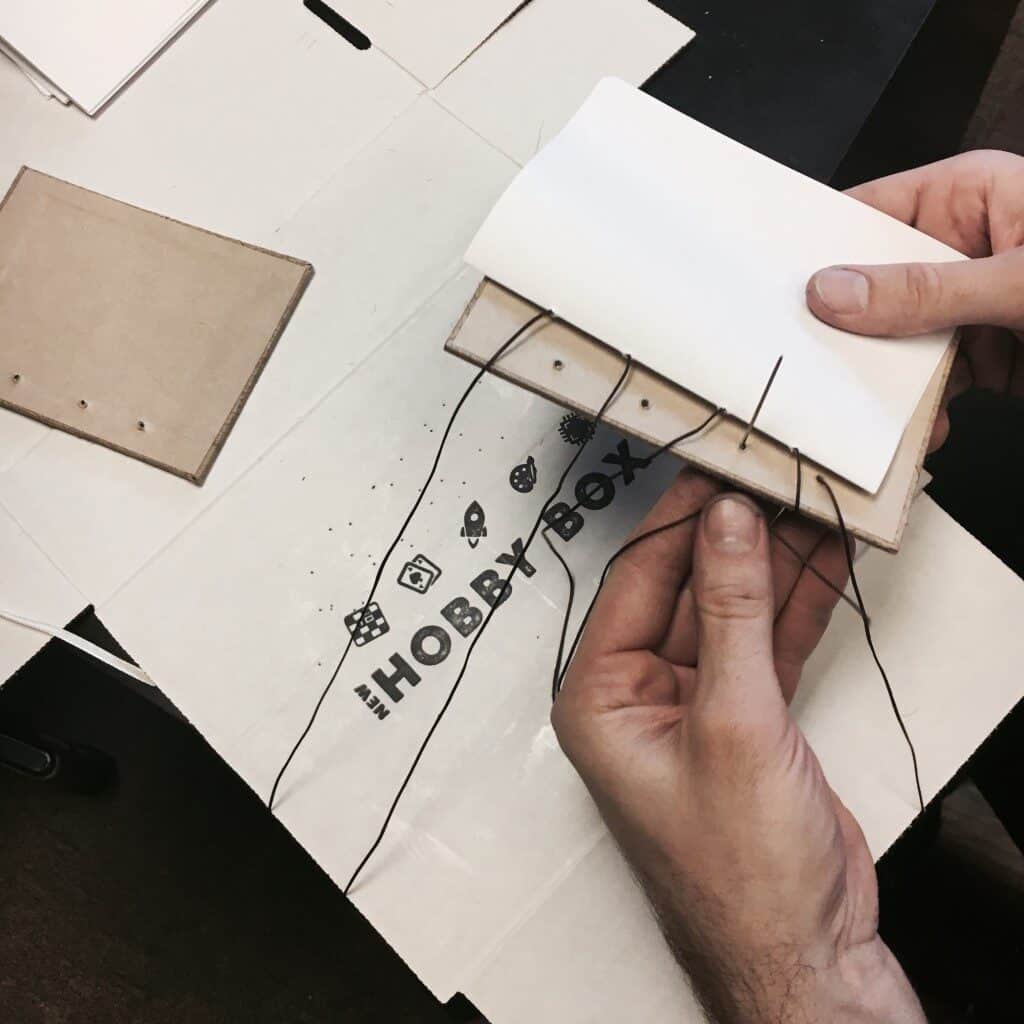
19. Thread Needle Around Front Cover to Each Hole
Move each needle around the front cover of the book and insert them through their corresponding holes. You want the needle exits on the right (your thread line should be on the left of the needle).
Now that you have bound the front cover to the first signature, it is time to align them. To do this, you will carefully pull the thread tighter and make sure that the book is aligned.
You’ll repeat a similar process for the second signature. Just place the second signature on top of the first signature and insert the first needle through the first hole from the outside of the second signature.
The needle should exit on the inside of the signature. And you guessed it, just do the same with all the other needles – pulling the thread lines through from the inside of the second signature.
20. Crossover Needle Through Second Hole, From Inside Signature
Crossover the first needle through the second hole from inside the signature. You want to carefully pull the needle from the outside of the signature through the hole once you have done the crossover.
One important thing to remember – the inside needles go out and the outside needles go in.
You’ll then crossover the second needle through the first hole from inside the signature and carefully pull the needle from the outside of the signature through the hole.
Once you’ve finished the crossover binding, pull the second signature carefully in line with the first signature and the front cover.
Now it’s time to create the Coptic/kettle stitch (the braided look.)
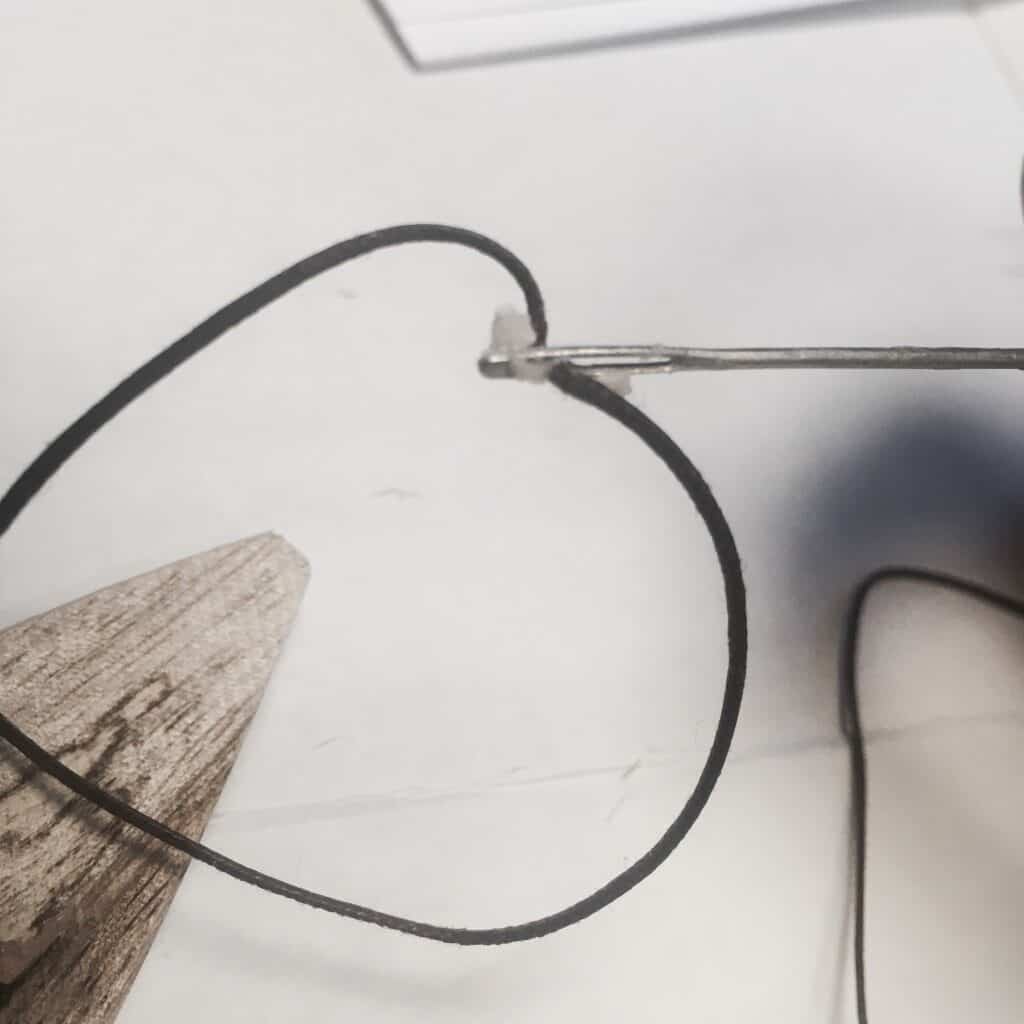
21. Thread Behind Signature, Then Pull and Tighten
Insert the first needle behind the first signature and exit on the right – then pull the threading carefully through and tighten the bind.
Another way to think of it is entrance on the left, exit on the right.
Now you just have to repeat this process with each new signature 🙂.
In other words, after each new signature, you will go back one signature then complete a loop before moving on to the next signature. Don’t forget that you can watch the video we made of the entire tutorial on YouTube, it might be of assistance if you need to see this all in action.
Need more help? I find this video extremely helpful for learning Coptic stitching.
Have you made it through the chain and on the back cover, tied it off? Great, then it’s time to tie off on the inside…
And then a quick snip-snip…
Ohhh, snap! You’ve successfully bound your first book!!!
***High-fives***
Keep digging into bookbinding and researching all the different methods and materials you can use. And don’t forget to check out our paper making tutorial – this DIY and the handmade paper tutorial were built for one another.
Thanks for trying something new with us!
Happy Hobbying!