Have you ever wanted to make your own unique journal or repair a broken book? If so, you may have stalled out because you thought it was too difficult to do. So let’s answer the question once and for all; how easy is it to bind a book at home?
Binding a book or journal at home is easy to do with basic materials, although it does require many simple steps. For instance, Coptic binding requires a needle, thread, signatures, awl, bone folder, glue, thread, and book boards. However, restoring a book’s binding is difficult to do from home.
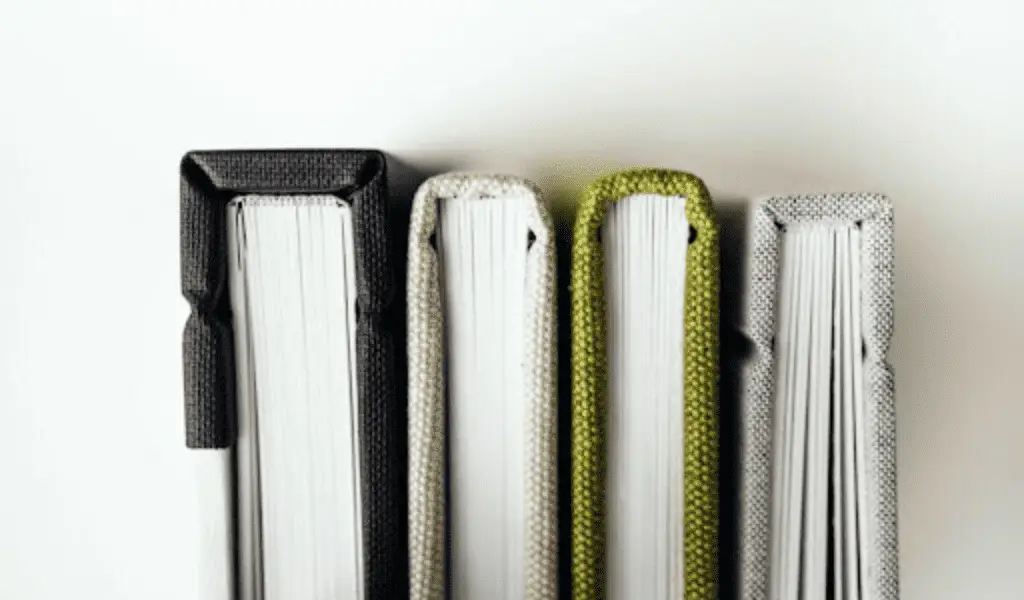
There are countless ways to bind a book, but three styles are the easiest to do from home. In this article, we’ll show you which three bookbinding techniques will be the easiest for you to try from home.
WHAT ARE THE 3 EASIEST BOOKBINDING TECHNIQUES?
Bookbinding is a craft that’s been around for millennia, and because of that, there are numerous ways to bind a book.
Traditional methods of bookbinding include hand-stitching with thread, machine stitching with an industrial stitcher, thermal binding with glue strips, and comb binding with plastic combs.
More modern methods have also been developed such as adhesive binding, in which the spine of the book is held together by a pressure-sensitive adhesive.
As you can guess, some techniques are more challenging than others to do from home – this comes down to the type of materials and tools needed and their respective costs, as well as the difficulty of the bookbinding process.
Among all the different bookbinding techniques, here are the 3 easiest ways to bind a book from home:
- Saddle Stitch Bookbinding: The saddle stitch is one of the easiest bindings to do at home. All you need is a needle and thread, as well as your printed pages. The pages are stapled together in the middle using two or three staples on either side, then secured with a single looped stitch.
- Perfect Binding: Perfect binding requires no sewing and is really easy to do from home as it only requires that you glue the pages together.
- Coptic Binding: Coptic binding is a traditional bookbinding technique that uses a needle and thread to stitch the pages together. While it can take some practice, this type of binding doesn’t require much in terms of materials, making it one of the easiest ways to bind a book from home.
Let’s take a closer look at all three methods so you can pick the right technique to start your bookbinding adventures!
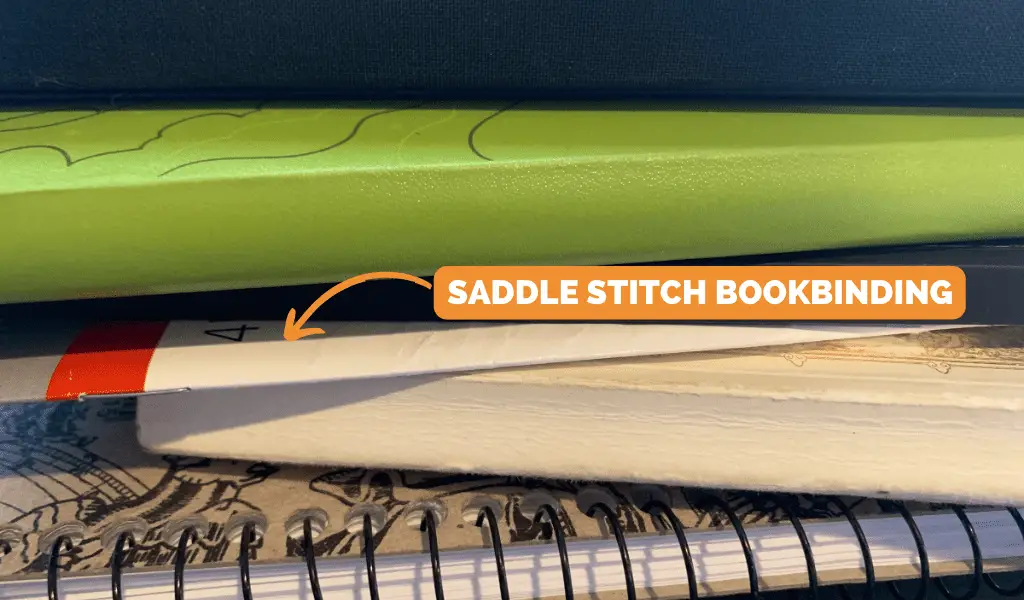
1. Saddle Stitch Bookbinding – Inexpensive, Easiest, Office-Like Aesthetic
If you’re looking for a cheap and easy way to bind books, saddle stitching is just the trick. It requires nothing more than stapling the signatures together in the middle – making it both inexpensive and quick.
Not to mention, it’s relatively straightforward even for a beginner – so you can save time and money all while ensuring that your book is cleanly and securely bound. The downside is that this form of binding looks like it might belong in a cubicle for a conglomerate, but it’s a great entry point for learning the barebones of bookbinding.
Unfortunately, saddle stitching also has size limitations. Anything thicker than a quarter inch will be nearly impossible to bind. You may even struggle to bind materials with an eighth-inch thickness. And if you’re looking to mix up page types, you’ll have to look for another solution.
What makes saddle stitching so great is also the source of its greatest weakness: metal staples. They can wear down paper quicker than you’d expect, cutting a book’s lifespan short.
But don’t worry, you can just swap them out for some thread, and voilà! It pays to think outside the (staple) box!
SADDLE STITCH – THE THREAD METHOD
For a sturdier binding, try out the thread method! To saddle stitch using thread, you’ll need waxed thread (or beeswax), a needle that can guide that thread, an awl, scissors, binder clips, and a book press or weights. Here are the steps involved to thread your binding:
- Line up your pages and secure with clips.
- Make marks for the holes with an awl and start single-threading from the middle hole–leave a few inches out at the end.
- Then weave to the end, turn back over to sew to the other side, and finish in the middle.
- Make the last stitch outside of the middle hole then twist into a lock stitch – tie ends together and trim off excess thread.
- Finally, bend over pages (and cover if needed) to clamp shut!
It’s amazing what a little thread can do – you’ve created a more secure saddle stitch, and with some heavy opinion, a more aesthetically pleasing binding.
PROS OF SADDLE STITCH BOOKBINDING:
- Affordable Materials
- Easy Process
- Quick to Make
- Improved Durability by Threading
CONS OF SADDLE STITCH BOOKBINDING:
- Size Constraints
- Not Durable
- Brochure-like Aesthetics
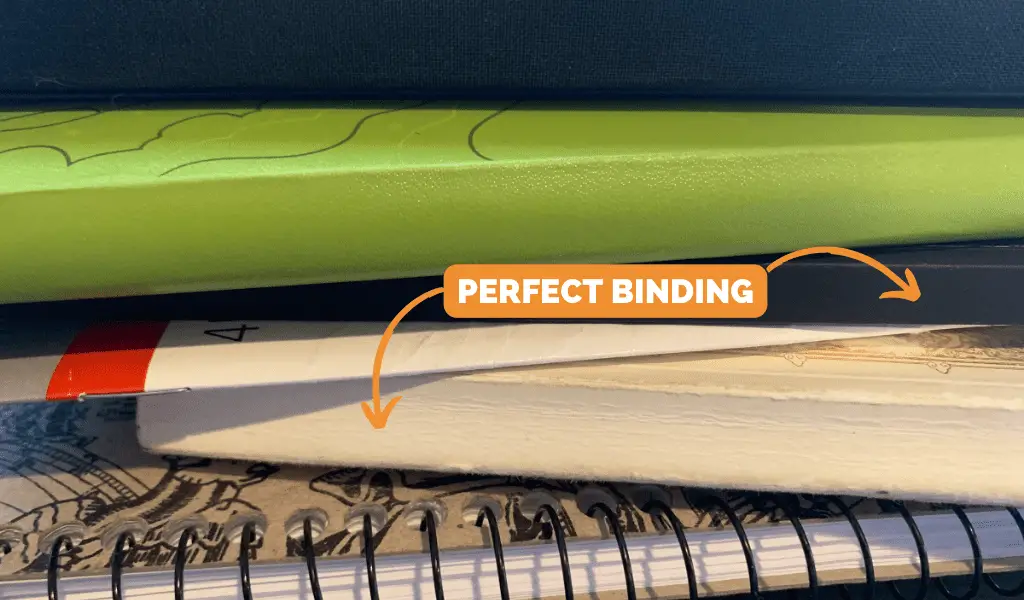
2. Perfect Binding – Polished PaperbackLook
Perfect binding is the go-to stitch for paperback books with a high page count – it can handle thickness requirements that saddle stitching cannot. It’s also great for brochures, catalogs, and directories – producing a book that looks great and has a strong spine to last.
With the perfect binding technique, you get to choose how to interleaf your pages as you wish. This means you can swap out paper types, add illustrations and elements that couldn’t be bound with saddle stitching, or create your own layouts.
Perfect binding uses a strong yet malleable adhesive to securely bind pages without the need for stitching. With this method, you can connect single sheets without having to worry about signatures or sewing. You’ll see why that matters once you read the Coptic binding section.
HOW TO PERFECT BIND A BOOK
Perfect binding using single sheets requires careful alignment along the bottom and spine. Here’s how you use the perfect binding technique:
- Start by ensuring that the pages are aligned along the bottom and spine.
- Hold them together firmly and press them lightly against a flat surface to make sure they stay in place.
- Next, clamp them together with a book press, vice, or another type of clamp, making sure that the spine is facing out.
- Finally, use a glue brush to coat the spine with PVA glue.
- Allow it to dry and add two or three more layers until you achieve optimal binding strength.
- Make sure to let each layer dry before adding another!
Although perfect binding does require care, it’s still simple. You just need to hold all the pages together and press lightly on a flat surface to make sure they are in the right place. This ensures that your book will be held together and be able to withstand some stress.
PROS OF PERFECT BINDING:
- Thicker Paperbacks
- No Stitching
- Interleaf any Paper or Layout
CONS OF PERFECT BINDING:
- Requires Precision
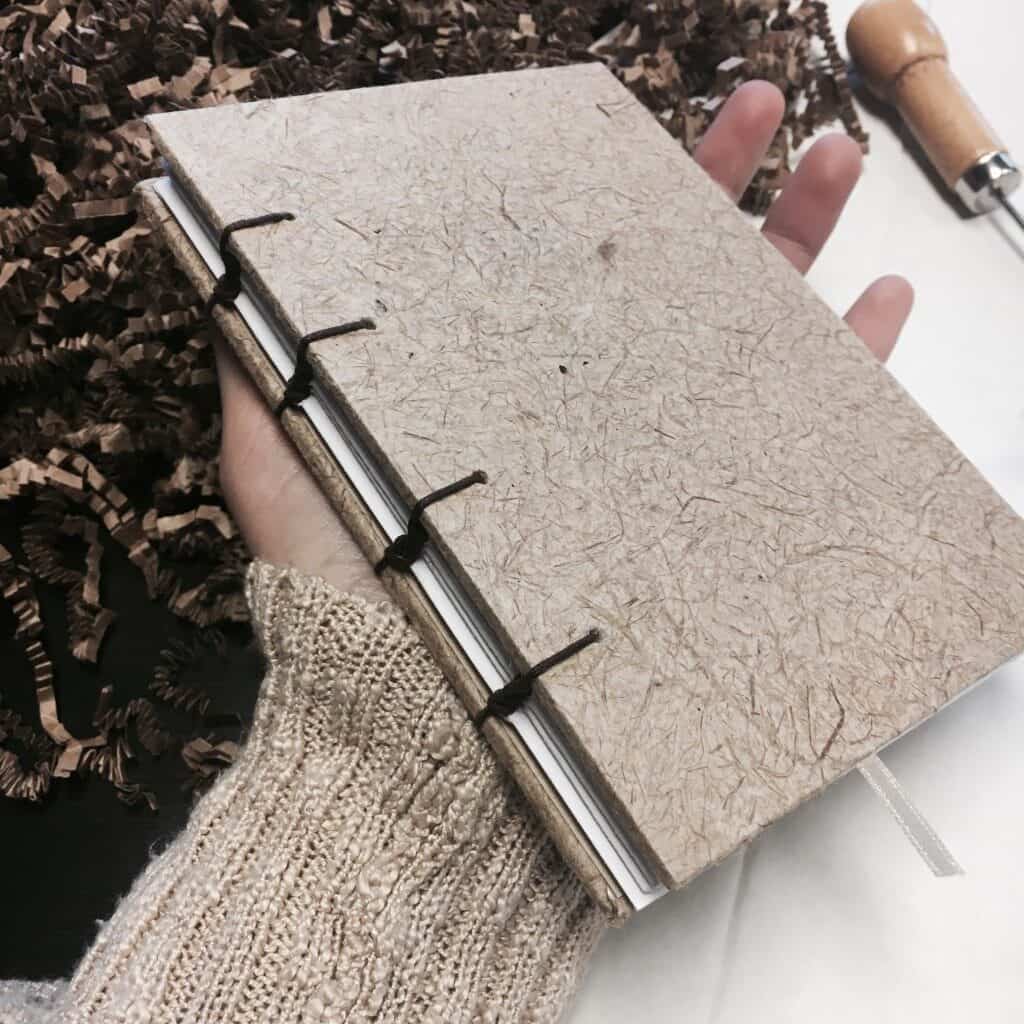
3. Coptic Binding – Ancient, Aesthetic, and Most Durable
Coptic binding is the most labor-intensive of the three techniques, but it’s also one of the oldest and most durable binding methods in existence. It produces beautiful bindings with a distinct aesthetic – the exposed spine gives books and journals an ancient, almost medieval look that adds to their charm.
There are also no limitations to how many signatures (groups of paper) you can add to it. A book with a Coptic stitch resembles a spiral-bound notebook in that it lies flat and can be folded back onto itself without any concerns about damaging the binding.
This is one of the reasons it’s perfect for journaling – you’ll always have a completely flat surface to write on. It’s also a more affordable alternative to perfect binding as it uses thread to bind the pages, as opposed to costlier glue.
Sure, it’s more complicated than the others due to the long number of steps, but the steps are simple to follow and the book has incredible durability – not to mention it looks so cool – and this makes it completely worthwhile.
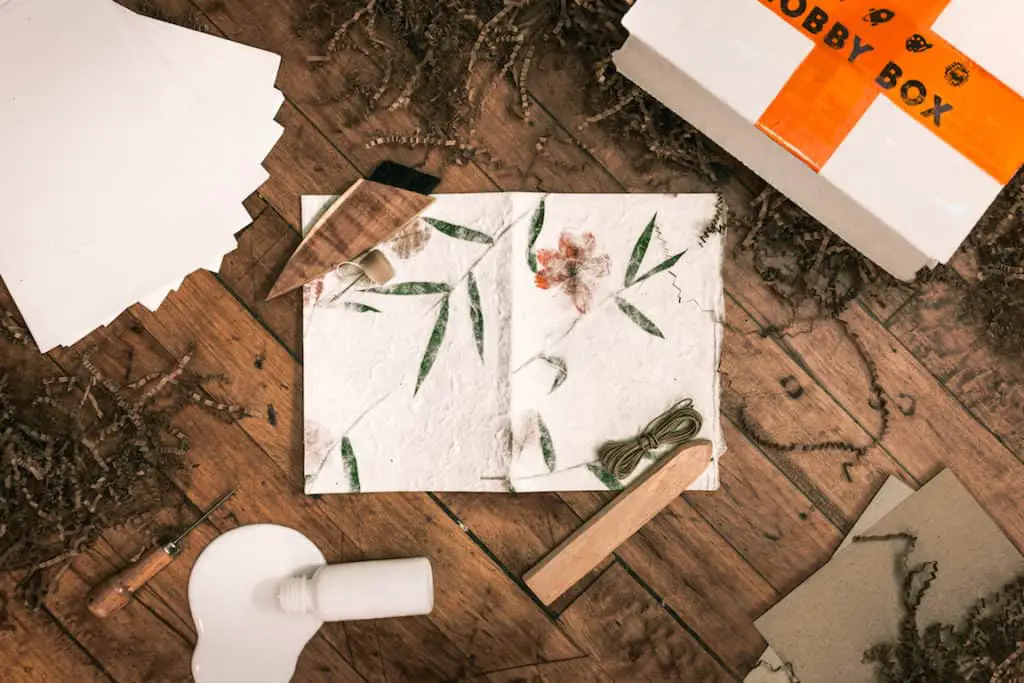
Plus, if you follow the New Hobby Box tutorial on how to Coptic bind a book, it will become even easier. The tutorial includes a video to show you the process as well as written out detailed steps with images to go along with it. We even show you how to make an attractive cover for the book using decorative paper, and how to add a bookmark as well.
And if you’re feeling super ambitious, you can make the paper by hand to go into the book, following our paper-making tutorial.
Coptic stitching is by far our favorite way to bind a book, and the supplies are low-cost and easy to get.
PROS OF COPTIC BINDING:
- Durable
- Lays Flat
- Historical Look
- Non-Adhesive
- Affordable and Accessible Materials
CONS OF COPTIC BINDING:
- Long Process
MORE BOOKBINDING TECHNIQUES
As you know, we’ve only hit the three easiest techniques of bookbinding that you can do from home. There are way too many methods of bookbinding to list here. But if you’re interest is piqued, we’ve dropped a few more interesting styles below for you to investigate.
Noble Binding
With noble binding, you can get that “threaded saddle stitch meets perfect binding” look with a little waxed thread and some fancy stitching. And let’s face it, who doesn’t love a bit of fancy stitching?
Similar to Japanese four-hole binding, noble binding uses a waxed thread to secure single sheets together. You sew from the center of the book and move outward (just like saddle stitching) but this time you also loop around the spine.
Case Binding
If you want a sturdy book that can hold a tome, this is your choice. Case binding is essentially hardcover binding, and it can be done through sewing or gluing techniques. This method adds extra protection to the spine and exterior and also provides a great way to showcase artwork or textured cover options.
Section Sewn Binding
For larger books that need to be extra-durable, you’ll want to use section-sewn binding. This technique is more complex and requires more materials but the result is a book that can withstand any amount of wear and tear. It’s perfect for textbooks, cookbooks, or other hardbound volumes.