In the blink of an eye, Christmas came and went this year. The older we get, the faster it seems to go, which means one minute we’re panic-decorating to get the house festive for visiting relatives and the next we’re last-minute shopping for gifts.
If you find yourself in a similar situation during the holidays, then let this be the guide to solving a lot of Christmas season predicaments.
While we’ll focus on Christmas items primarily, the best part of marbling is you can do it for any occasion just by throwing in a different color. So if you consistently experience any holiday time crunch you can use marbling as a creative and quick way to put your best foot forward.
This marbling DIY will list out all the tools and materials needed for marbling at home using a hydro-dipping method, plus, we’ll share our favorite marbling kit in case you just want to buy everything all at once. We’ll also show you every step to marble ornaments and cards, whether you’re trying to make memorable gifts, eye-catching decorations, or just trying to have some fun with crafts.
WHAT IS MARBLING IN ART?
Marbling in art is the process of creating intricate patterns and designs on a variety of surfaces, like paper, wood, plastic, and more. It’s done by suspending pigments in a liquid solution like water, then carefully manipulating them into shapes and patterns before dipping any object into them.
In other words, you typically fill up a basin of water and place drops of special paint in it that can float on top. Using combs, rakes, chopsticks, or any tool you like, you can then create truly original patterns out of the colors.
The resulting piece can look like anything from the swirls of a galaxy to the subtle waves of the ocean, which makes it easy to get lost in your imagination and make something truly beautiful.
If you remember learning about primary and complementary colors, that knowledge is going to come in handy. If not, we’ll give you a quick recap further on.
Once you have a design you like, that is, the colors you prefer in patterns you want, you take a porous object and dip it into the basin with dyes in it, then remove the object. The paints will adhere to the object, where you’ll let them dry and retain the super cool marbling effect.
It might sound like a complicated process, but it’s rather simple after you see it.
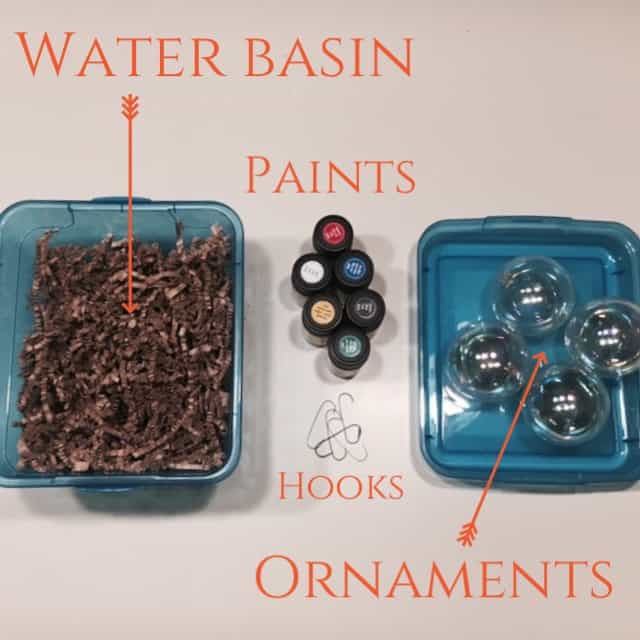
SUPPLIES NEEDED FOR MARBLING
You won’t need a ton of supplies for marbling, but you will need special items to do it. Unfortunately, dropping acrylic paints in water won’t work. So if you’re thinking of just grabbing random paint from around the house, we’ll save you the trouble. Let’s take a look at what you’ll need to start marbling Christmas cards and ornaments:
- Marbling Paints: Marabu is by far the most premium marbling paint brand on the market. The set listed here includes the exact same 6 paints we use throughout the tutorial, just the packaging is more recent in the link. Go with Marabu, you won’t regret it.
- Clear Ornaments with Hooks: You need transparent plastic that’s semi-porous so the paint sticks well. We like these ornaments the best because you can put things inside of them, they include hooks as well, but you can also marble on them extremely well. If you decide to put something like silver or gold tissue paper inside, this will create a cool visual effect when you marble the outside.
- Water Basin: We’ve linked to the same water basin used in the New Hobby Box paper-making tutorial simply to show you that having a nice water basin on hand can work for a ton of different hobbies. That said, you can use a plastic container or anything from your kitchen, so long as it’s clean and you’re okay with it getting dirty or stained. We used a spare Tupperware container in this tutorial – no need to buy something if you already have something around the house to use. Don’t use your sink as your water basin by the way!
- Blank Cards and Envelopes: It’s always great to have quality blank cards and envelopes around the house. We’ve linked to the same cards and envelopes used in the New Hobby Box stamp carving guide – it’s crazy how just a few core items can work so well across numerous hobbies!
Not everyone likes to buy individual pieces for a hobby, some just want everything in one spot and click the “Buy Now” button one time. We get it – we used to sell hobby kits for a living after all. So in that spirit, here are some kits you should consider.
Recommended Marbling Kit – Marabu 56 Color Set
If you’re a regular New Hobby Box subscriber, you know that we typically only recommend kits that include everything you need in one box, and are also insane values where you get a real bang for your buck.
This kit is the only exception you will find across our entire website. It’s still an insane value, but it does not include everything you need to marble. And we think that’s ok, here’s why.
While we use marbling in this tutorial to make Christmas cards and ornaments, you can marble just about anything with the right paints. And Marabu paints are certainly the right paints.
They are specifically designed to handle hydro-dipping, which you might guess is a super quick way of marbling items, and it works on everything from shoes to tumblers. Marabu, unlike others on the market, works on so many surfaces, including paper, glass, ceramic, metal, wood, polyester, canvas, etc. It even works on wax, so if you want to try your hand at making candles, you can dip your candles into this marbling afterward.
You can find a water basin pretty easily, and you can grab just about any item around your house and marble it. As you can see, in marbling or hydro-dipping, it’s all about the paint. And this kit is super cool because it has a huge variety of colors with a wide range of effects – it includes all the basics of the color wheel, but also has pastels, neons, and metallic hues. With 56 different colors, you won’t need additional marbling supplies for a long long time.
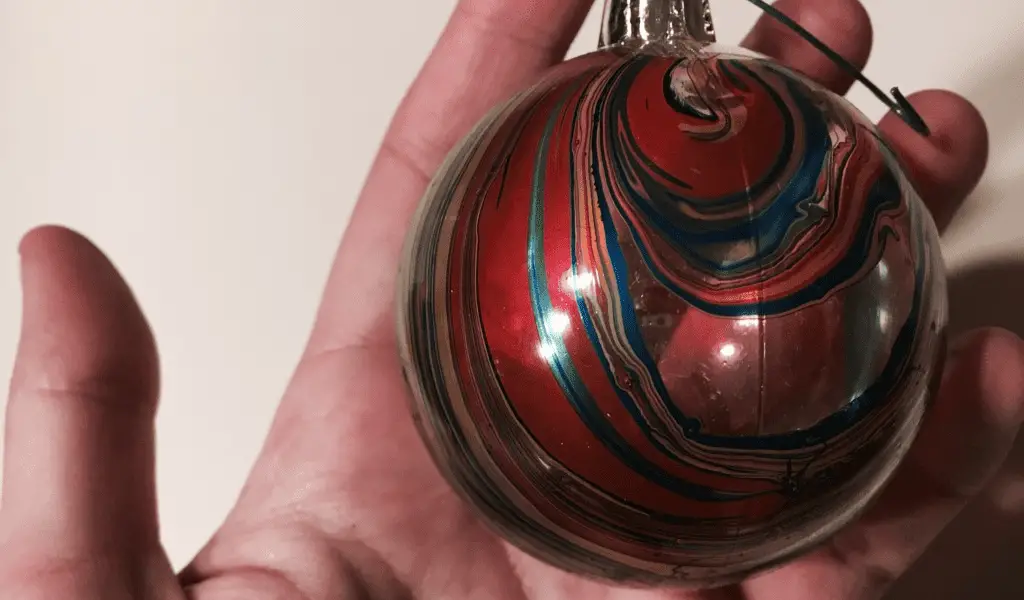
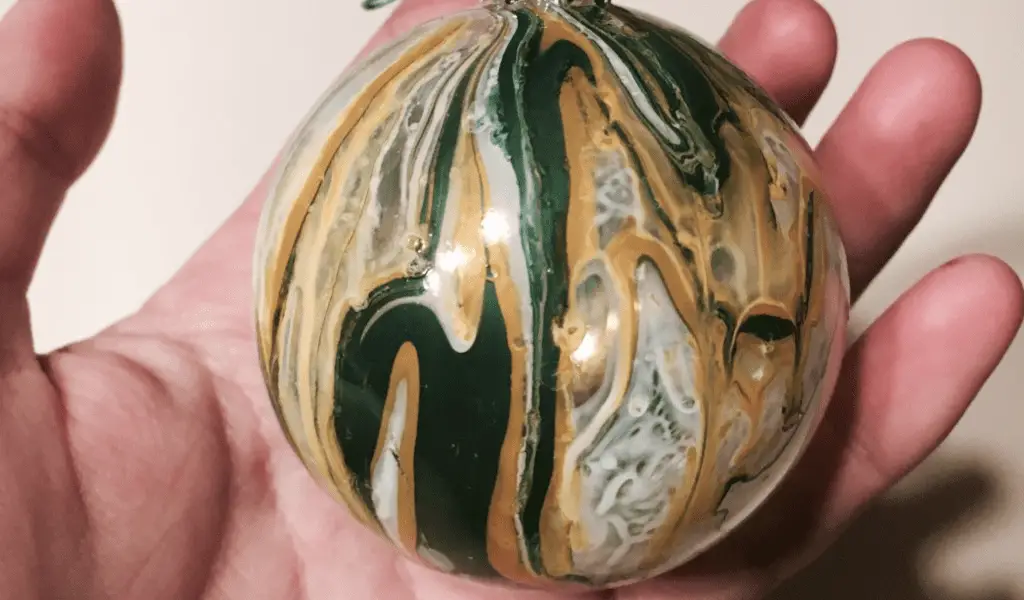
HOW TO MARBLE CHRISTMAS TREE ORNAMENTS
Have all your paints and supplies? Ready to marble? Great! We’ll begin with Christmas ornaments first then get into Christmas cards afterward.
Remember, you’re about to work with paint, so take the proper precautions so you don’t stain your clothes or any objects you plan to work on or around. If you don’t handle paint often, trash bags work wonders as a surface cover. Also, if you happen to get paint on anything (including yourself) nail polish remover or acetone may help to remove it.
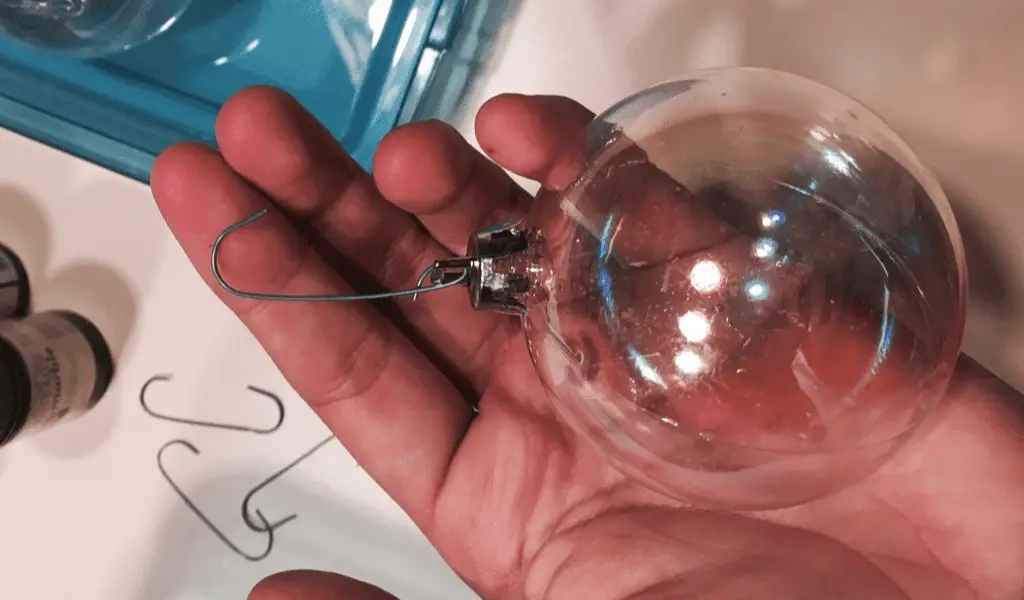
1. Attach Hooks to Ornaments
To get started with the ornaments, begin by placing a hook into every bulb you plan on marbling. If you’re going to put anything inside the bulbs, you can do it at this point as well – just make sure you have a firm seal on the ornament’s closure.
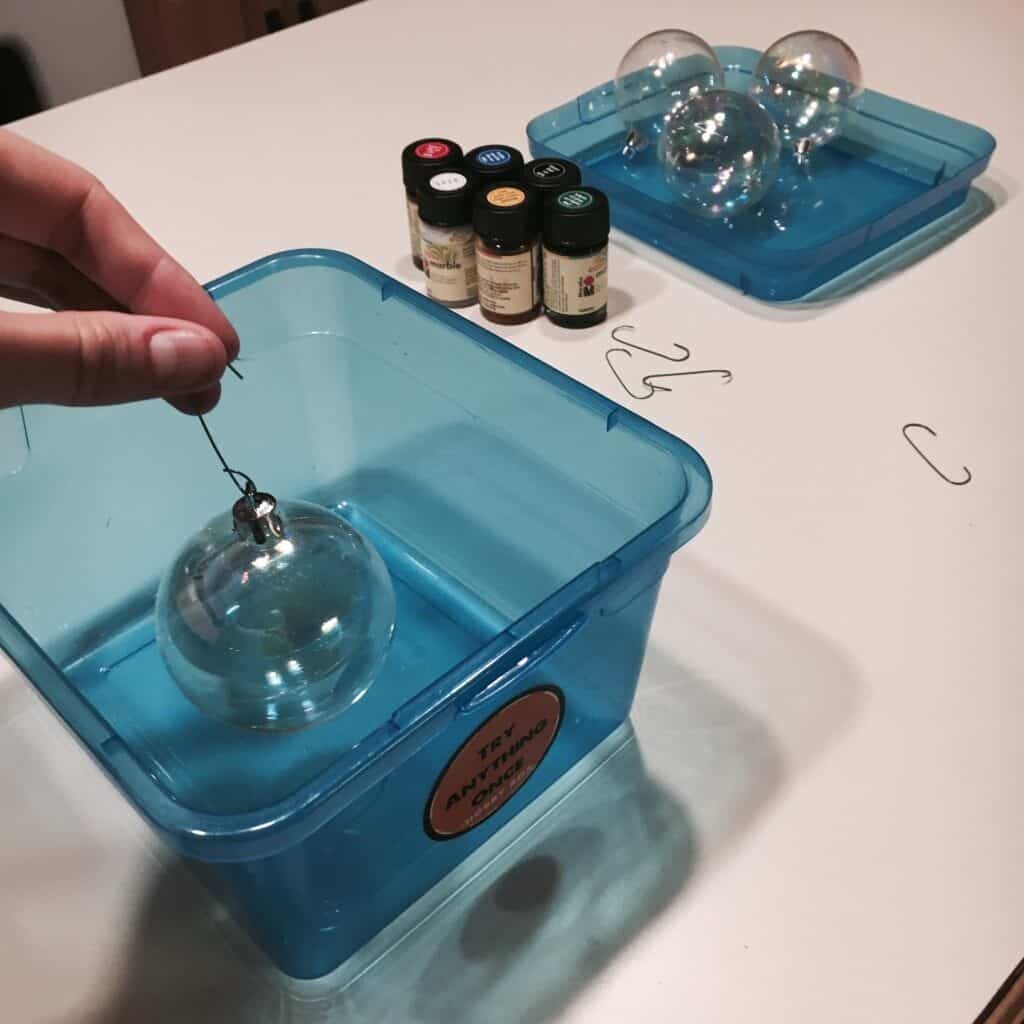
2. Practice Dipping
Get a good feel for how far into the container you can dip your ornament without touching the sides or bottom. No need to add water yet, just practice the motion. It sounds silly, but this is the key to marbling without mistakes. We’ll repeat this more than once, but you’ll dip slowly and then remove quickly – always without touching the sides.
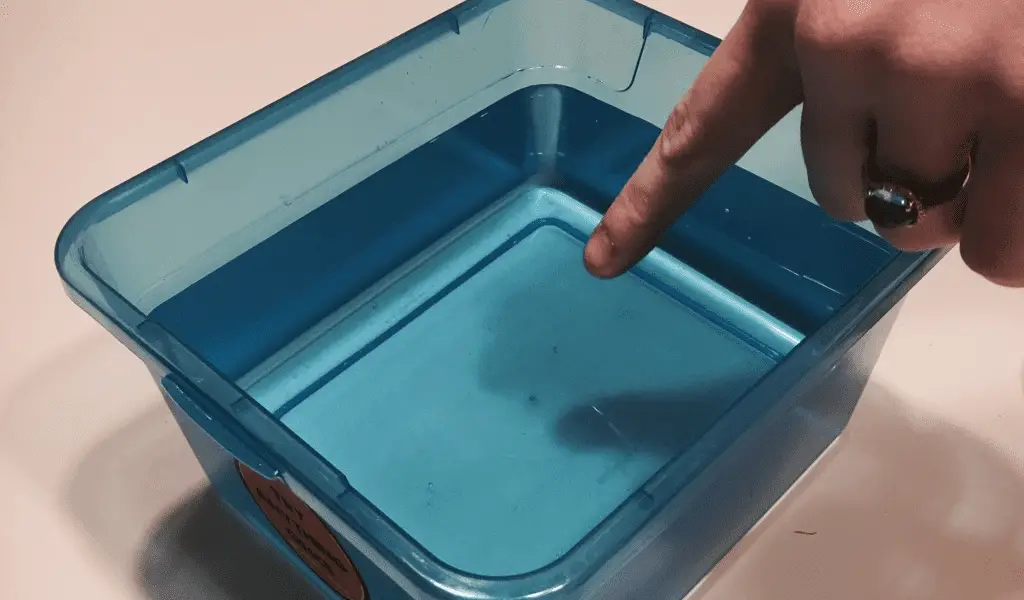
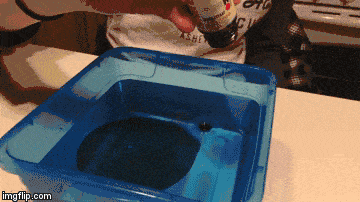
3. Just Add Water
Once you feel like you can dip with the best of them, go ahead and fill your basin with water. You need the water to be high enough that dunking your object won’t hit bottom, but also not too high where submerging your object makes the water and paint solution spill over.
Before adding paint, this is a good time to practice dipping again just into the water. Better safe than sorry here! Have a good depth? Great, go to the next step.
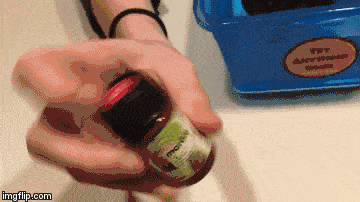
4. Shake Your Paints
Pick your color palette and get to shaking… don’t hold back! Spend about 30 seconds for each bottle, you want to make sure the pigments are nice and evenly mixed.
5. Add a Few Drops of Paint
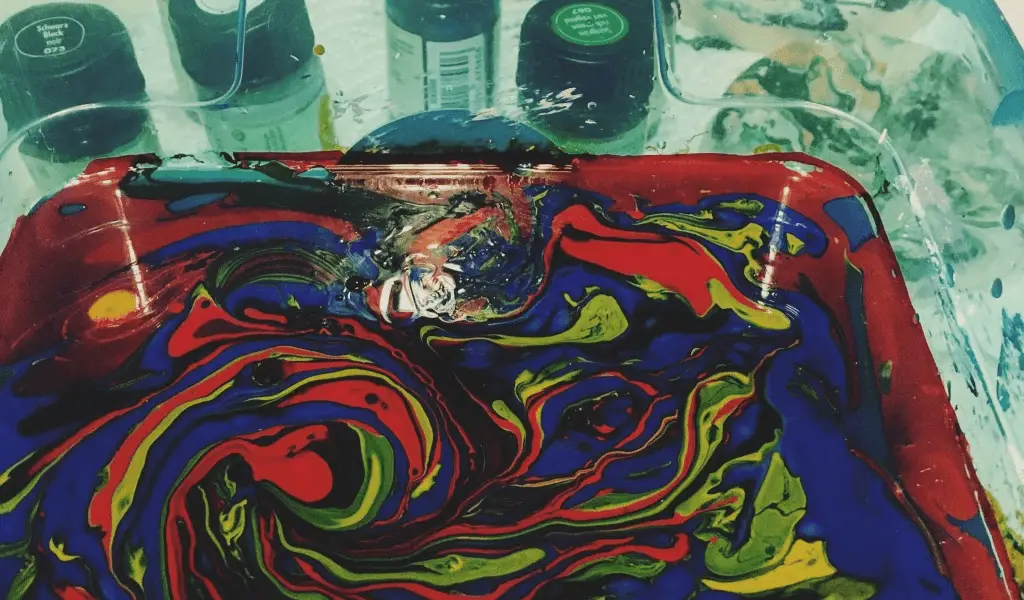
Now that it’s nice and shaken, let a few drops fall into the water. You’ll see a film of color layer on top of the water. This solvent-based paint will float – that’s the magic of hydro-dipping and marbling in action.
There’s no one way to marble, this is art, and there are no rules here except to have fun with it. Less a rule and more of a planning technique, you should know that the sequence of how you drop colors has a dramatic impact on the final marbling – the second color is typically the most obvious. Layering the paints also will give a nice pattern to your final object.

6. Design Your Patterns
Grab a pencil, chopstick, comb, or any disposable long object (we even used one of the hooks on some of ours) and get your swirl on (patent pending for this phrase).
This is where you create the final pattern that will stick to your object. If you go with a swirl like ours, you’ll want to swirl longer than you typically would expect to since the water will keep moving. Swirl slowly and keep it simple because of that. The more swirls you do, the muddier it can become.
Once you finish the swirl dance you’ll want to move as quickly as possible from dripping to dipping (also patent pending) because your paint can dry on the surface of the water.
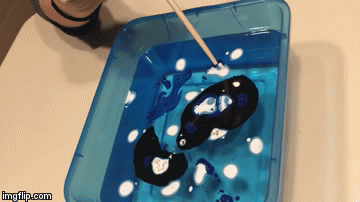
If your paint is moving like the gif directly above, it means your paint is starting to dry. Instead, you want your swirls to look like the gif at the beginning of this step.
7. Dip Your Object in the Paint
Now for the grand finale. Grab an ornament or any item and get ready to dip. Make sure you submerge it slowly and keep it stable as you dip. The water will want to push up obviously, but try to keep it dunked then bring it up rapidly but still in control.
As it comes up, the paint will want to collect – use your swirling stick or a paper towel to remove any excess. Sometimes it will fall off on its own as well.
Each design in the water will last one or two dips, so once you have your first dip back up for air, get ready to drop your second object in.
Anything more than one or two dips will start to dry and get sticky. To save yourself from dumping the water each time, if you wait a few minutes, you can simply wipe away the paint on the surface away! Consider this our pro tip.
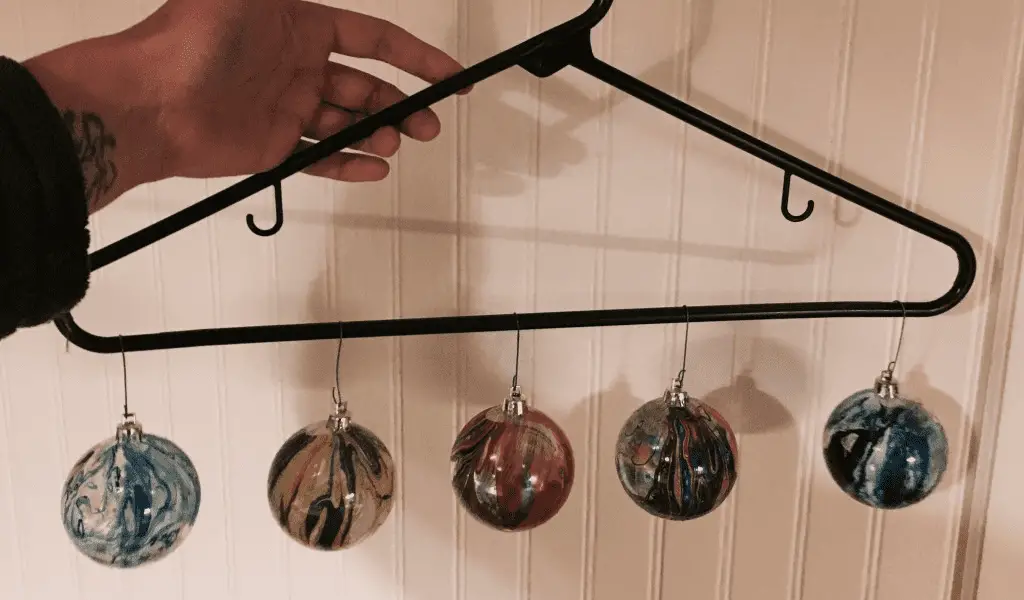
8. Grab a Hanger to Air Dry Your Objects
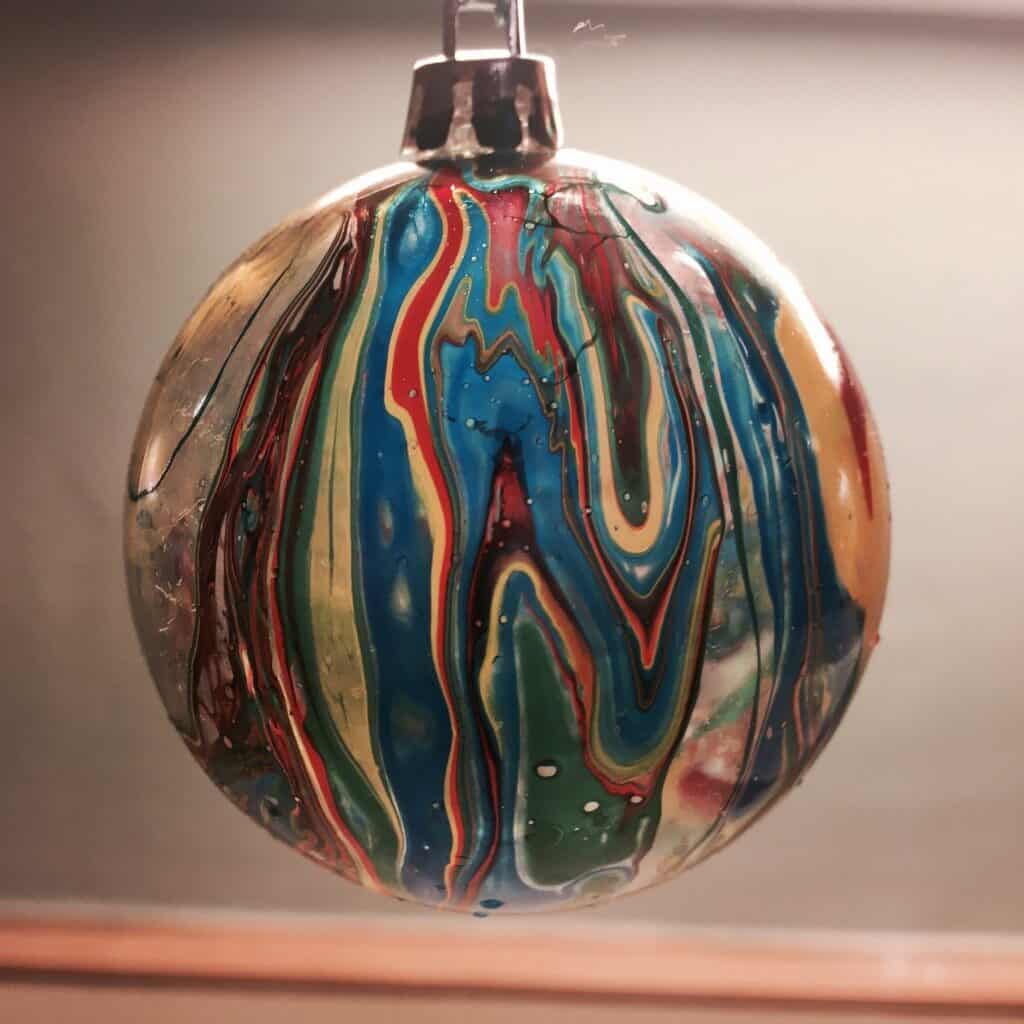
Grab a hanger, hook your wet bulbs on it, then hang it over a paper towel. This is hands down the best way to get an even dry without making a mess. Wait a few hours for complete dryness, then stand back and admire your creativity.
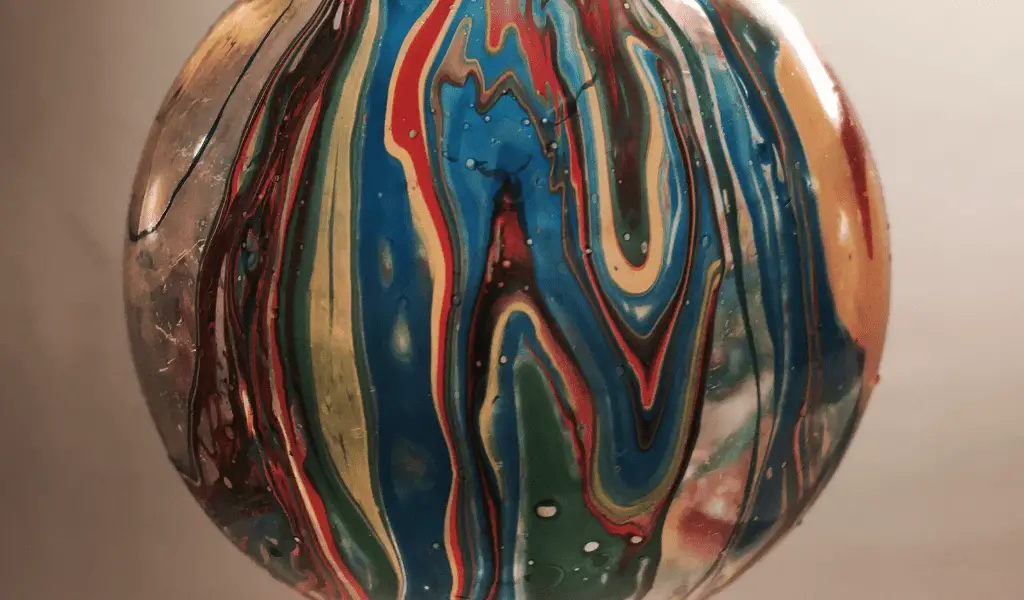
Want to see the finished product? Behold!
TIPS FOR MARBLING OBJECTS
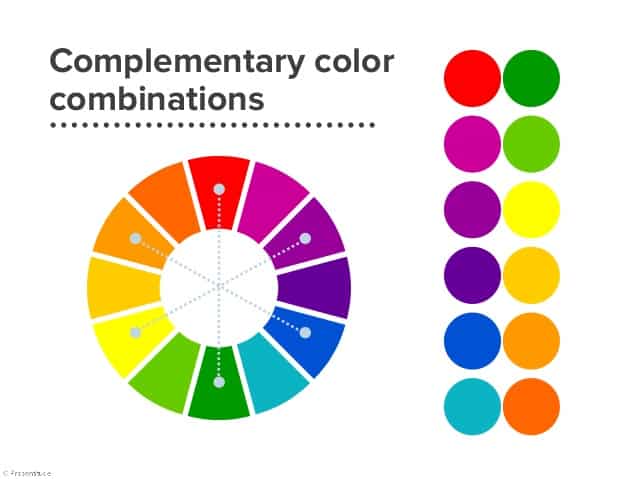
If you’re trying to figure out what colors to use, this complementary wheel can go a long way in helping out. Colors that are directly opposite of each other add a natural appeal, while the wheel only draws this connection between primary and secondary colors, this is a universal law that applies to tertiary colors as well.
On the right side, you’ll notice that the complementary pairs are called out on the right side. For the Christmas crew out there, it’s quite convenient that red and green are the top two, huh
Here’s a great article and video on complementary colors from our friends at Apartment Therapy.
With six colors at your disposal, you can make nearly any color imaginable. So, while complements look great on their own, you can use this color wheel to make any color possible.
For instance, in your kit, you’ll find red and blue. If you were to mix the two, looking at the wheel, you would go halfway in between and find a shade of purple. The color wheel is helpful like that.
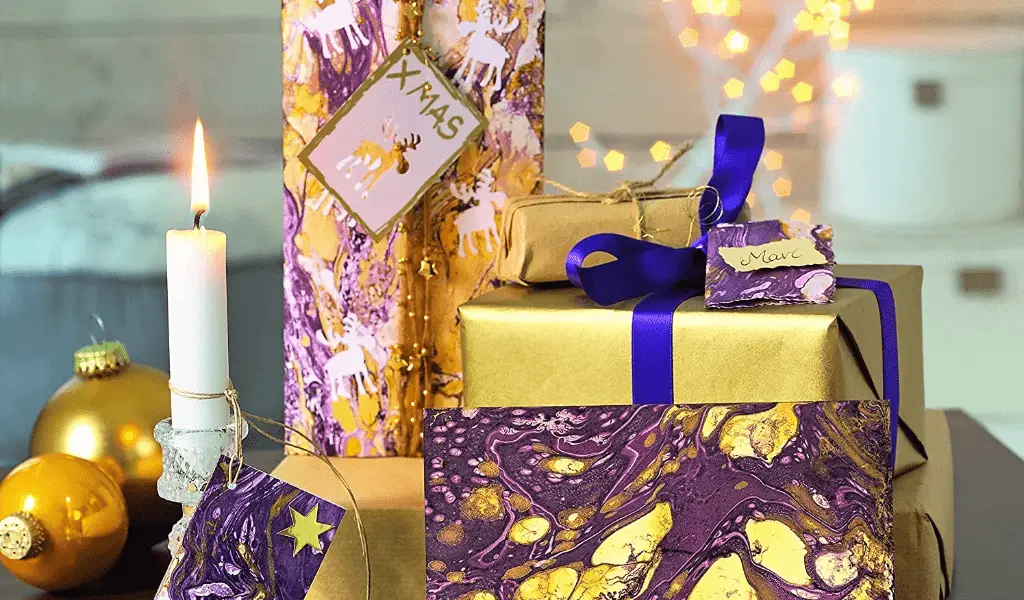
YOU CAN MARBLE JUST ABOUT ANYTHING!
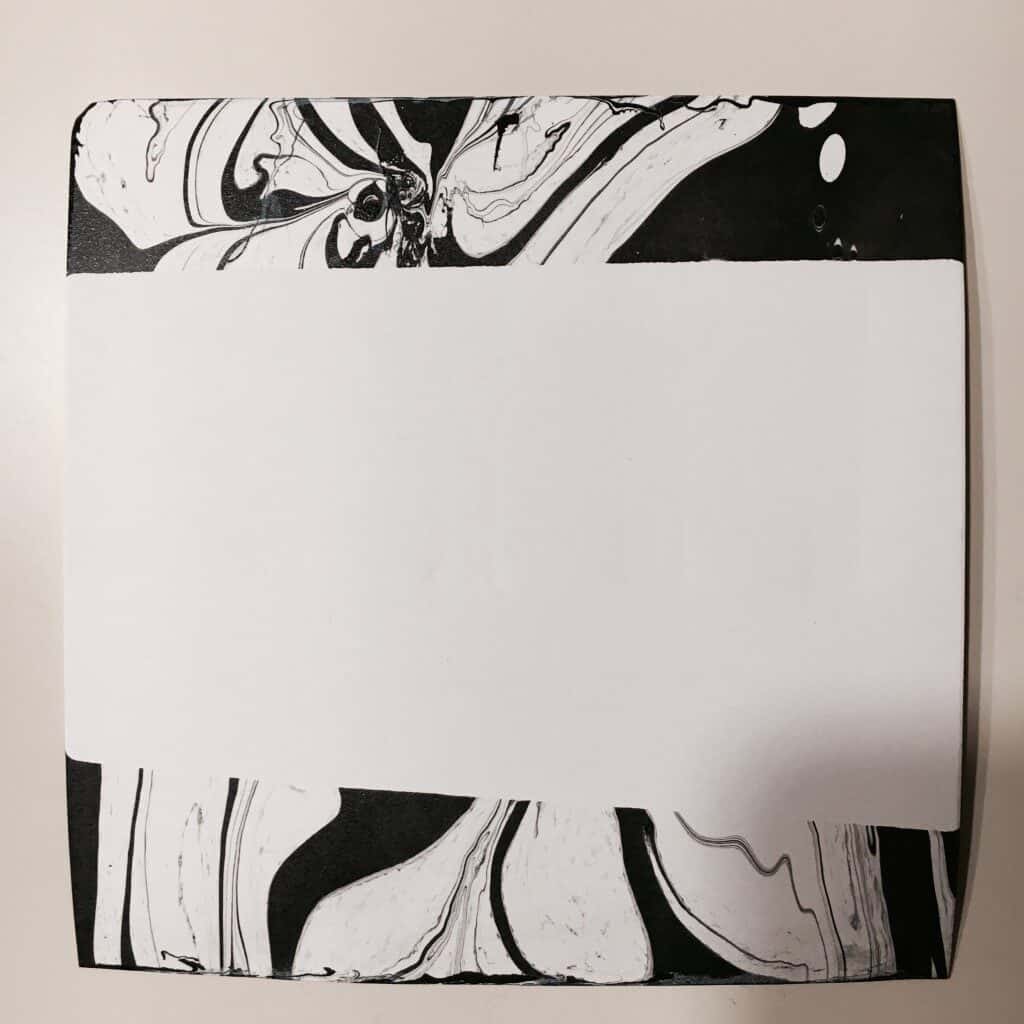
Using the same process, you can easily dip your card and envelope in to create similar effects.
It’s up to you on how to approach any object, card, envelope, or otherwise, but we really like the accent look for a card since it doesn’t take away from the note that will end up on it. You can also just marble the tongue of the envelope and leave the front completely blank. When it comes to card decorations, less is more in our book
While we’ve shared mostly ornaments and cards as proof of the pudding, the amazing thing about marbling is how little of the paints you’ll use. Whether you got the 6 color set or the 56 color kit, you’ll have enough hydro-dipping power on hand to decorate a Christmas village.
So get creative, experiment, try new patterns and new objects. We’ve marbled wooden coasters, clay pots, plastic photo frames, etc. – and they’ve all turned out amazing!
If you have any questions on the process or about anything marbling related, please ask away! We’ve done this more than enough times to know the ins and outs of doing it well. And if we don’t have the answer, we probably know where to find it for you.
Happy Hobbydays!