Want to give your favorite objects an upgrade? Then wire wrapping is the way to go! Let’s get one thing straight though – wire wrapping isn’t jewelry-making. There’s a BIG difference, as wire wrapping can be decorative or worn, whereas jewelry is made solely to be worn.
From pretty sea glass finds to wooden knick-knacks… now they can be turned into stunning sculptures worthy of being placed on display or worn as accessories.
What they do have in common though is their level of difficulty; both are hard skills to master. But if you’re up for the challenge, then we’ve got you covered with this tutorial. So wrap up some creativity today with wire wrapping!
Here’s a sneak peek at what you can do once you master wire wrapping.
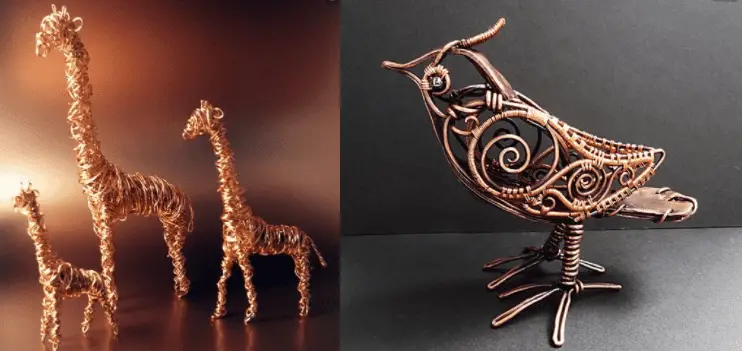
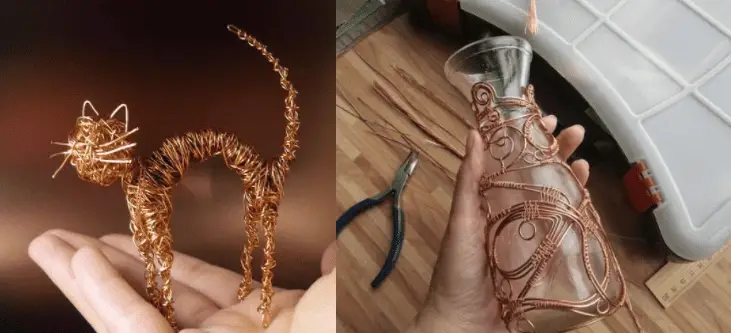
Pretty cool right? You’ll build up to that, but as a wire-wrapping novice, you should start by learning how to wrap objects and then move on to sculptures and ornate wrappings.
We’re not here to restrain your imagination with a strict curriculum – rather, we want to set some sparks flying and give you the freedom to explore wire wrapping in any way that tickles your fancy!
So instead of a boring lesson on how to make the same wire wrapping project, we want to show you some techniques and let your creativity do the rest – go wild!
Your first few projects won’t be pretty, but hey, I bet the first time you parallel parked wasn’t so pretty either. (Luckily in this case instead of you paying for damages, you can simply unwrap your wire.)
Wire wrapping is a skill that, like any muscle worth building, requires regular exercise. The more reps you put in the bigger your pay-off – better projects and sharper technique all around!
Enough with the preamble though, let’s look at what supplies you need and where to get them.
SUPPLIES NEEDED FOR WIRE WRAPPING
At New Hobby Box, it’s our mission to make sure you get only what you need to learn a new hobby; we want to make sure you aren’t wasting money on bad products, buying things you can find around the house, or spending too much before you know if you like something or not.
Because of this, we like to list out the specific supplies that are used in each tutorial in case you can purchase single items rather than all supplies, hopefully saving you some money along the way.
We’ll list a kit we recommend as well, in case you don’t have any of the supplies. This will usually save you money in that case and also make sure you’re getting a quality product at a good price.
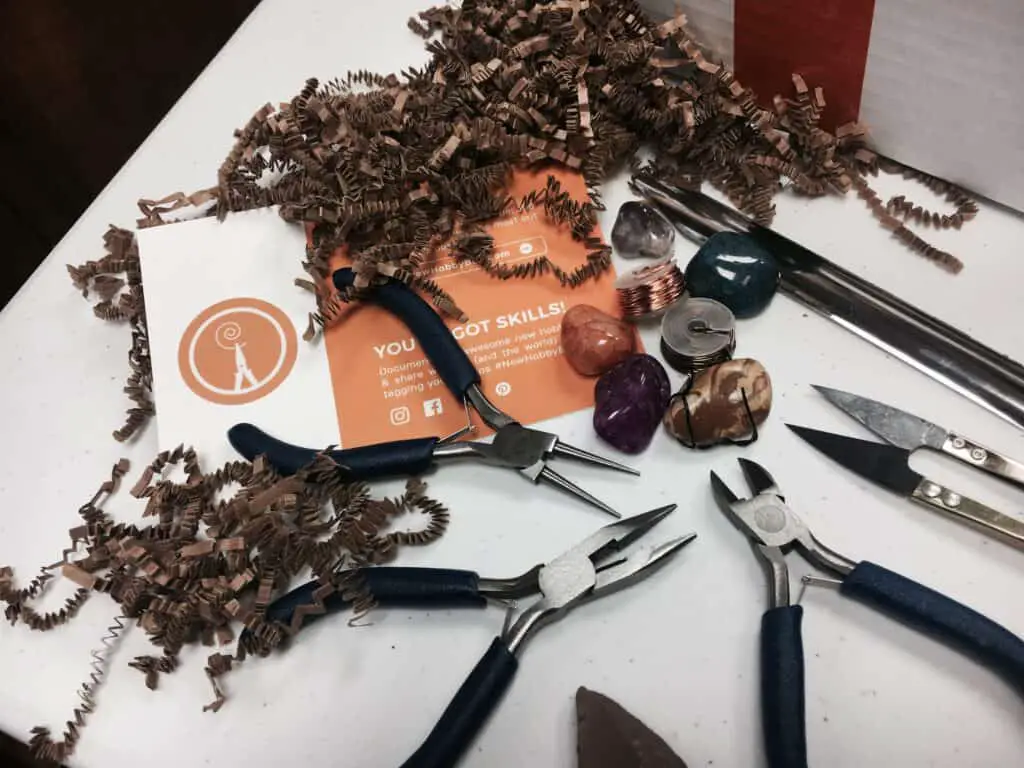
If you’d like to purchase individual wire wrapping items, here’s what you’ll need:
- Gemstones
- Wire
- Chain Nose Pliers
- Round Nose Pliers
- Wire Cutters
- Tweezers
- Snips
- Bead Scoop
- Storage Drawers
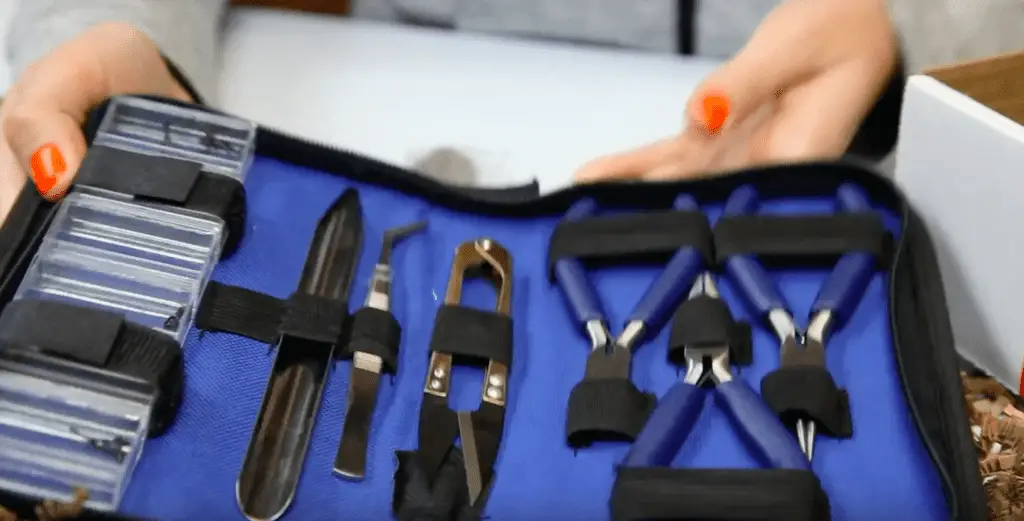
Wire Wrapping Kits
Sometimes you just want everything all at once. If you’re looking for a kit like the one we used to make and sell at New Hobby Box (pictured above), we have two options for you:
- Wire Wrapping Kit for Beginners: This is a starter kit that’s nearly identical to the one we used to make and sell. This is a great kit for beginners since the price is reasonable and it includes all the tools and most of the materials needed to follow along with the tutorial. You’ll just need to purchase gemstones separately if you want to follow the tutorial in earnest, but you can always go grab some rocks from around the neighborhood if you like too.
- Wire Wrapping Kit for Gift Giving: This is a high-quality tool kit that makes an amazing gift to yourself or a person in your life who loves crafting. The kit includes a wide range of premium tools that can be used in wire wrapping, jewelry making, leathercrafting, and book binding – which we have a fantastic tutorial on. So purchasing this kit opens you up to many different hobbies to try. This specific kit is an Etsy Pick too, so you know it’s a great selection. As a gift, it’s good to go. But if you’re purchasing this with the intent of following this tutorial, you’ll need to grab wire and gemstones from the list above.
Once you’ve got all the supplies and materials, you’re ready to move forward.
About Your Wire Wrapping Tools
With anywhere from 3-5 pliers at your disposal now, it’s important to know the purpose of each and when to use them. For the uninitiated, they look pretty similar, but they do quite different things.
So we’ll quickly review a few important tools that will get a lot of mileage for this hobby, before we jump into the wire wrapping video tutorials.
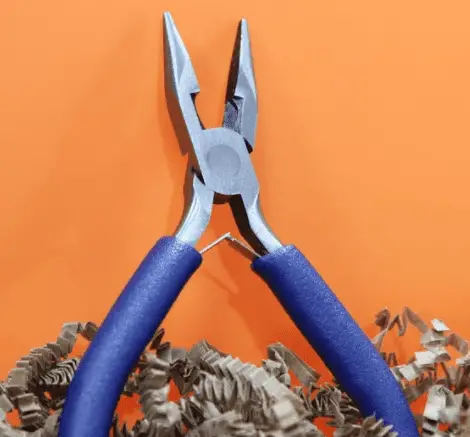
CHAIN NOSE PLIERS – YOUR UTILITY TOOL
Chain nose pliers make a great sidekick when you’re working with wire, arguably the most versatile tool in your wire wrapping kit!
They bend and unbend wire like nobody’s business, plus they grip your wires without denting or scratching – just what any wire wrapper or jewelry maker needs to make perfect headpins and eye pins (the loop that connects your pendant to a necklace, keychain, bracelet, etc.)
The key? Chain nose pliers have a flat and smooth jaw while the outsides are rounded, which lets you grip without leaving a mark, and also make bends. Because the jaw creates a nice right angle, it can bend the wire to create clean angles.
Also, the inner-most part of the tool will typically be able to cut wire, as seen in the image of our chain nose plier above. But if you need to make a cut, especially a visible one, use the wire cutters for a cleaner edge. More on that in a minute.
As we said, chain nose pliers are the utility tool that can just about do it all.
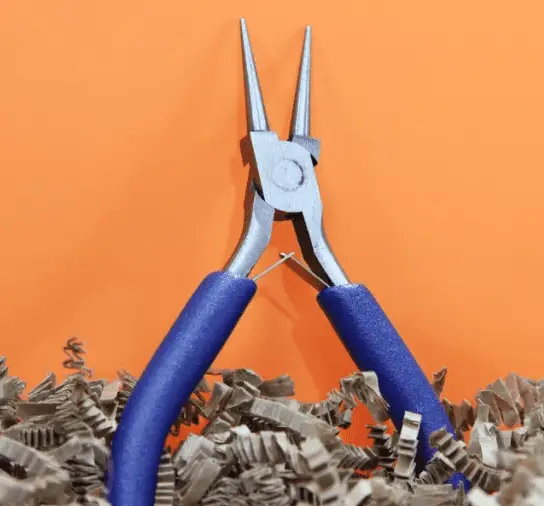
ROUND NOSE PLIERS – YOUR LOOPING TOOL
Round nose pliers allow you to precisely manipulate wire into loops, making them an essential tool for many projects. They will also be better for bending wire in general because it’s nearly impossible to mar the surface of the wire thanks to the smooth surface.
So if you need round edges for your bends, pick up the round nose pliers. If you need to grip for your bend, don’t use round nose pliers.
Since each tip is conical and smooth, you’ll get no traction on the wire.
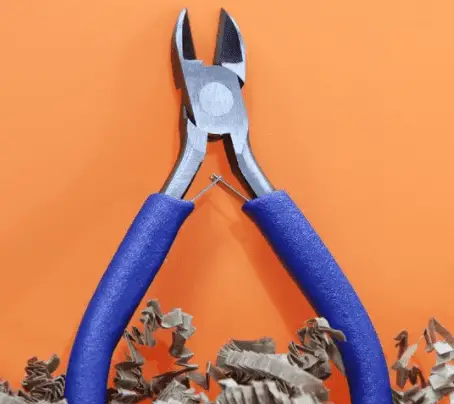
WIRE CUTTERS – YOUR CLEAN EDGE TOOL
I’m sure you know what a wire cutter does, it’s autological after all. But the important factor that gets overlooked for wire cutters is how it cuts wire.
The goal of wire cutters is to cause as little damage as possible to the wire while cutting. This will result in a perfect edge at the end of your wire and a more aesthetically pleasing line in your project.
So keep it clean out there!
HOW TO WIRE WRAP – 3 TECHNIQUES WITH 4 PROJECTS
The video above demonstrates how wire wrapping comes to life using gemstones and wire alone. You’ll see how three of your tools lend themself to technique, especially chain nose pliers, round nose pliers, and wire cutters.
Instead of watching a boring video of each technique, we’ve put all three tools to the test with 4 separate projects.
The hope is that this sparks some ideas of what you can do to get started, as there are endless ways to bring wire wrapping to life.
The 4 wire wrapping projects in the video and their timestamps are:
- Gemstone Pendant: 00:34
- Wire Ring: 01:49
- Gemstone Critter: 02:46
- Wire Wrapped Typography: 04:50
Pay close attention to the tools used in each project – keying in on when they are used and how they are used.
This video is not a step-by-step guide – it’s simply meant to show you what your tools and imagination can make. The best way to learn this skill is to put time into trying and re-trying.
This wire wrapping demonstration video is sped up to illustrate what can be done, but if you want to focus on one project or technique to follow along, you can easily slow down the video on YouTube by changing one setting.
Here’s how to slow the playback speed of this wire wrapping video on YouTube:
- On a computer, hover over the video player. On mobile, tap the video one time.
- On a computer, click “Settings” which is the gear icon. On mobile, tap the “More” icon, which is three vertical dots.
- On a computer, click “Speed,” on mobile tap “Playback Speed,” then pick a setting that’s lower than “Normal” to slow the speed down.
WIRE WRAPPING INSPIRATION
For further wire wrapping inspiration, check out the video above on how to wrap an arrowhead. This is a great project for beginners if you’re uncertain of where to start.
Also, if you’re not on Pinterest but want to get into wire wrapping, this might be the time to take the plunge and sign up.
If you do create an account on Pinterest, search “wire wrapping” and you’ll find tutorial upon tutorial as well as inspiration for your next project. We’ve built a Pinterest board to get your wire wrapping creative juices flowing as well; it includes articles, photos, and guides, so be sure to check that out.

We love to see what our community comes up with so be sure to connect with us on Instagram and share your wire wrapping creations.
And that’s a wrap!
Happy Hobbying!