It seems like part of being a kid is receiving crocheted hats and scarves from grandma. The quality and care are always mind-blowing, often making you think to yourself, “I wish I could make something like that.” Well, here we are almost 20 years later and it’s finally time to learn how to crochet, just like grandma did. We’re new to crocheting, so if you’re a beginner, we’re happy to have you learn along with us.
WHAT IS CROCHET?
Crochet is a method of creating fabric by interlocking loops of yarn with a hooked needle. It’s a versatile craft that can be used to make anything from cozy blankets to cute stuffed animals. With just a few simple stitches, you can create a wide variety of projects – from a washcloth to a Yoda coffee koozie.
These are both patterns you’ll learn in this tutorial.
If you’re new to crochet, don’t worry – we can learn together! We’ve attempted each of the patterns in this tutorial a few times now, so we’re confident enough to share how it works. This comprehensive guide will help you learn the basics.
We’ll cover everything from choosing the right tools and materials to picking the right yarn and hook to creating your first project. By the end of this article, you’ll have the skills and confidence to tackle any crochet project. So, grab your hook, and let’s get to it.
SUPPLIES NEEDED TO CROCHET
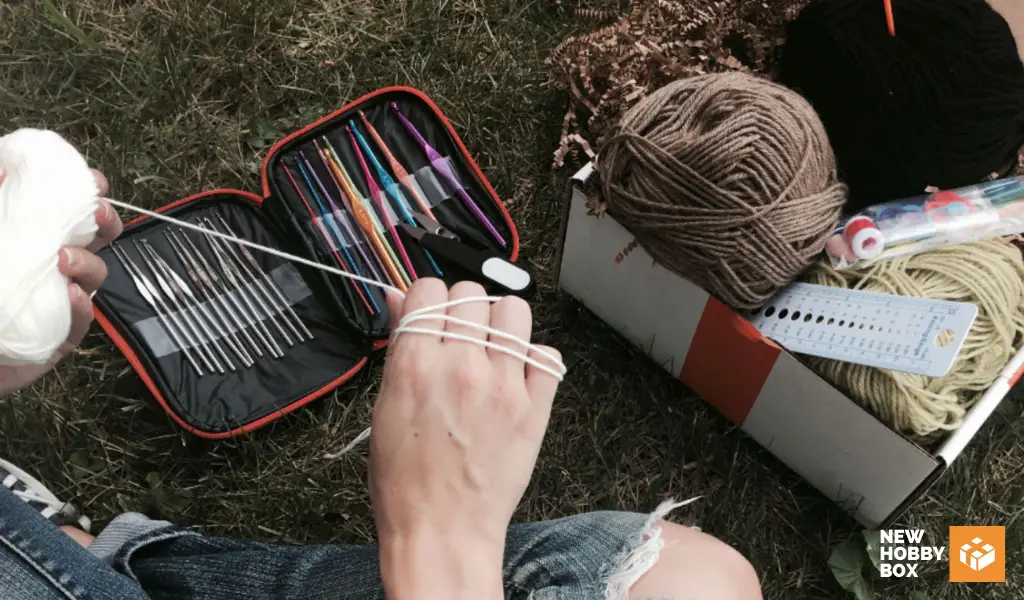
The key to crocheting is to make sure you have the right tools before you get started. Unfortunately, this means investing in some basic supplies such as yarn, hooks, and scissors. But, the good news is that you can get all the supplies for relatively affordable prices.
Let’s begin by looking at the tools you’ll need to complete this tutorial:
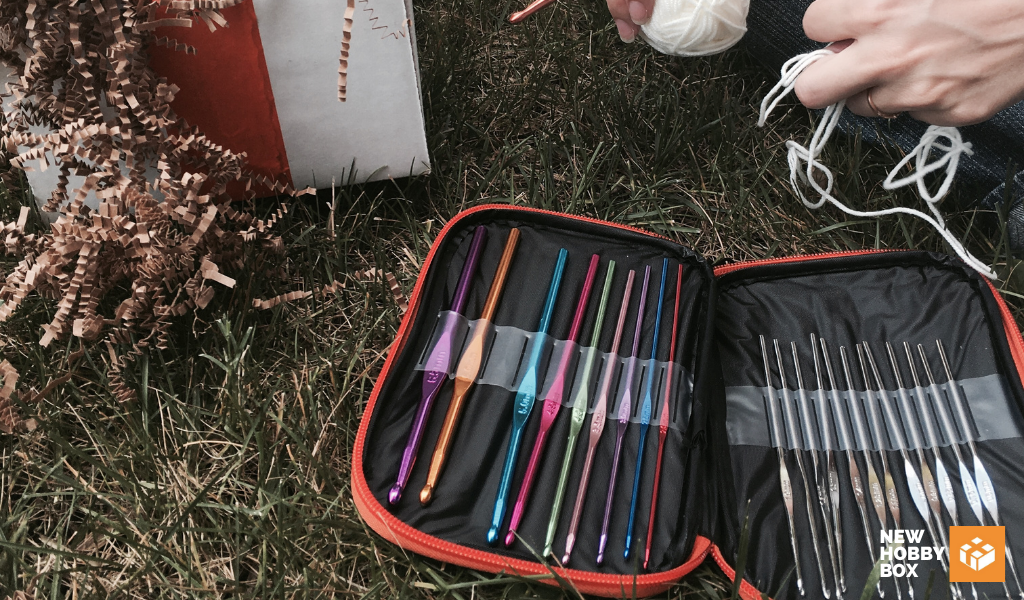
Crochet Tools Used in This Tutorial
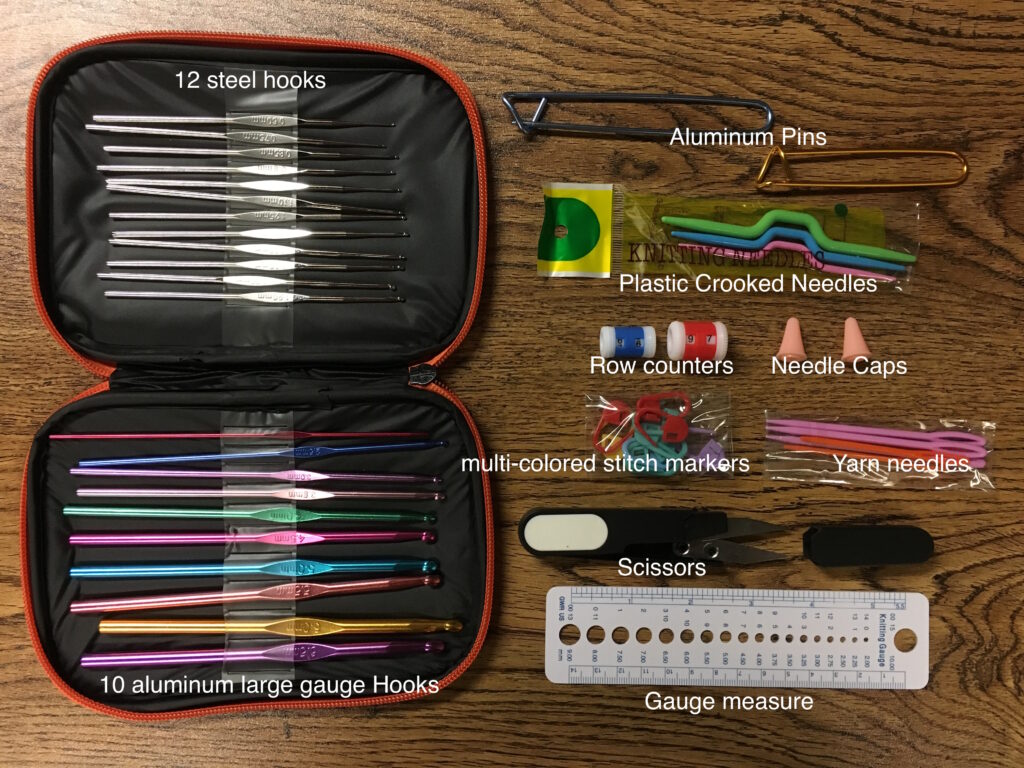
The tools used in this tutorial come from a 54-piece kit that has every tool needed for this tutorial, and many other projects down the line. This toolkit does not include skeins, but we’ll cover that in the next section. Here’s what’s inside:
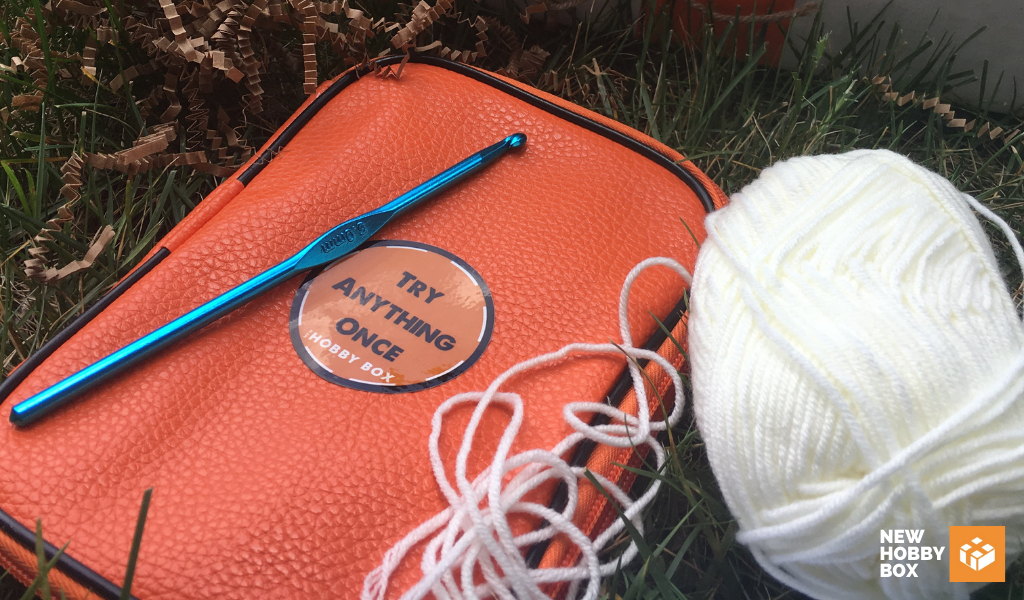
- 1 Carrying Case: Convenient vinyl zip-up carrying case to keep all your accessories together.
- 10 Large Gauge Aluminum Hooks: Sizes 2.0mm, 2.5mm, 3.0mm, 3.5mm, 4.0mm, 4.5mm, 5.0mm, 5.5mm, 6.0mm, and 6.5mm.
- 12 Steel Hooks: Sizes 0.60, 0.75,0.85, 0.90, 1.00, 1.10, 1.25, 1.40, 1.50, 1.60, 1.75, 1.90.
- 10 Stitch Markers: Multi-colored stitch markers to keep track of any place in your design.
- 1 Gauge Measure: This tool measures your ratio of stitches and keeps your design consistent and on track.
- 1 Pair of Scissors: Razor-sharp scissors for quick snips.
- 6 Yarn Needles: Creates a wider variety of projects you can take on.
- 2 Aluminum Pins: 3.5-inch and 4.5-inch safety pins to keep your work in place while you knit.
- 2 Row Counters: Keep track of stitches and rows worked (1 blue and 1 red)
- 2 Needle Caps
- 3 Plastic Crooked Needles
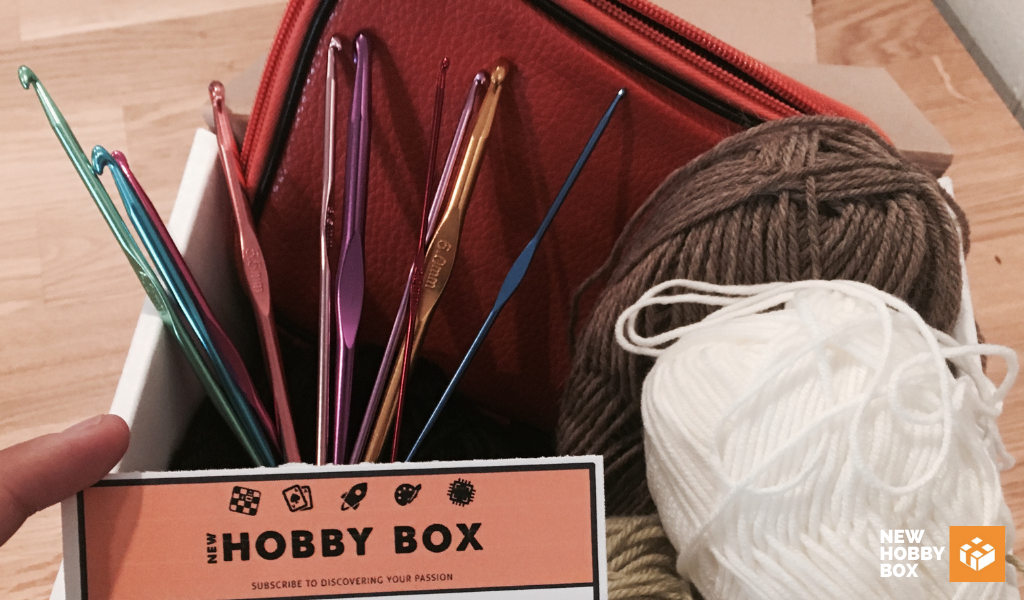
Crochet Skeins Used in This Tutorial
Skeins are just fancy crochet terms for pre-measure and weighted lengths of yarn for different projects. Many crochet toolkits don’t include skeins since choosing the color of the skein and its length is specific to each project. Not to worry, there are many options out there for affordable skeins.
We recommend this kit of 20 acrylic yarn skeins since it has a wide assortment of colors to choose from, many will be perfect for this tutorial. Plus, the price is fantastic and hard to beat.
CROCHET KITS WE RECOMMEND
If you prefer to get everything in one place and want a higher quality product to get started, look no further than this 73-piece crochet kit for beginners, off of Etsy. The kit has every tool you’ll need for any type of crochet pattern (such as 21 crochet hooks) and includes 15 skeins of yarn.
Oh, and it comes with a cute tote bag, which is always a nice touch.
Now then, whether you decided to get individual tools and skeins, or went for the complete kit off Etsy, once you have your supplies in hand, it’s time to get started. Well, at least close to starting. There are some housekeeping things you should know first.
THINGS TO NOTE BEFORE YOU CROCHET: PATTERNS
Now that we have our tools, let’s start learning a little bit about how to crochet. When looking for something to crochet, what you’re going to find are “patterns”. These patterns might include visuals to guide you, but many times they’ll just be a series of cryptic “codenames”.
These codes act as your step-by-step instructions, so you need to know the language before you get much further. They are often acronyms, and they describe the type of stitch you’ll need to perform.
Here are a few of the basic crochet stitches by their shorthand names:
- CH – Chain
- SC – Single Crochet
- DC – Double Crochet
- SC2TOG – Single Crochet Two Together
There are more acronyms to learn, but since this is possibly your first time seeing these and these are the only ones you’ll need to make both projects in this tutorial, let’s keep it simple and focus on these only.
Plus, the majority of patterns you’ll try in the future will use just those four abbreviations.
So let’s try out all four with a practice round – grab a practice color of yarn and your hooks, then start reading the next section.
HOW TO CROCHET – THE 4 FOUNDATIONS
Since the pattern used later in this tutorial calls for green tea heather, coal, and camel heather, try to pick a color of yarn outside those options or whatever substitute color you would use in its place.
You’re about to try crocheting a chain, single crochet, double crochet, and the single crochet two together – but before starting that, here are some insider tips to make them a little easier. AKA, these are issues we had the first time trying these.
Crochet Tip #1 – Start Small
To start you always start with a small loop tied in your yarn about 4-5 inches from the beginning of the yarn.
Crochet Tip #2 – Mind How You Hold the Yarn
In the four tutorial videos below, take notice of how she is holding the yarn and the hook. The yarn is held with your non-dominant hand with your thumb and pinky securing the bottom of the yarn and your index and middle finger securing the top.
Crochet Tip #3 – Pull From Beneath
Remember to always pull from underneath the yarn. This will make more sense when you get started so maybe come read this again after you do the chain.
The way I remembered this was to think of it in 3 steps each time:
- Put the hook below the yarn.
- Bring the hook around the top away from me.
- End with the hook facing down.
Crochet Tip #4 – Keep It Loose
Finally, my first time through I pulled the yarn way too tight. It may seem a little counterintuitive but keep your chains loose, you’ll be glad you did once you start the single crochet.
Enough chit-chat – watch each tutorial below to get started.
1. Crochet Foundation Chain – CH
2. Single Crochet Stitch – SC
3. Double Crochet Stitch – DC
4. Single Crochet 2 Together – SC2TOG
How’d it go? Feel like a pro now? If not, don’t stress. You can always keep practicing with the tutorials above, or, you can take it to a real pattern and start with the first project on our list.
HOW TO CROCHET A WASHCLOTH
Using the lessons learned above you’re going to make the most widely tested introductory crochet pattern… that’s right, a washcloth!
We know, we know… It’s not the most exciting thing in the world. But you have to start somewhere. Plus, once you finish your first crochet project, you have something useful as an end product. If this project makes your eyes glaze over, don’t worry, there’s a more advanced and interesting project right after this washcloth pattern.
Materials Needed to Crochet a Washcloth
- 1 Skein of Yarn – You can choose any color you like, but try to not use any color resembling green tea heather, coal, and camel heather – you’ll need these for the Yoda koozie project.
- 4mm Hook
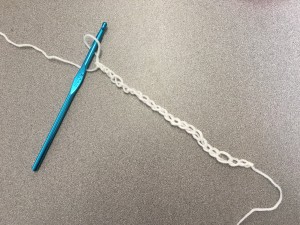
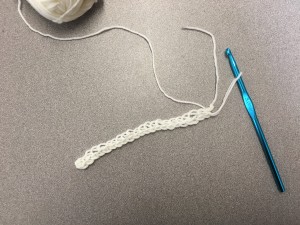
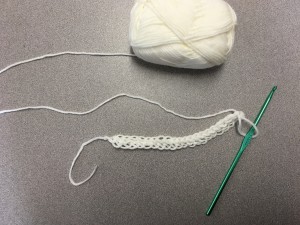
1. CH20 – Create 20 Chains
Crochet the chain stick 20 times as your foundation.
2. SC – Create 1 Single Crochet Stitch
Single crochet back over your first foundation chains.
3. SC20 – Single Crochet 20 Times
Repeat your single crochet stitch 19 more times to connect all the chains.
That’s It?
Yes, that’s it. Congrats on your first crochet project, we hope your washcloth is beautiful and handy. And if you’re just reading ahead and haven’t tried these three steps, you might find it’s a little more challenging than it looks. But still, that’s why we wanted to start with this project because if you jumped right into the Yoda koozie project, you’d find it way too difficult. After making a 20×20 washcloth, you’ll find that it’s a fantastic introduction to the world of crochet.
You’ll get the fundamentals down and be ready for a more advanced project.
If you want to try some other projects before heading to Yoda, check out the following resources:
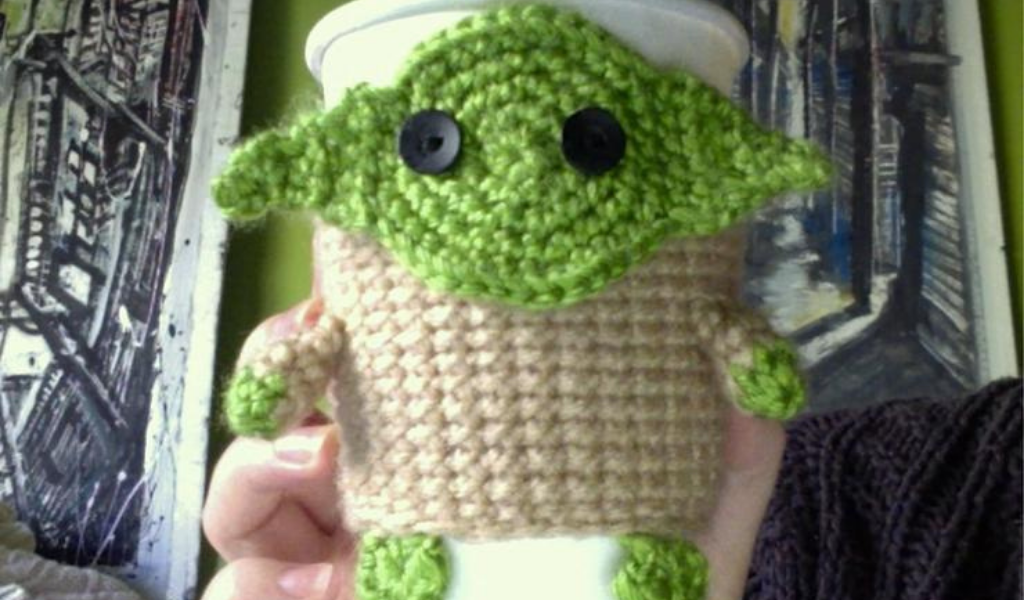
HOW TO CROCHET A YODA COFFEE KOOZIE
For the advanced crocheters and ambitious individuals out there, it’s now time to make a Yoda coffee koozie! Ready to keep your drinks warm and your hands cool? Let’s begin.
Materials Needed to Crochet a Yoda Coffee Koozie
- 1 Green Tea Heather Skein of Yarn (green)
- 1 Camel Heather Skein of Yarn (brown)
- 1 Coal Skein of Yarn (black)
- 5mm Hook
- 1 Yarn Needle
How to Crochet Yoda’s Body
1. CH34 BROWN YARN JOIN WITH SL ST
SLST stands for slip stitch, watch the video above this step to see how to make a slip stitch. Make sure the chain didn’t twist anywhere.
2. CH1 SC IN 1ST BASE CHAIN LOOP, CONTINUE SC AROUND
3. JOIN WITH SL ST – REPEAT CH1 SC AROUND 13 TIMES (TOTALLING 14)
4. BIND OFF
Tuck in All the Yarn
How to Crochet the Feet (2x)
1. MAKE A MAGIC LOOP WITH GREEN YARN
See the video above step one for directions on how to make a magic loop.
2. SC, DC, SC – REPEAT 3 MORE TIMES
3. BIND OFF
Bind off leaving enough yarn to sew onto the body. Tighten the magic loop so there is no gap. Don’t be afraid to pull hard.
How to Crochet the Arms (2x)
1. MAKE A MAGIC LOOP WITH GREEN YARN
2. SC8 – SWITCH TO BROWN YARN ON THE LAST ST
Do not SL ST – carry on in spiral rounds instead.
3. SC9 ST
4. TIGHTEN MAGIC LOOP
Tighten the magic loop so there is no gap, and cut the green yarn. With the non-hook side of your hook shove the loose thread into the arm. It will serve as stuffing and you won’t have to spend time tucking those threads.
5. SC2TOG, SC
Repeat this until 4ST is left.
6. SC AROUND – BIND OFF
Bind off leaving enough yarn to sew onto the body.
How to Crochet the Head and Ears
1. MAKE A MAGIC LOOP WITH GREEN YARN
Make sure the center tail is long enough to sew onto the body.
2. SC6 – DO NOT JOIN
Place a marker into the first ST and continue in spirals, moving the marker into the first stitch of every round as you go.
3. 2SC IN EACH ST
4. SC, 2SC, NEXT ST
5. SC IN NEXT 2 ST THEN 2SC IN NEXT 2ST
6. SC IN NEXT 3ST – 2SC IN NEXT ST
7. WITHOUT BINDING OFF, SC6, CH1, TURN
8. SC4, SC2TOG, CH1, TURN
9. SC2TOG, SC3, CH1, TURN
10. SC2, SC2TOG, CH1, TURN
11. SC2TOG, SC, CH1, TURN
12. SC2, CH1, TURN
13. ONE LAST SC2TOG AND BIND OFF
14. FOLD THE HEAD
Fold the head in half and place a marker where the second ear will begin.
15. ST, SC6, CH1, TURN
Do this without making an SL.
16. SC2TOG, SC4, CH1, TURN
17. SC3, SC2TOG, CH1, TURN
18. SC2TOG, SC2, CH1, TURN
19. SC, SC2TOG, CH1, TURN
20. SC2, CH1, TURN
21. ONE LAST SC2TOG AND BIND OFF!
Putting It All Together
Using black yarn and the yarn needle, go in and out of Yoda’s face while tying in the back for the eyes. With the extra yarn from the bind-off and a yarn needle, attach each arm and leg to the body as well as the head. Tuck in all the loose yarn and you are finished!
How’d your crochet Yoda koozie turn out? Even a bad crochet is lovable – especially when it’s Yoda. This project is far more complicated than a washcloth, so be sure to give yourself some slack if your Yoda isn’t looking so Yoda.
And that’s crochet! I hope you had as much fun with this as we did.
Happy Hobbying,